

How To Install Nest Thermostat To Worcester Boiler
Back in February I looked at my house and decided that it was time to drag it kick and screaming into the 21st century. This meant embarking on a rather aggressive plan that involved iii months of DIY and learning some new skills. The first job on my list was to invest in some smart heating engineering that would not only be a bit of a man gadget (I'm not gonna lie, information technology totally is) but would also salve some money on my heating bills due to improved free energy efficiency.
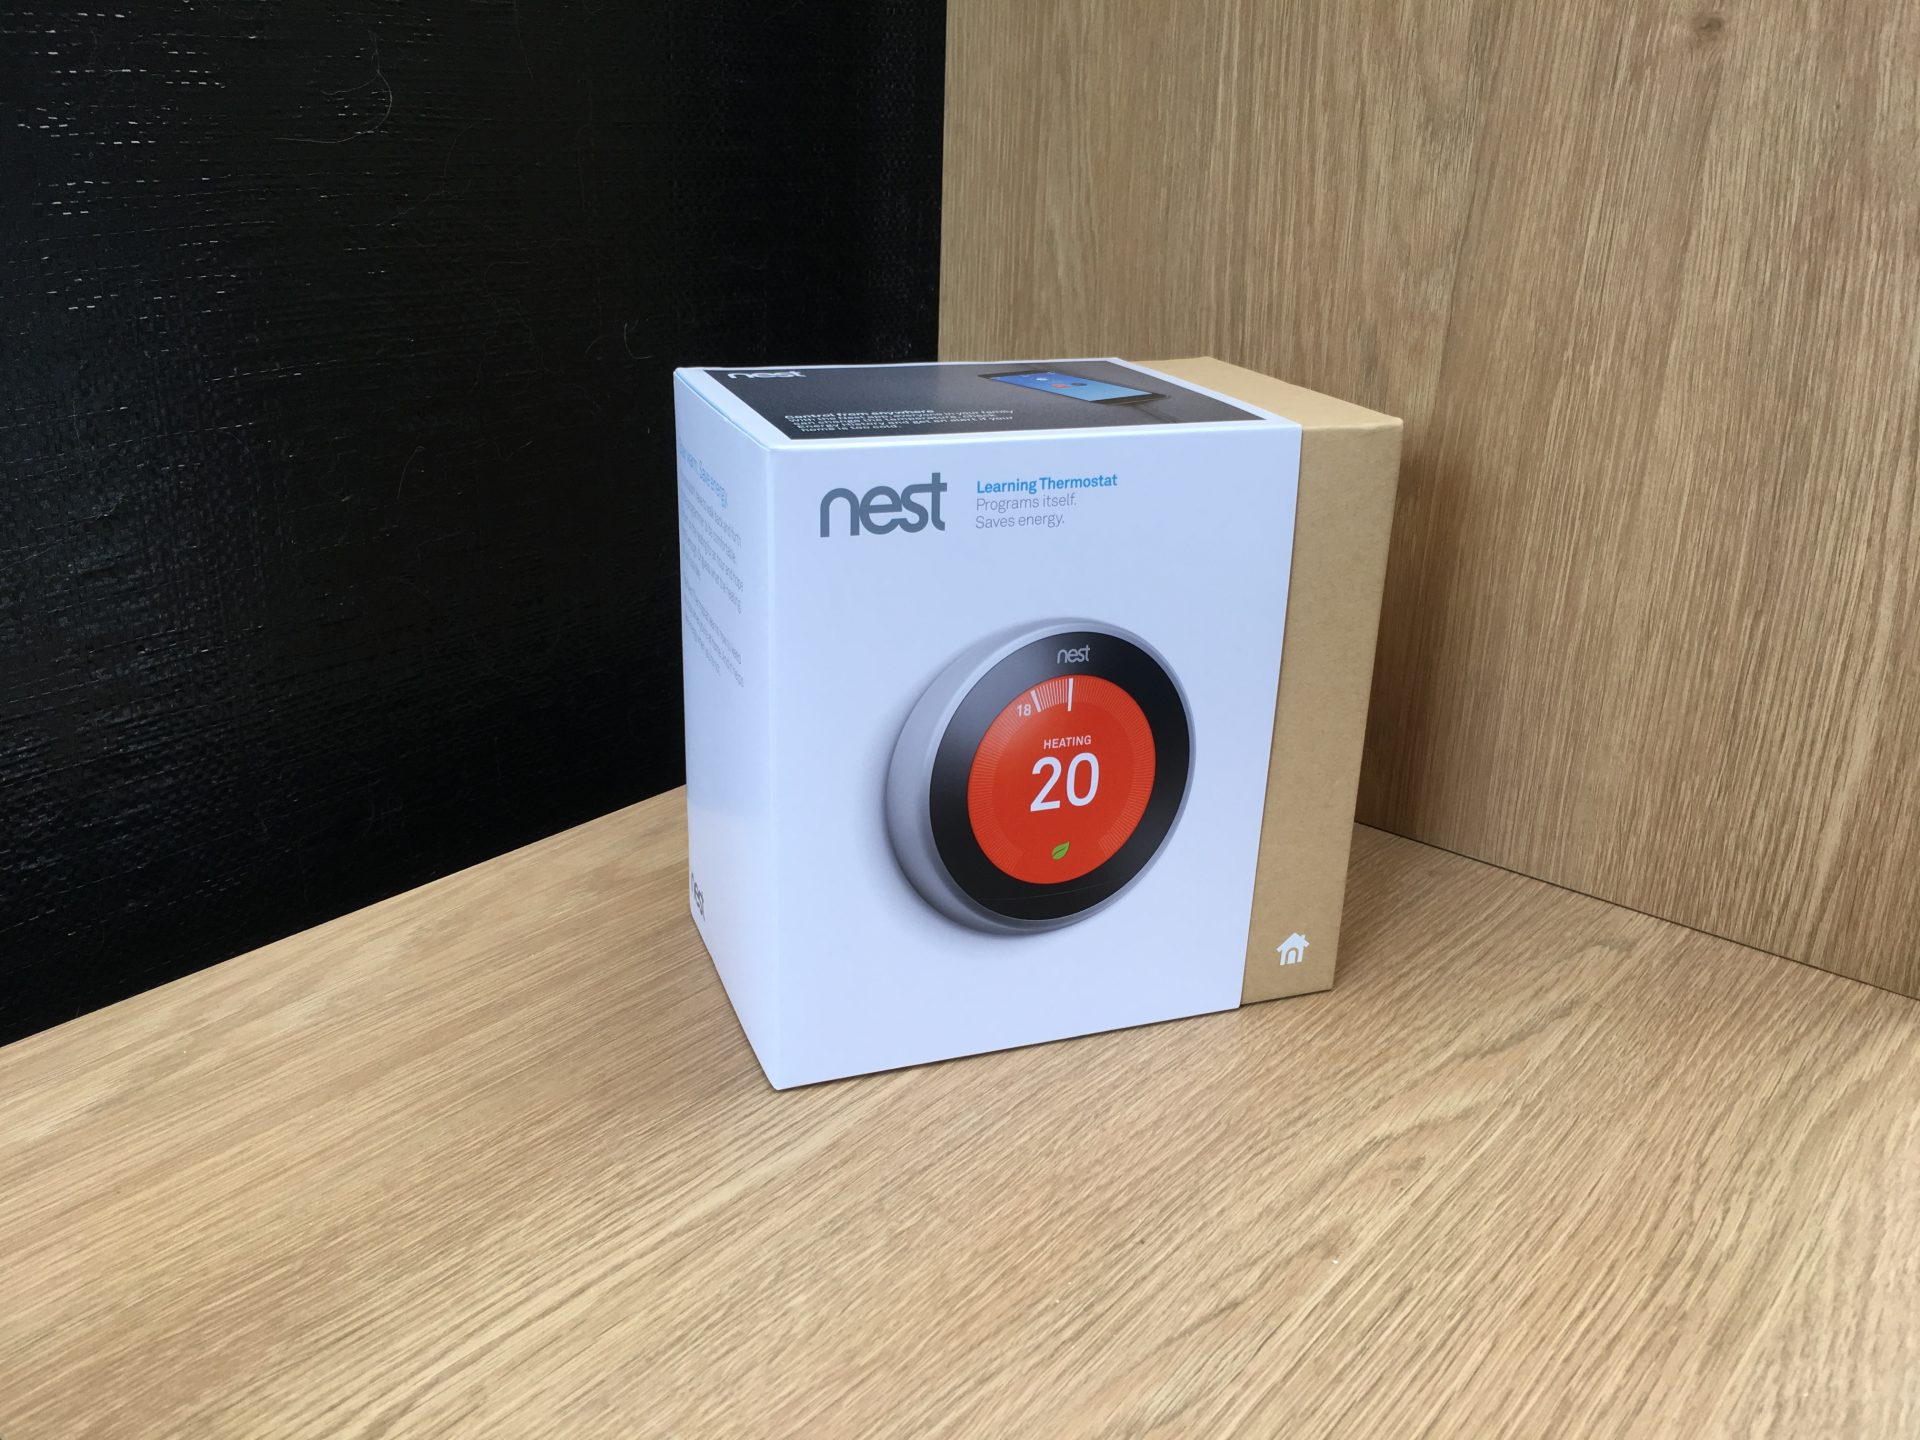
The option here only really involved the 2 leading players in the manufacture – Hive or Nest. Having read some reviews and spoken to a few friends who had each system I settled for the new Nest learning thermostat.
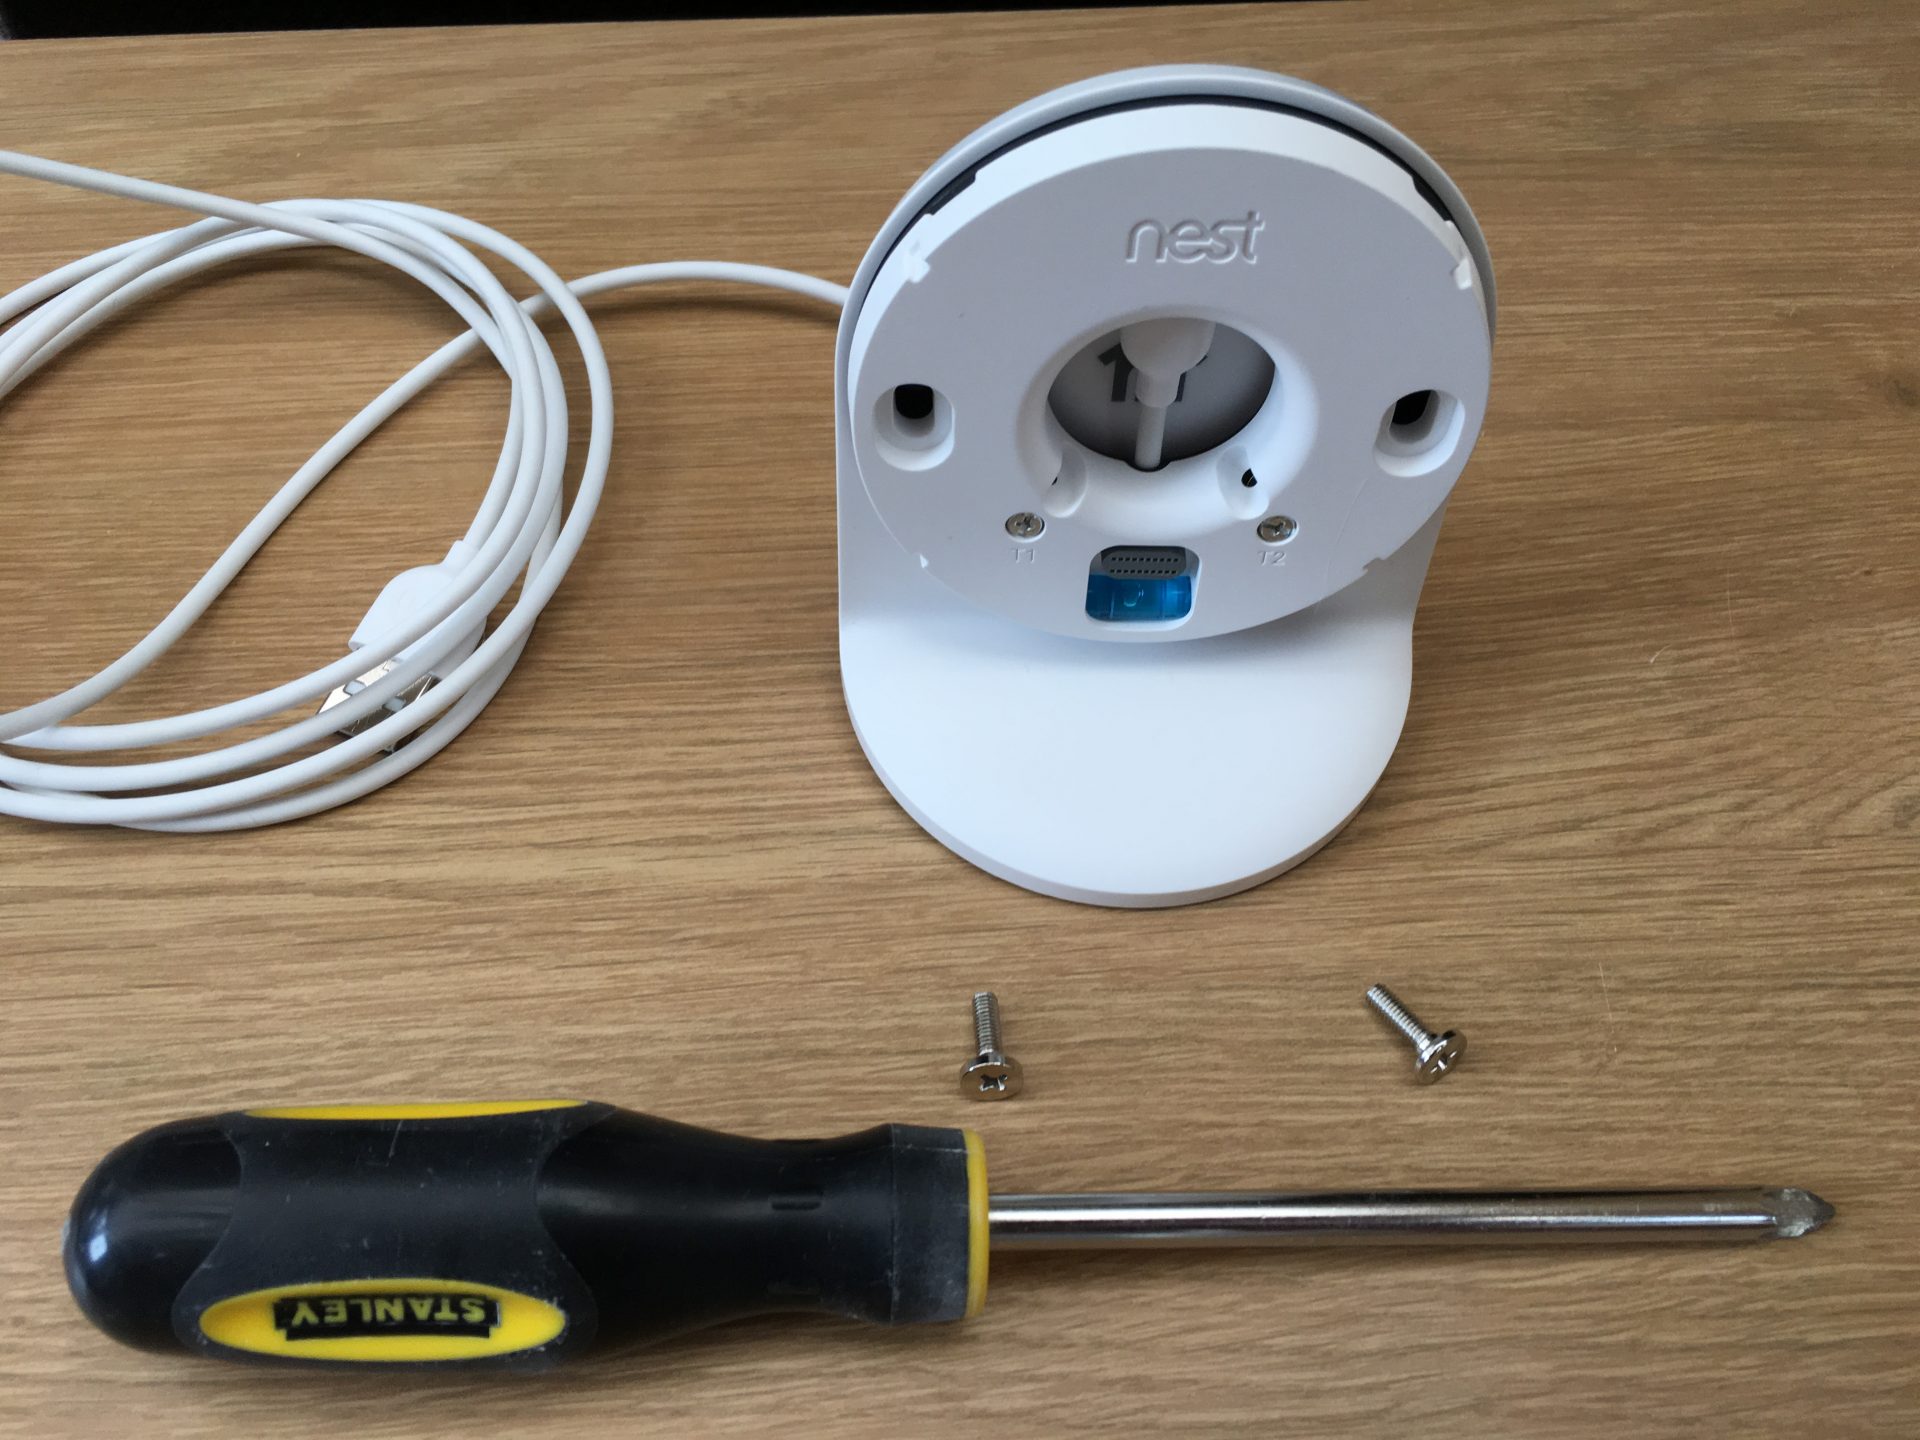
What's in the Nest thermostat box?
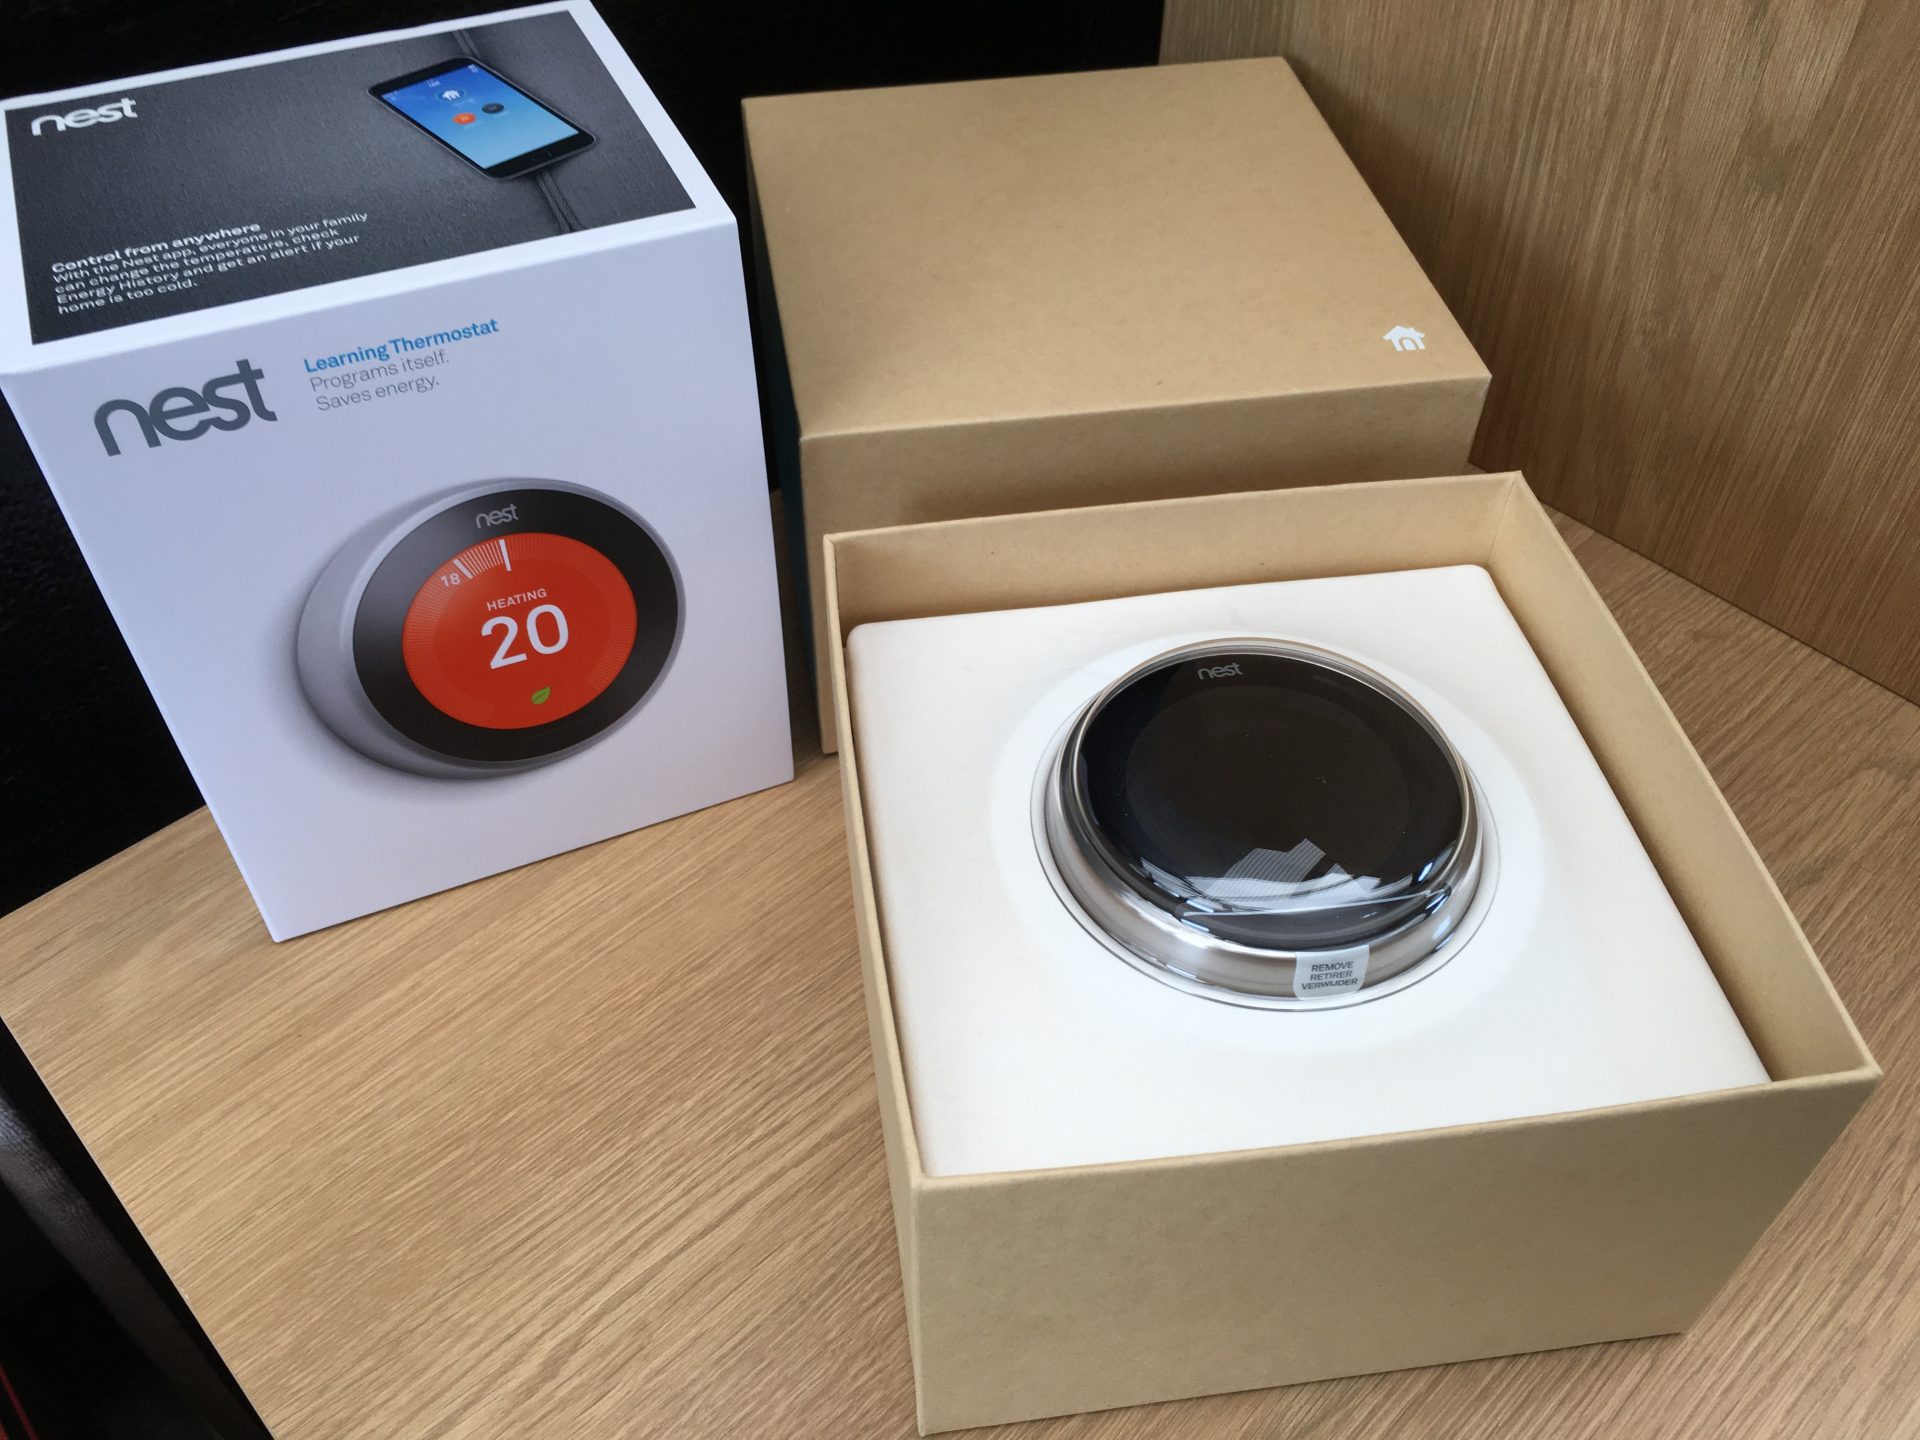
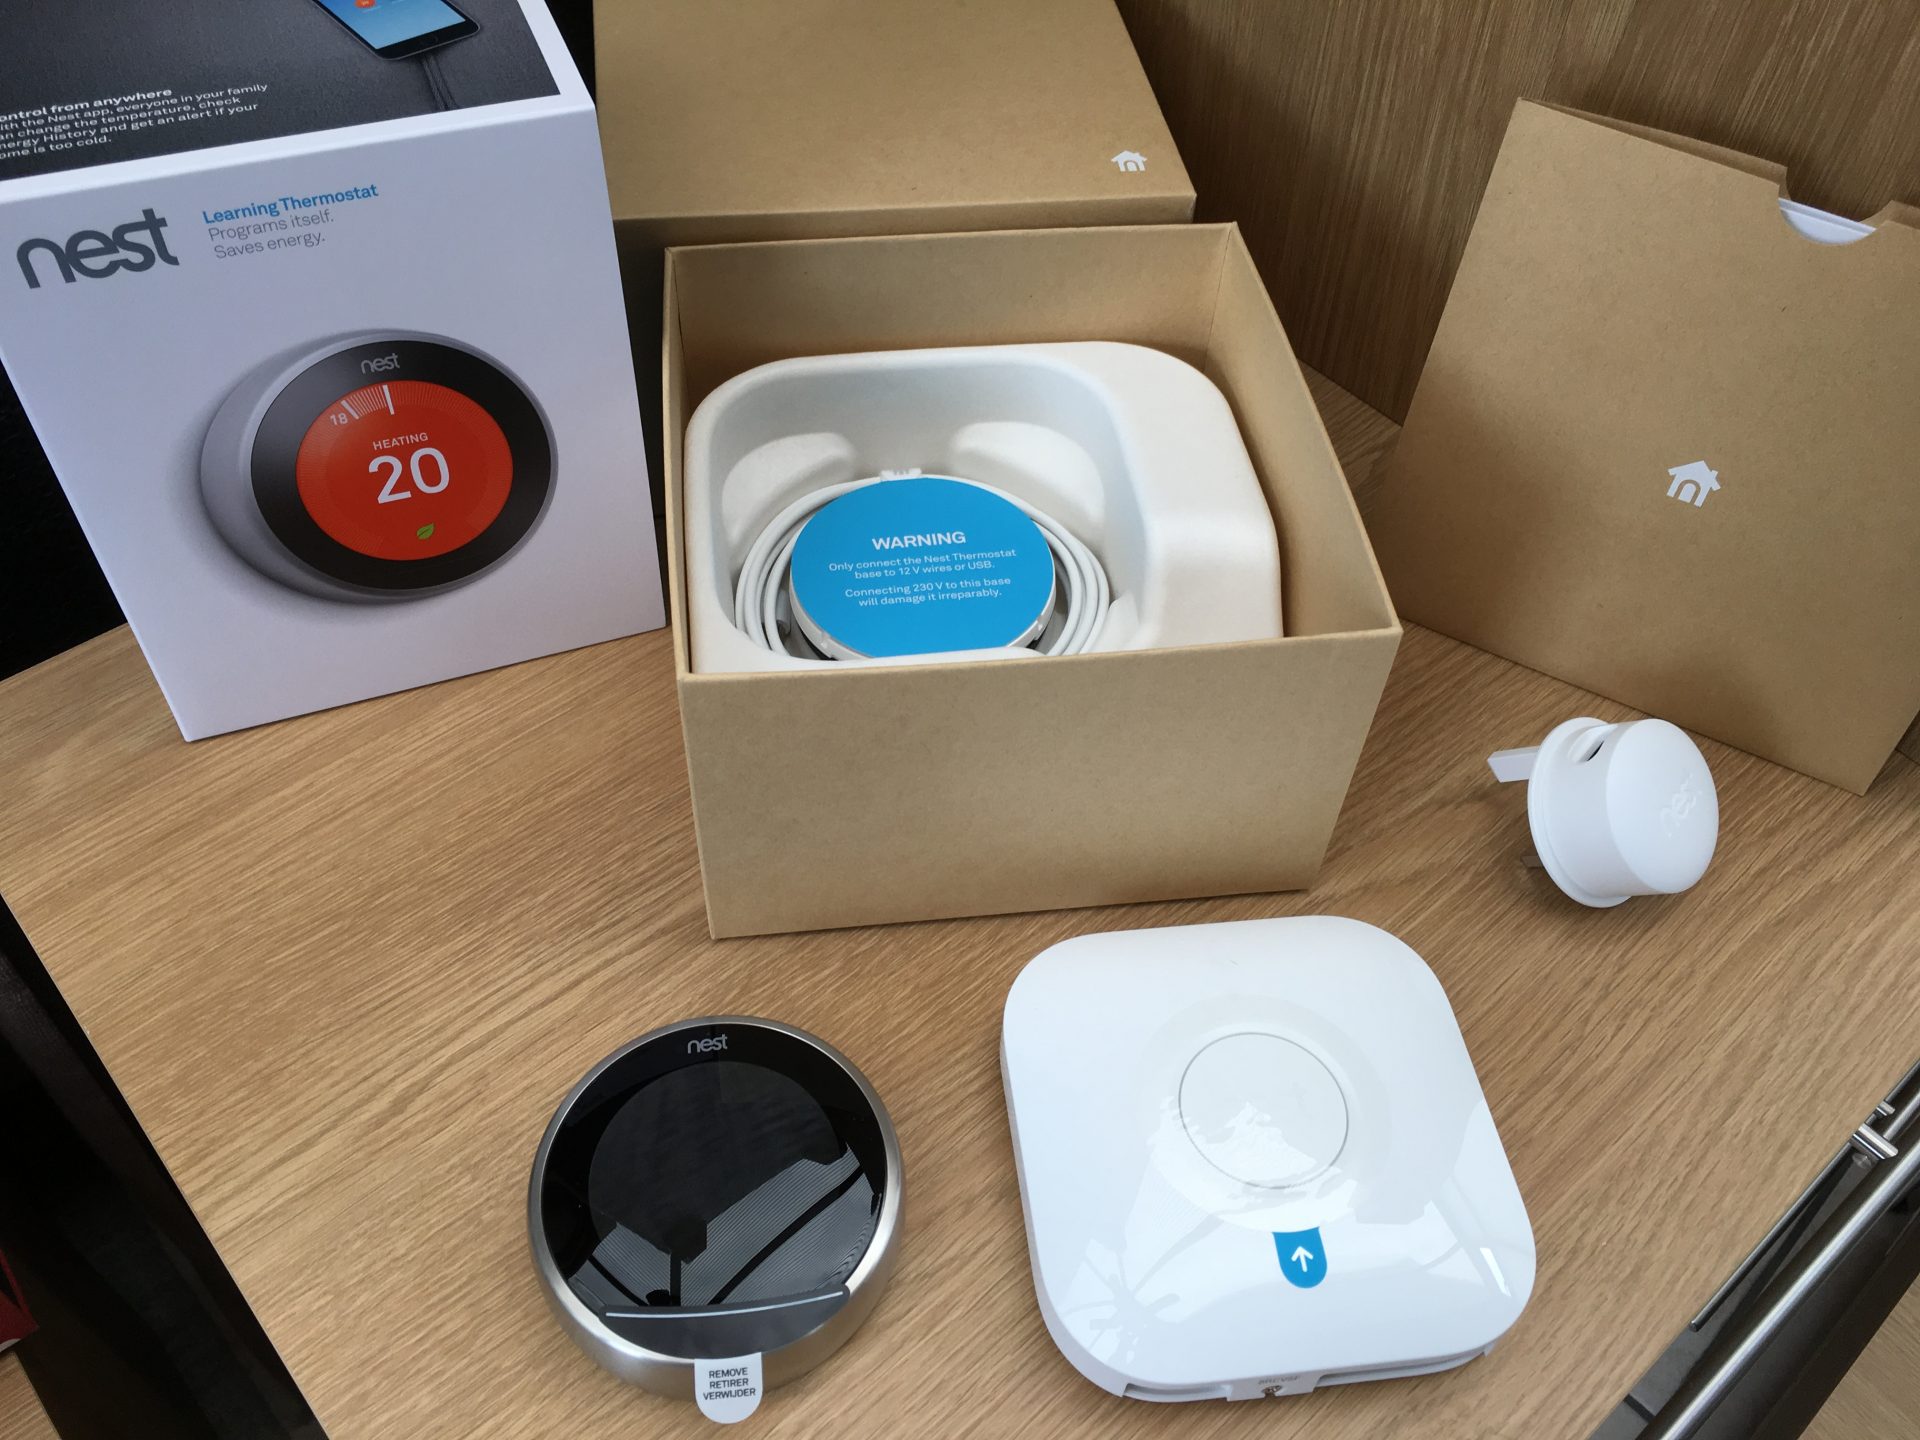

That'due south it! The key components here are:
- Nest Display (learning thermostat)
- Nest Rut Link
- Nest Base
- Nest Trim Plate and screws
- USB cablevision
- USB plug
- Installation guide
Identify your existing domicile heating setup
Before you go whatsoever further with the installation your first claiming is to identify what the existing heating setup is in your belongings equally in that location are numerous means to install the Nest system. The Nest installation guide that'due south in the box clearly outlines the different options that are compatible:
- S-Plan system
- Y-Programme system
- 230 V combi banality
- Low voltage/dry contact combi boiler
- OpenTherm banality
- District heating with electrical control valve
For the purpose of this mail I am focusing on my home'due south heating setup which is a Y-Plan system.
Installing your Nest thermostat into a Y-Plan organisation
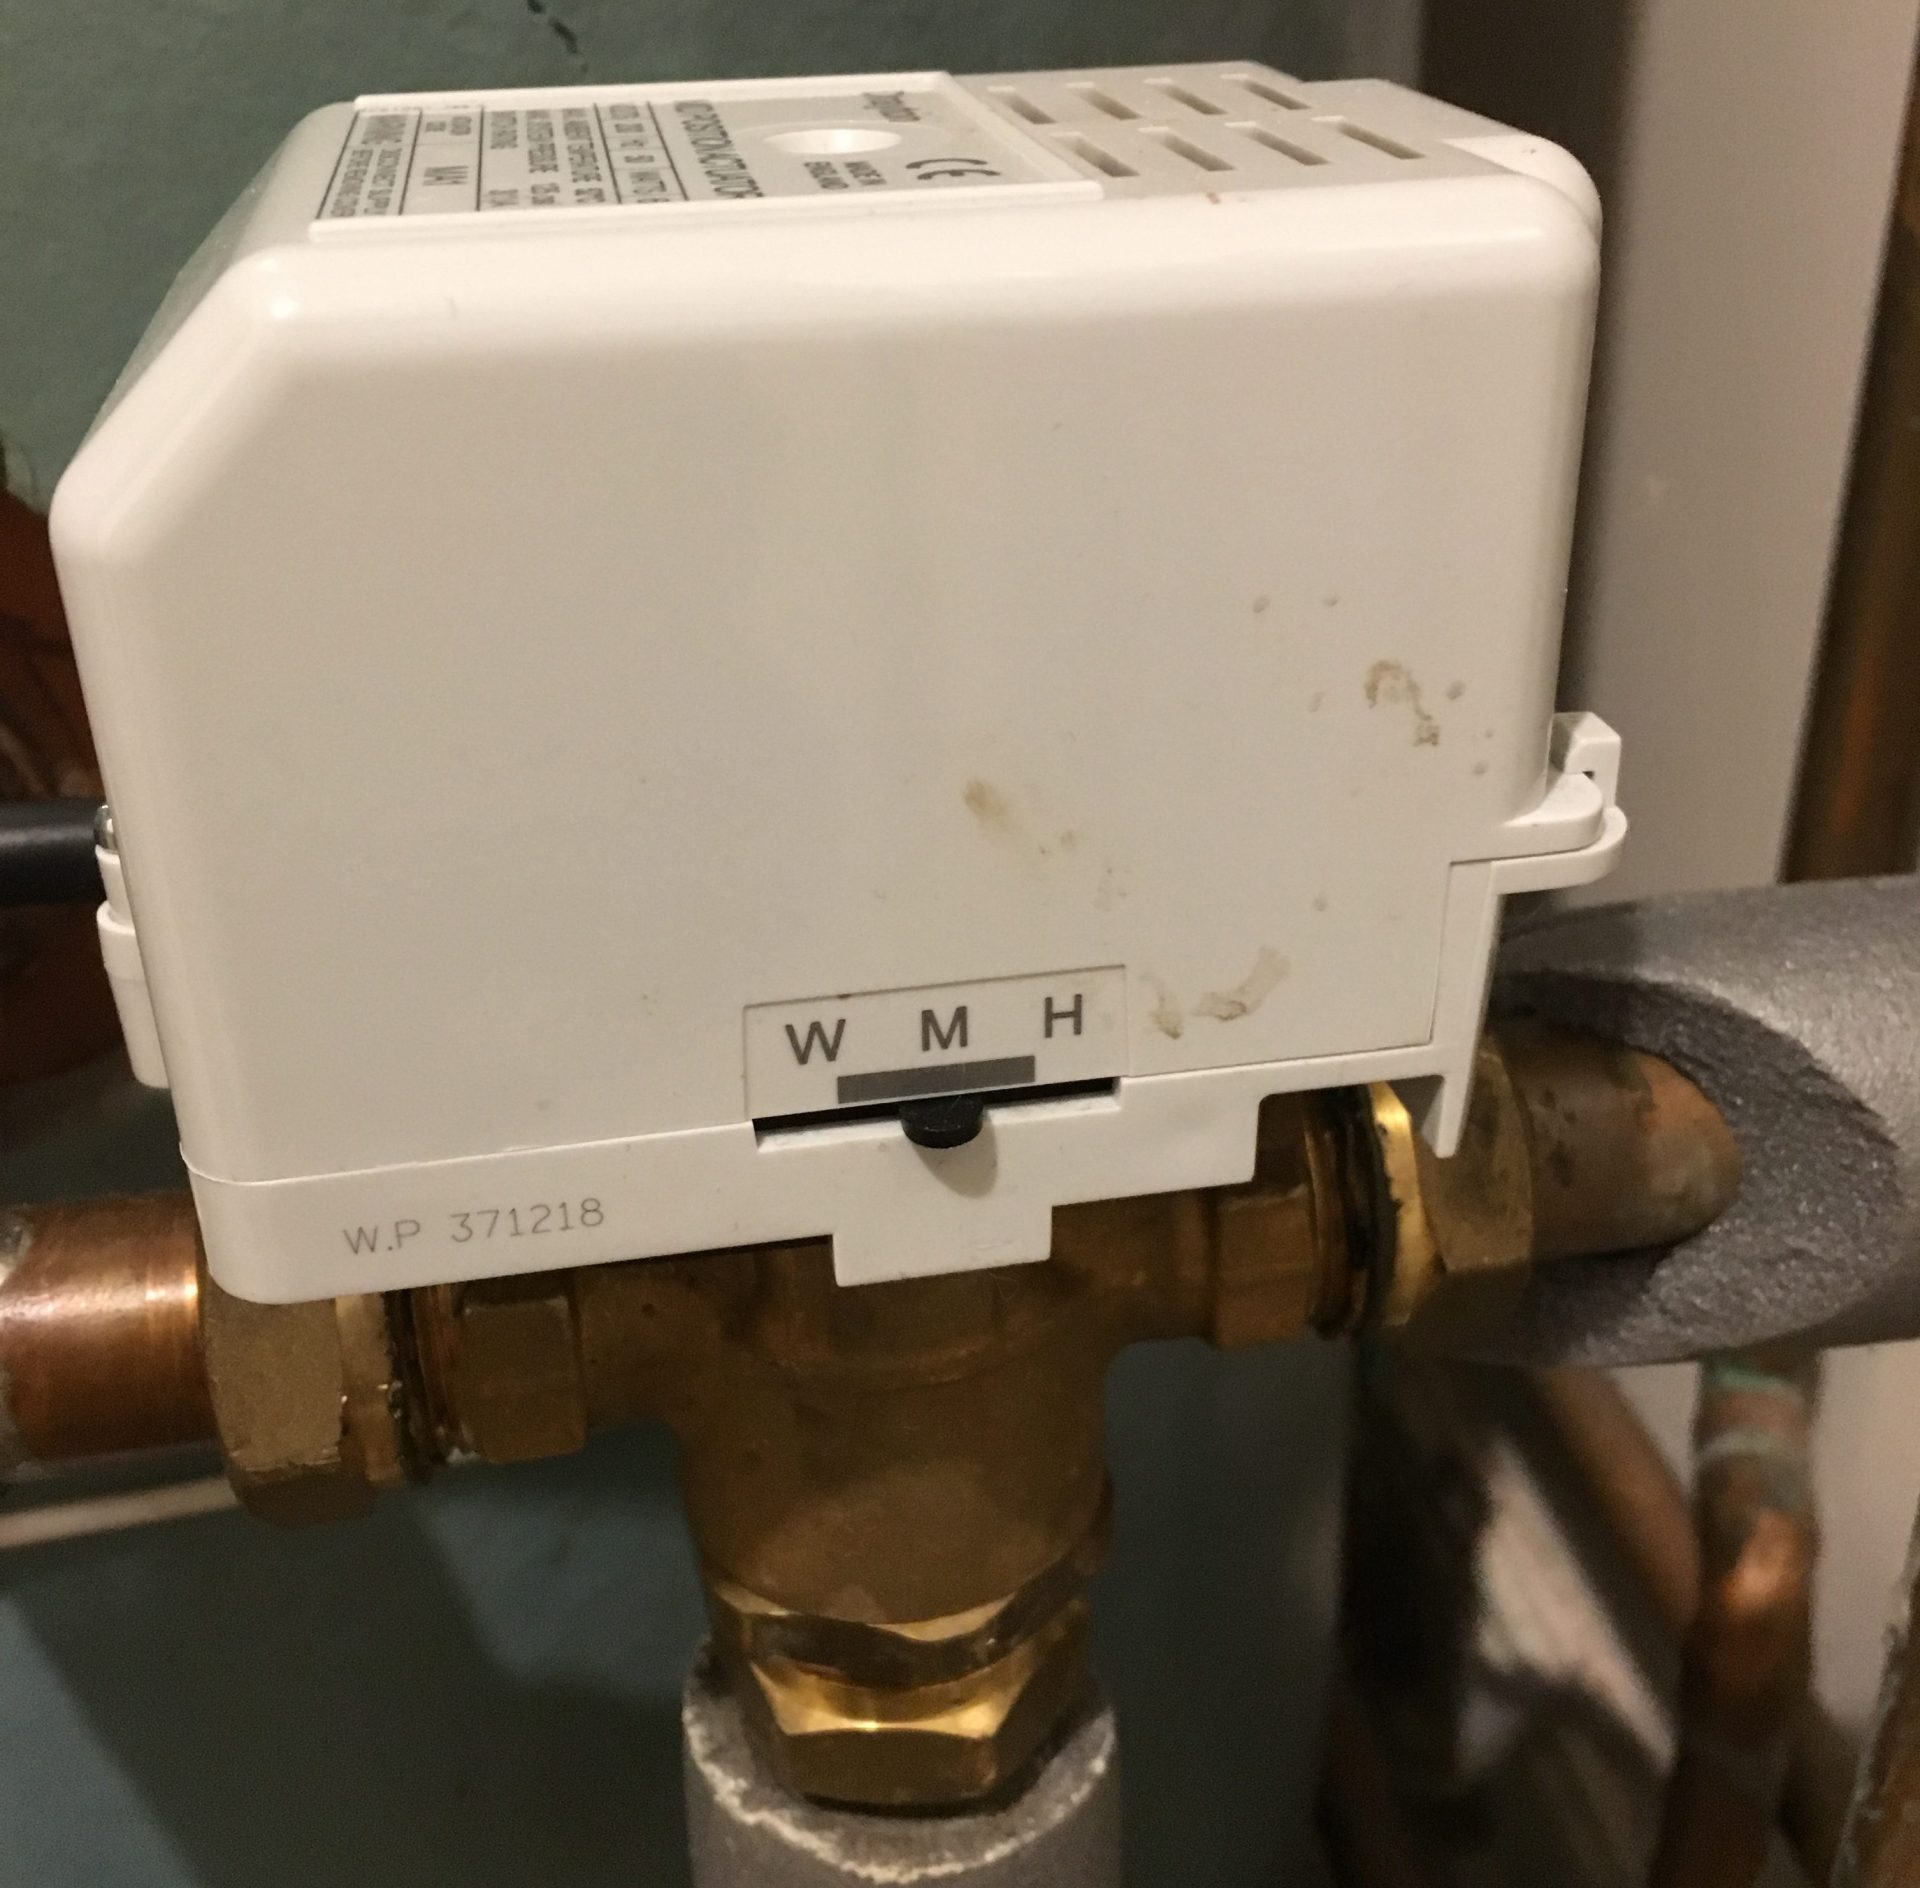
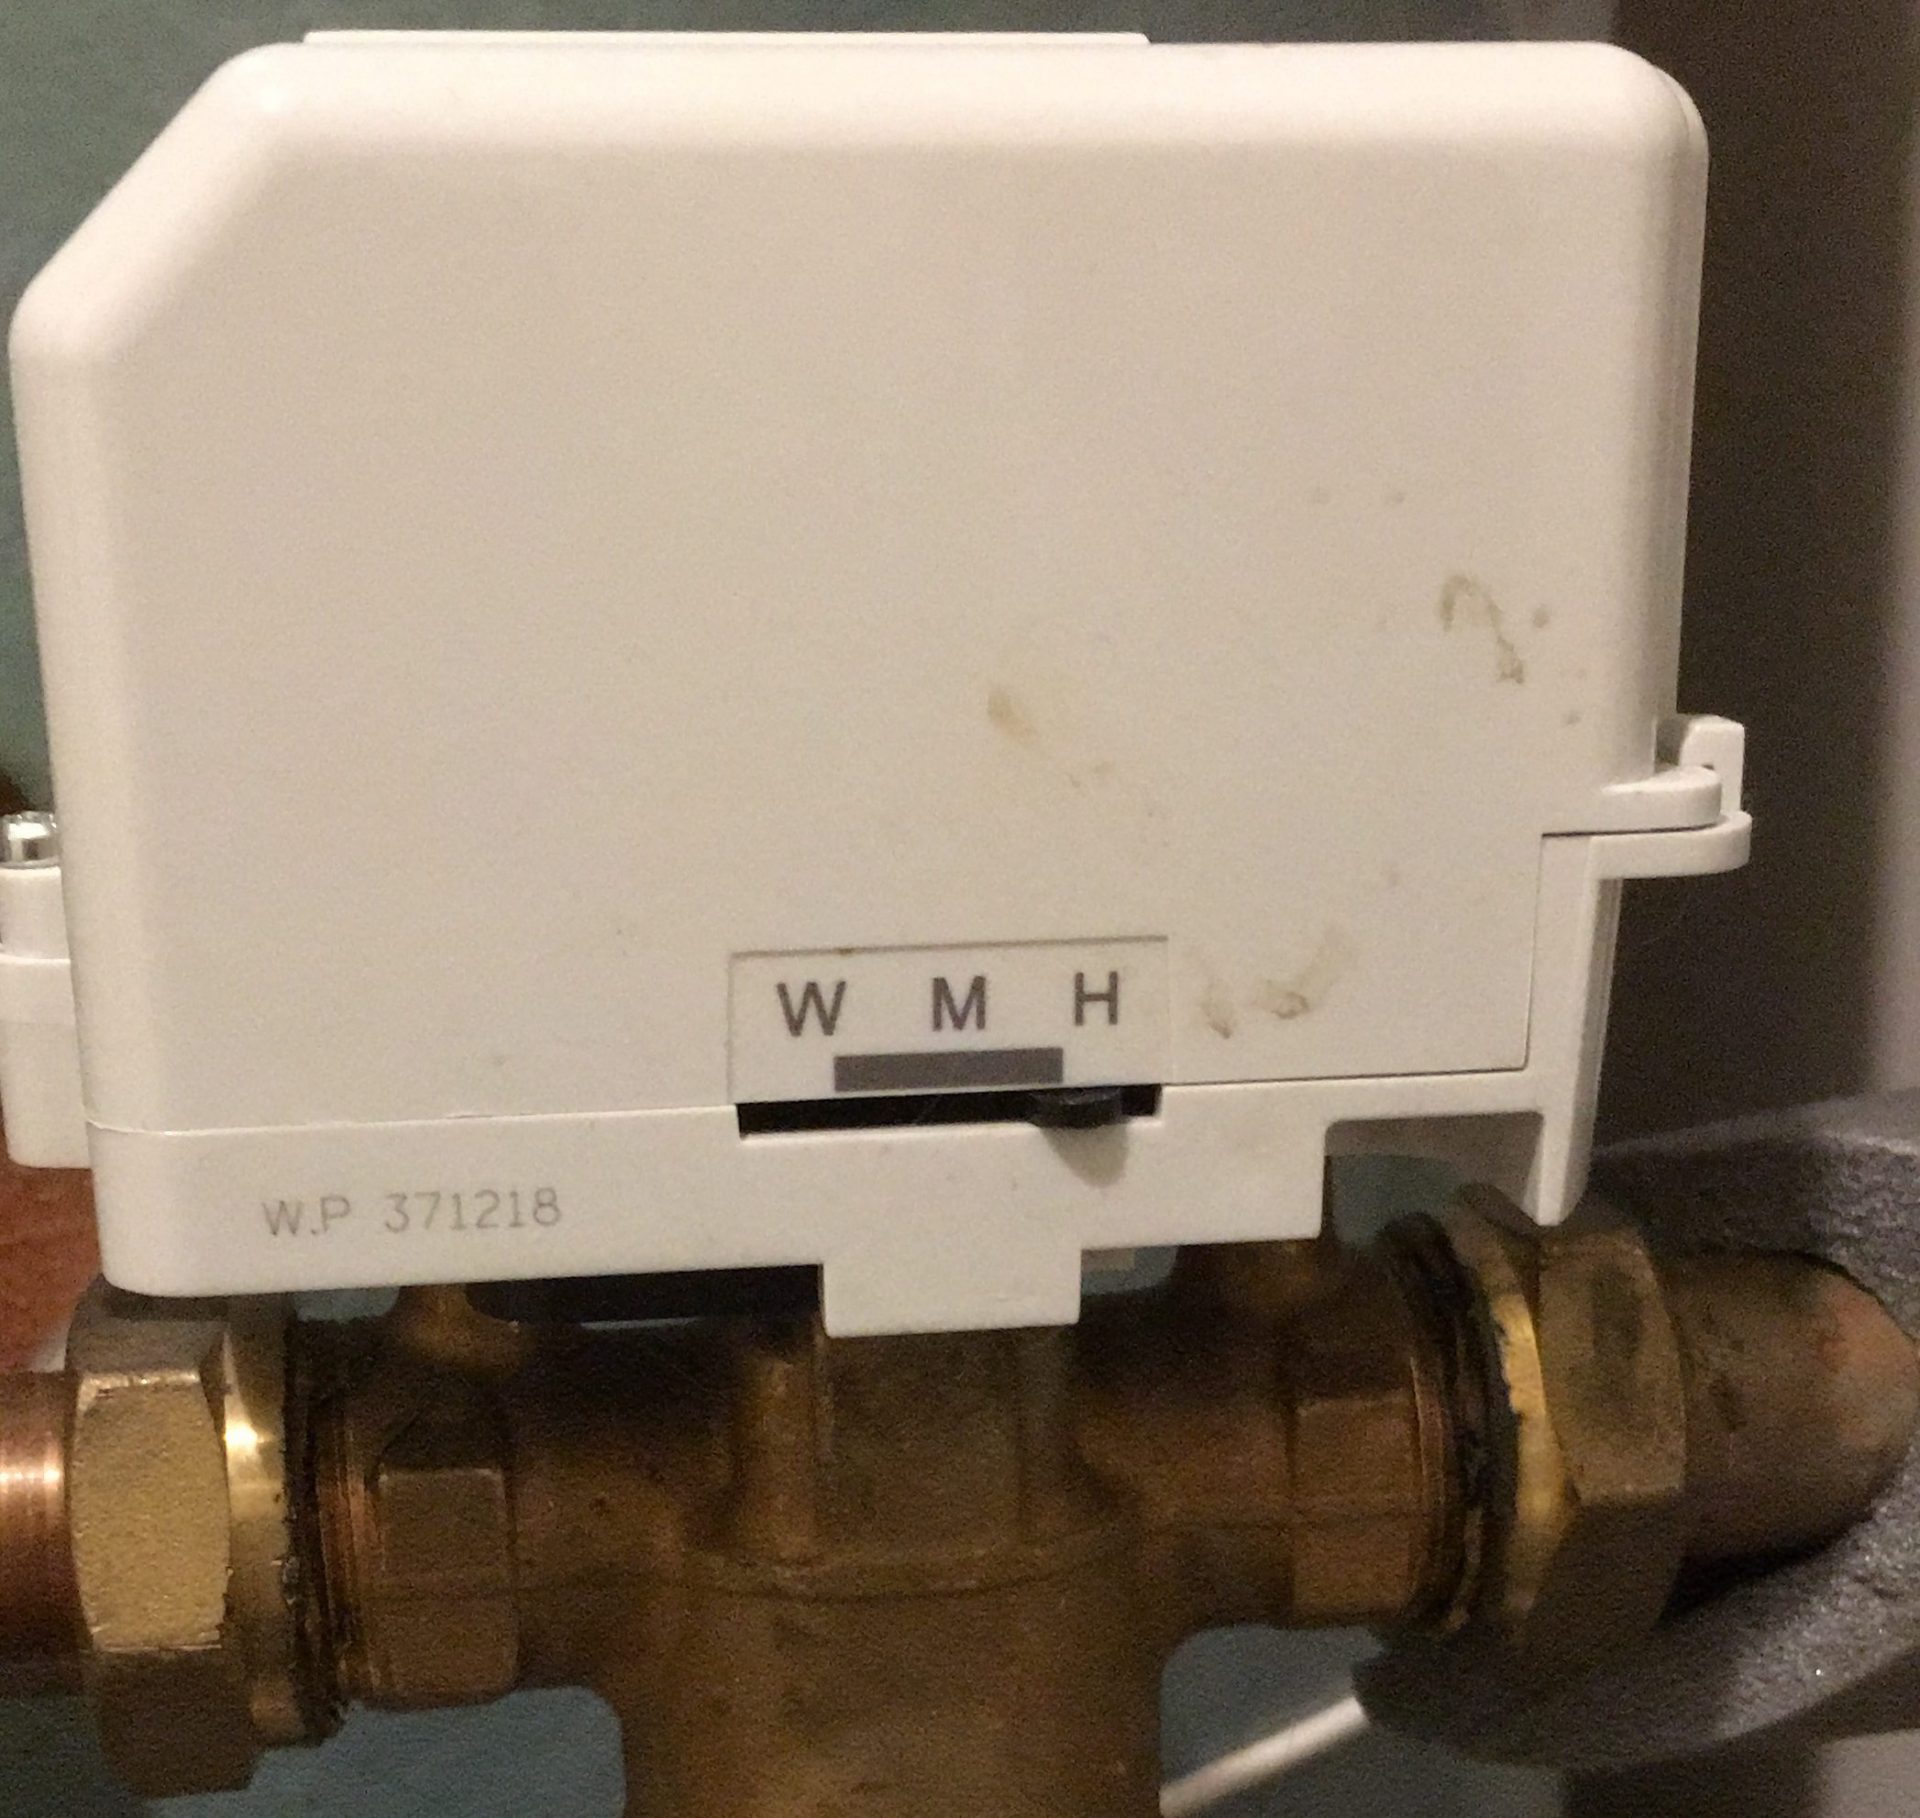
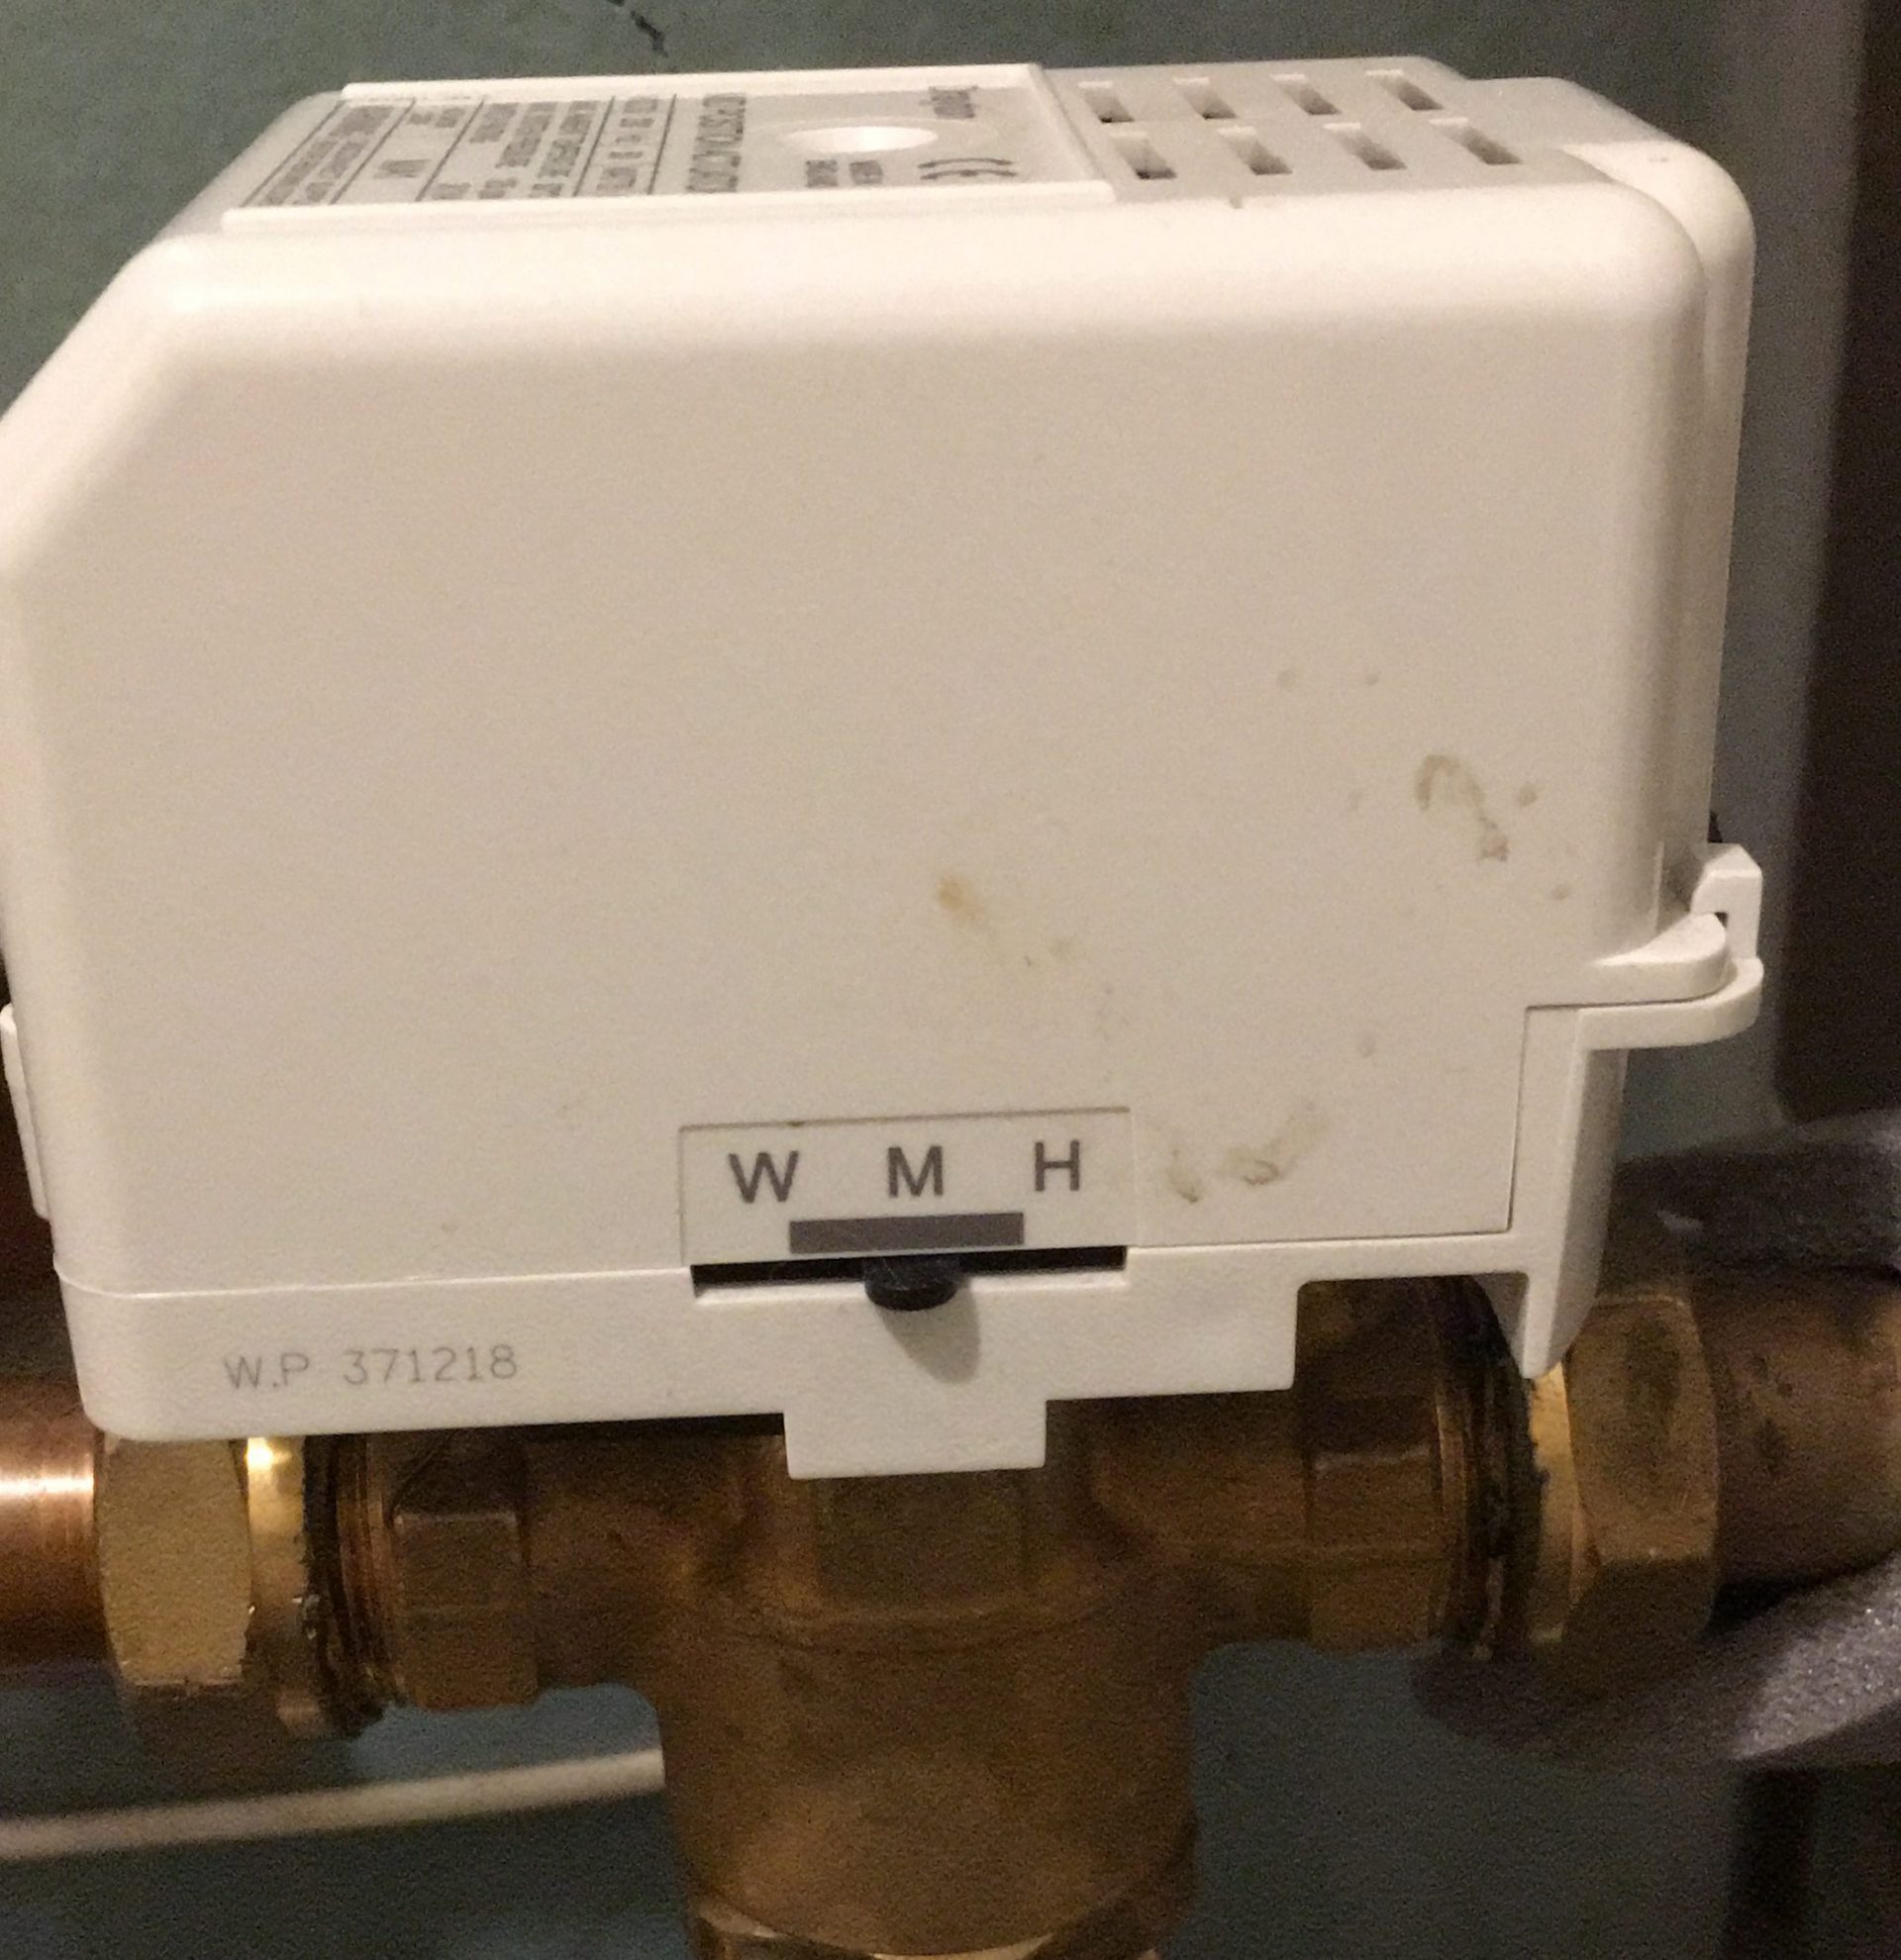
A Y-Plan system is one that involves a iii-port valve – in a nutshell this ways you can have only the heating on, merely the hot h2o on or both the heating and hot h2o on at the same time. To identify if you take a Y-Plan system, look for your three-port valve which should exist located in your airing closet fastened to the pipes coming from your water cylinder – this is what I have in my property where you can conspicuously see the 3 different value positions for Hot Water (W), Mid position (M) and Fundamental Heating (H):
Installing the Nest Heat Link
Upgrading your heating system to a Nest system requires yous to supervene upon your old heating controller/timer with the Nest Heat Link. The Heat Link then becomes the unit which is wired directly into your boiler and heating system and due to its wi-fi adequacy, allows yous to and so command your heating and hot h2o from your smartphone.
So how did my setup wait? Well, let's go started.
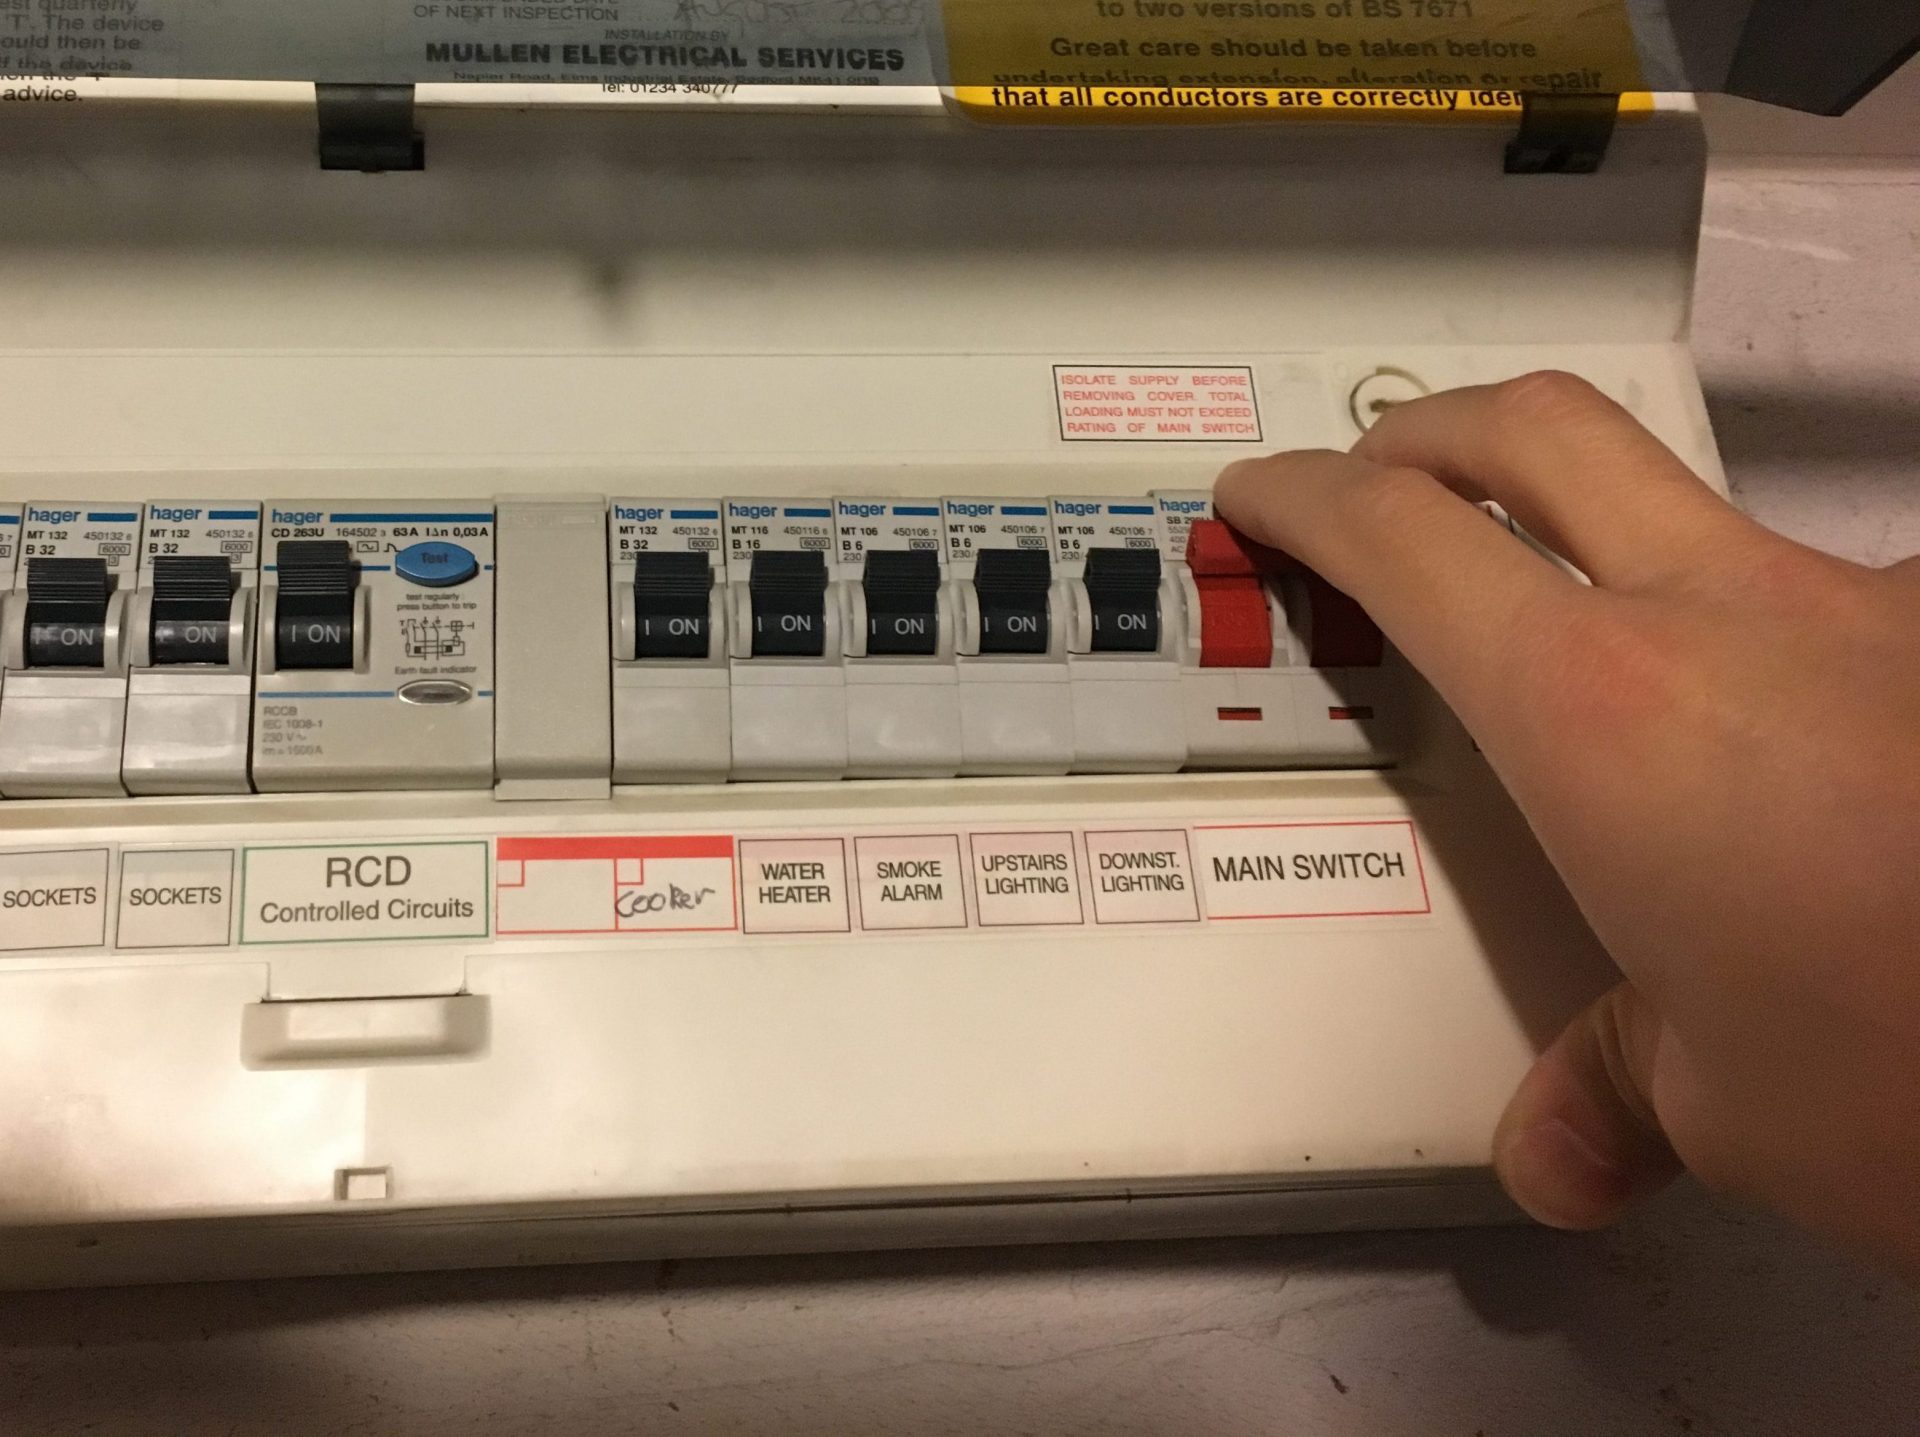
Stride 1: Turn off the power
Firstly, I killed the power! At present although there's a fuse running off of the programmer which could exist pulled out, when it comes to the electrics I don't take whatever chances and tend to always kill the mains ability – that way your take ensured your unabridged organisation is free from whatsoever unexpected wiring loops and minimise risk of electrocution.
Step 2: Disconnect your existing programming unit of measurement
With the power off I located the programming unit in my kitchen – in this instance a really old one from Danfoss and disconnected the face plate as shown (charge remains in the capacitors thus the screen is still live).
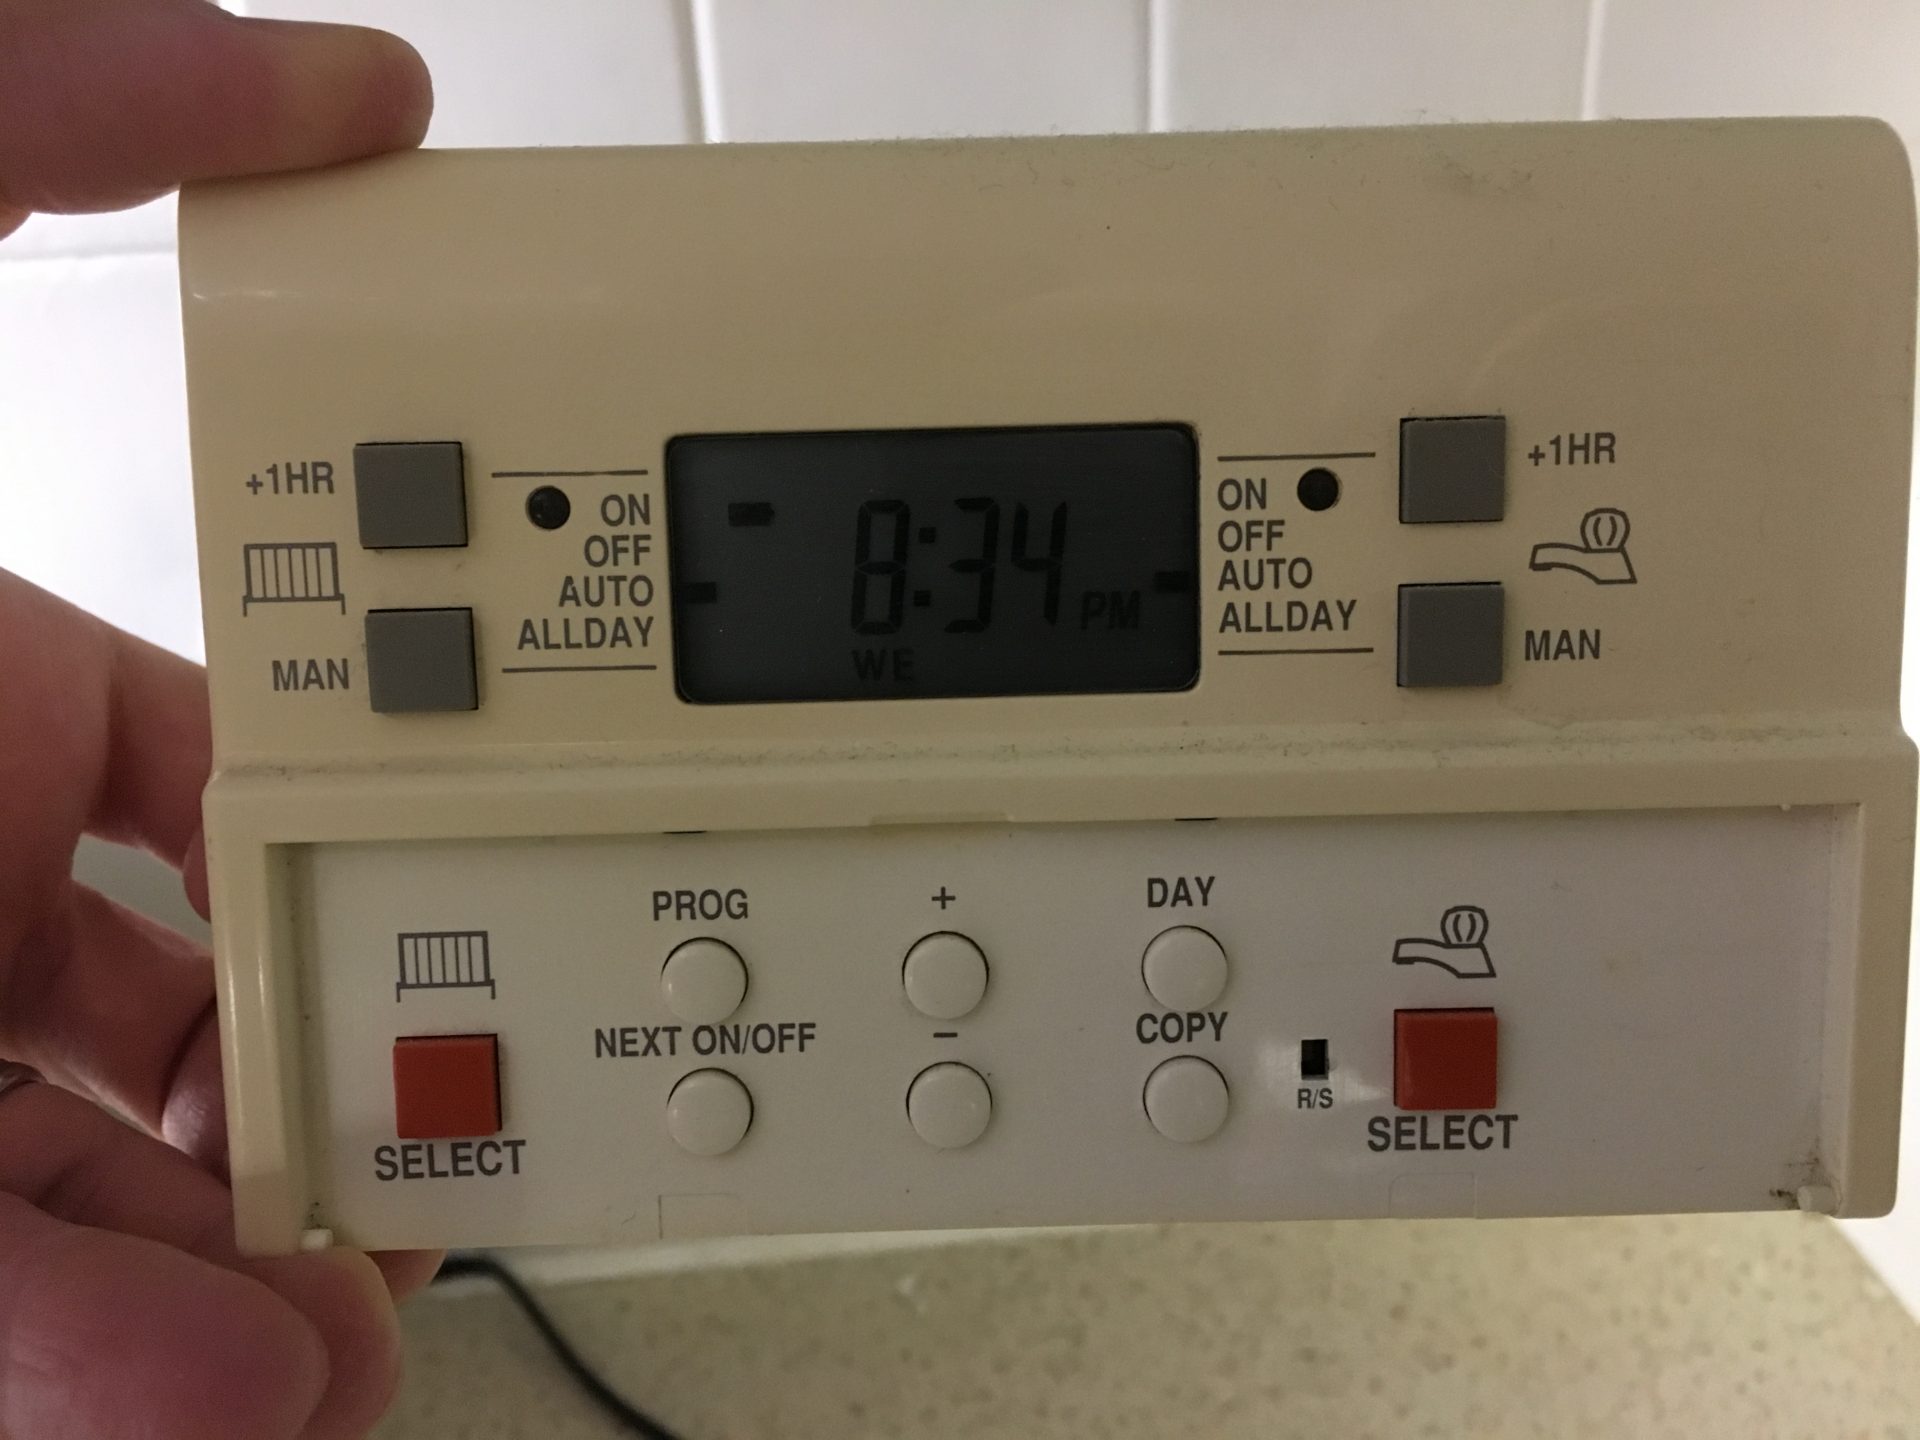
With the face plate removed this will allow you admission to the wiring that sits backside it – this is the wiring that will run to the boiler and the other parts of your heating system.
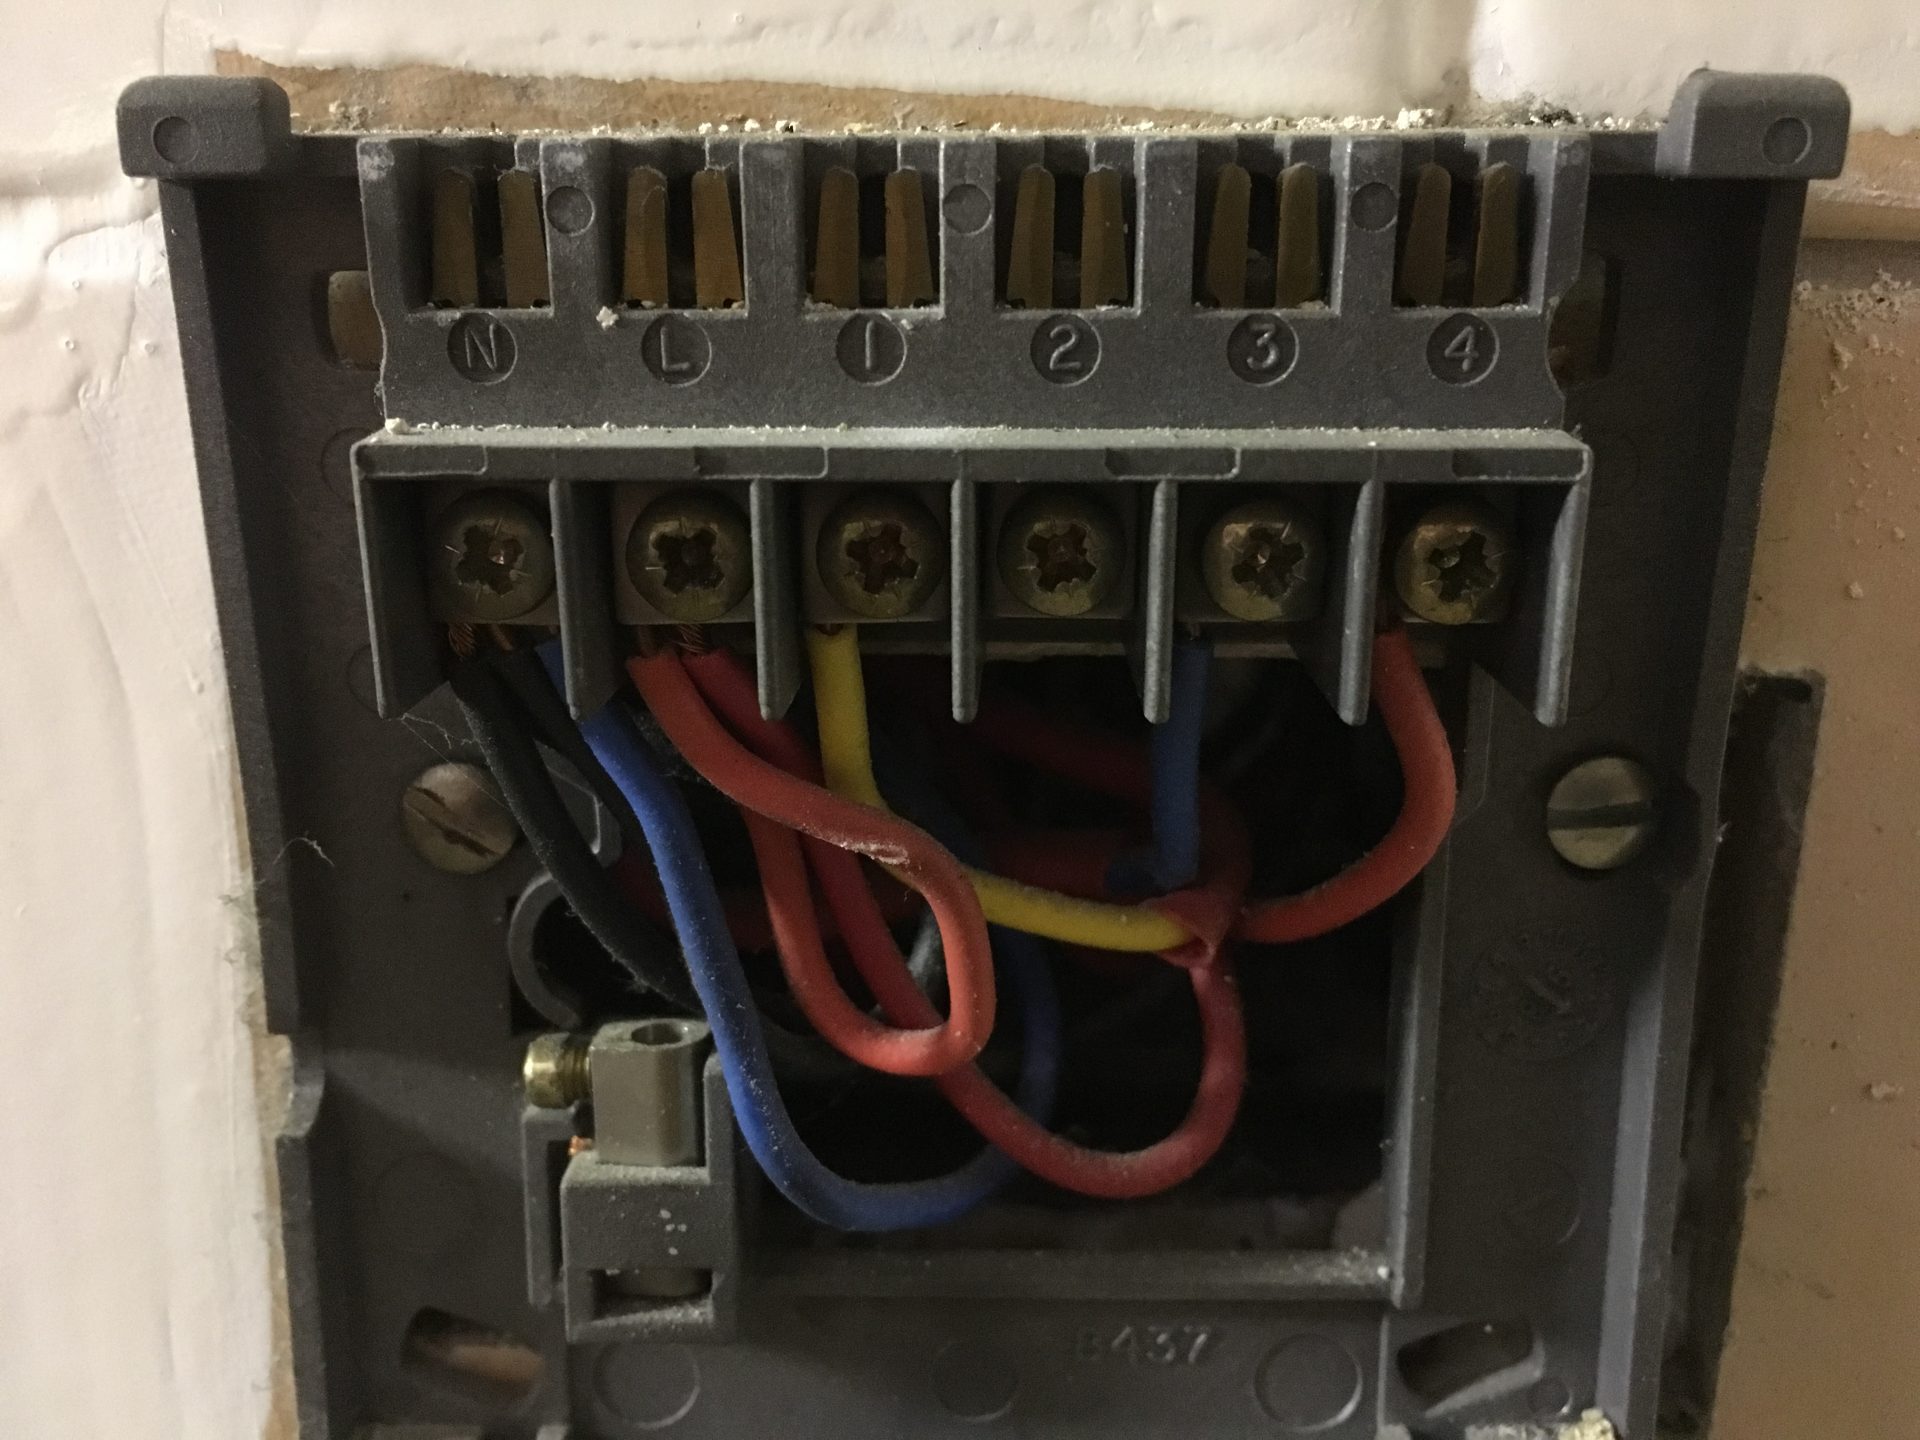
Pace 3: Identify the part of your existing terminals
As per the higher up photo, chances are you lot'll be faced with a spaghetti junction scenario similar I was! I tin can't stress enough at this point that BEFORE you disconnect any of these wires, make a note of which wires are going to each terminal (I wrapped a bit of masking record effectually them and wrote the number on) as you lot'll need to reconnect these shortly after.
I'k not sure if this volition be the case on all programmers still luckily for me on the back of the unit there was a final primal so I knew exactly what each of the existing wires and terminals were doing – if this isn't available on your programmer you may need to Google it to place the purpose of each terminal.
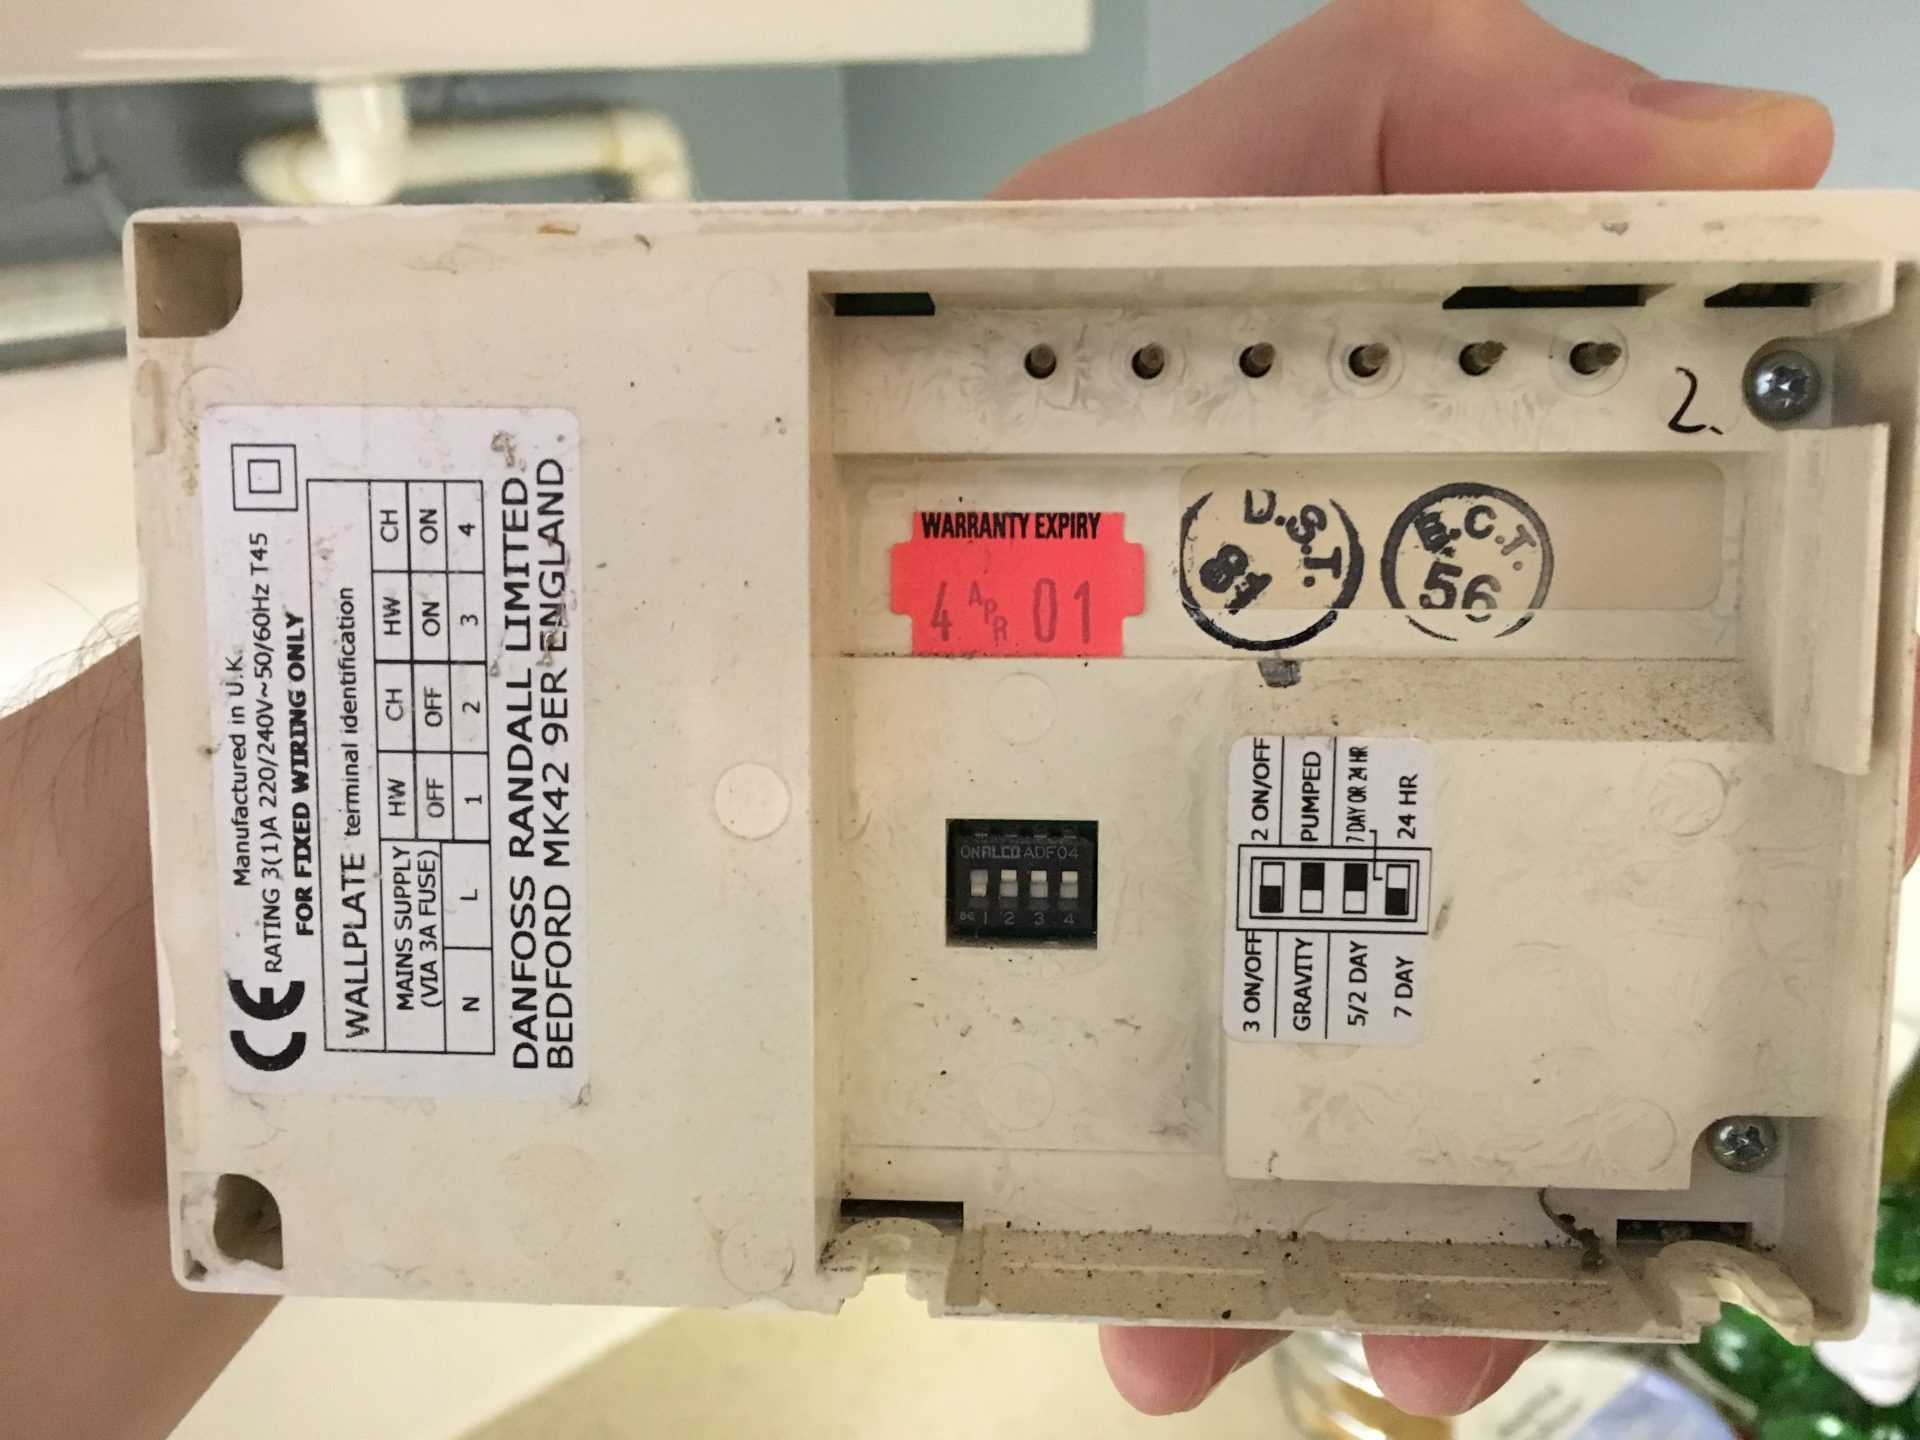
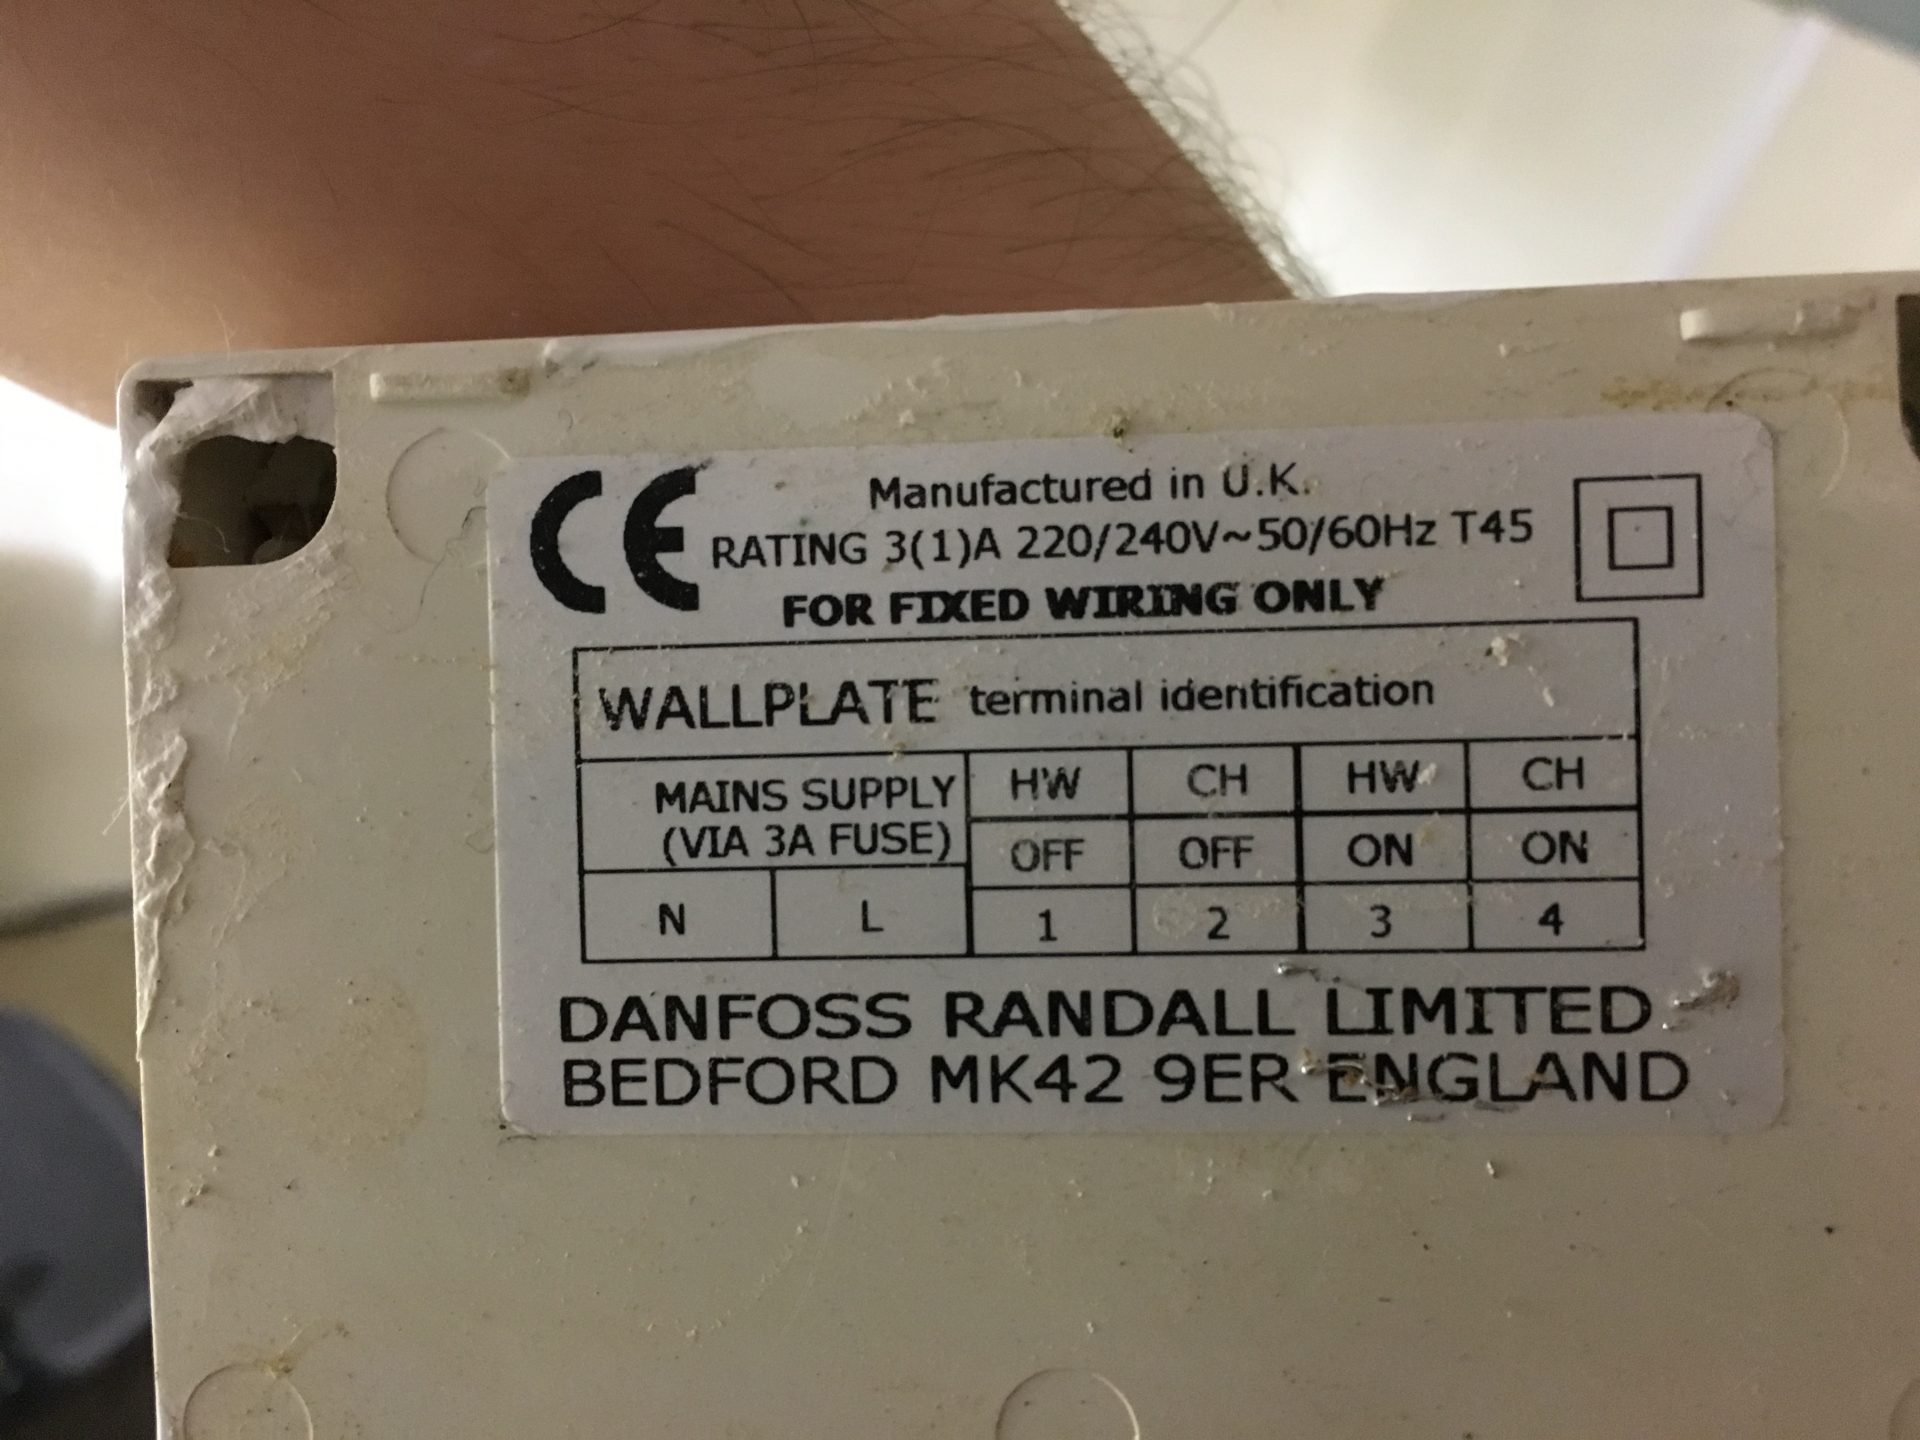
This terminal key made things really simple:
- Hot Water (HW) = Off
- Central Heating (CH) = Off
- Hot Water (HW) = On
- Primal Heating (CH) = On
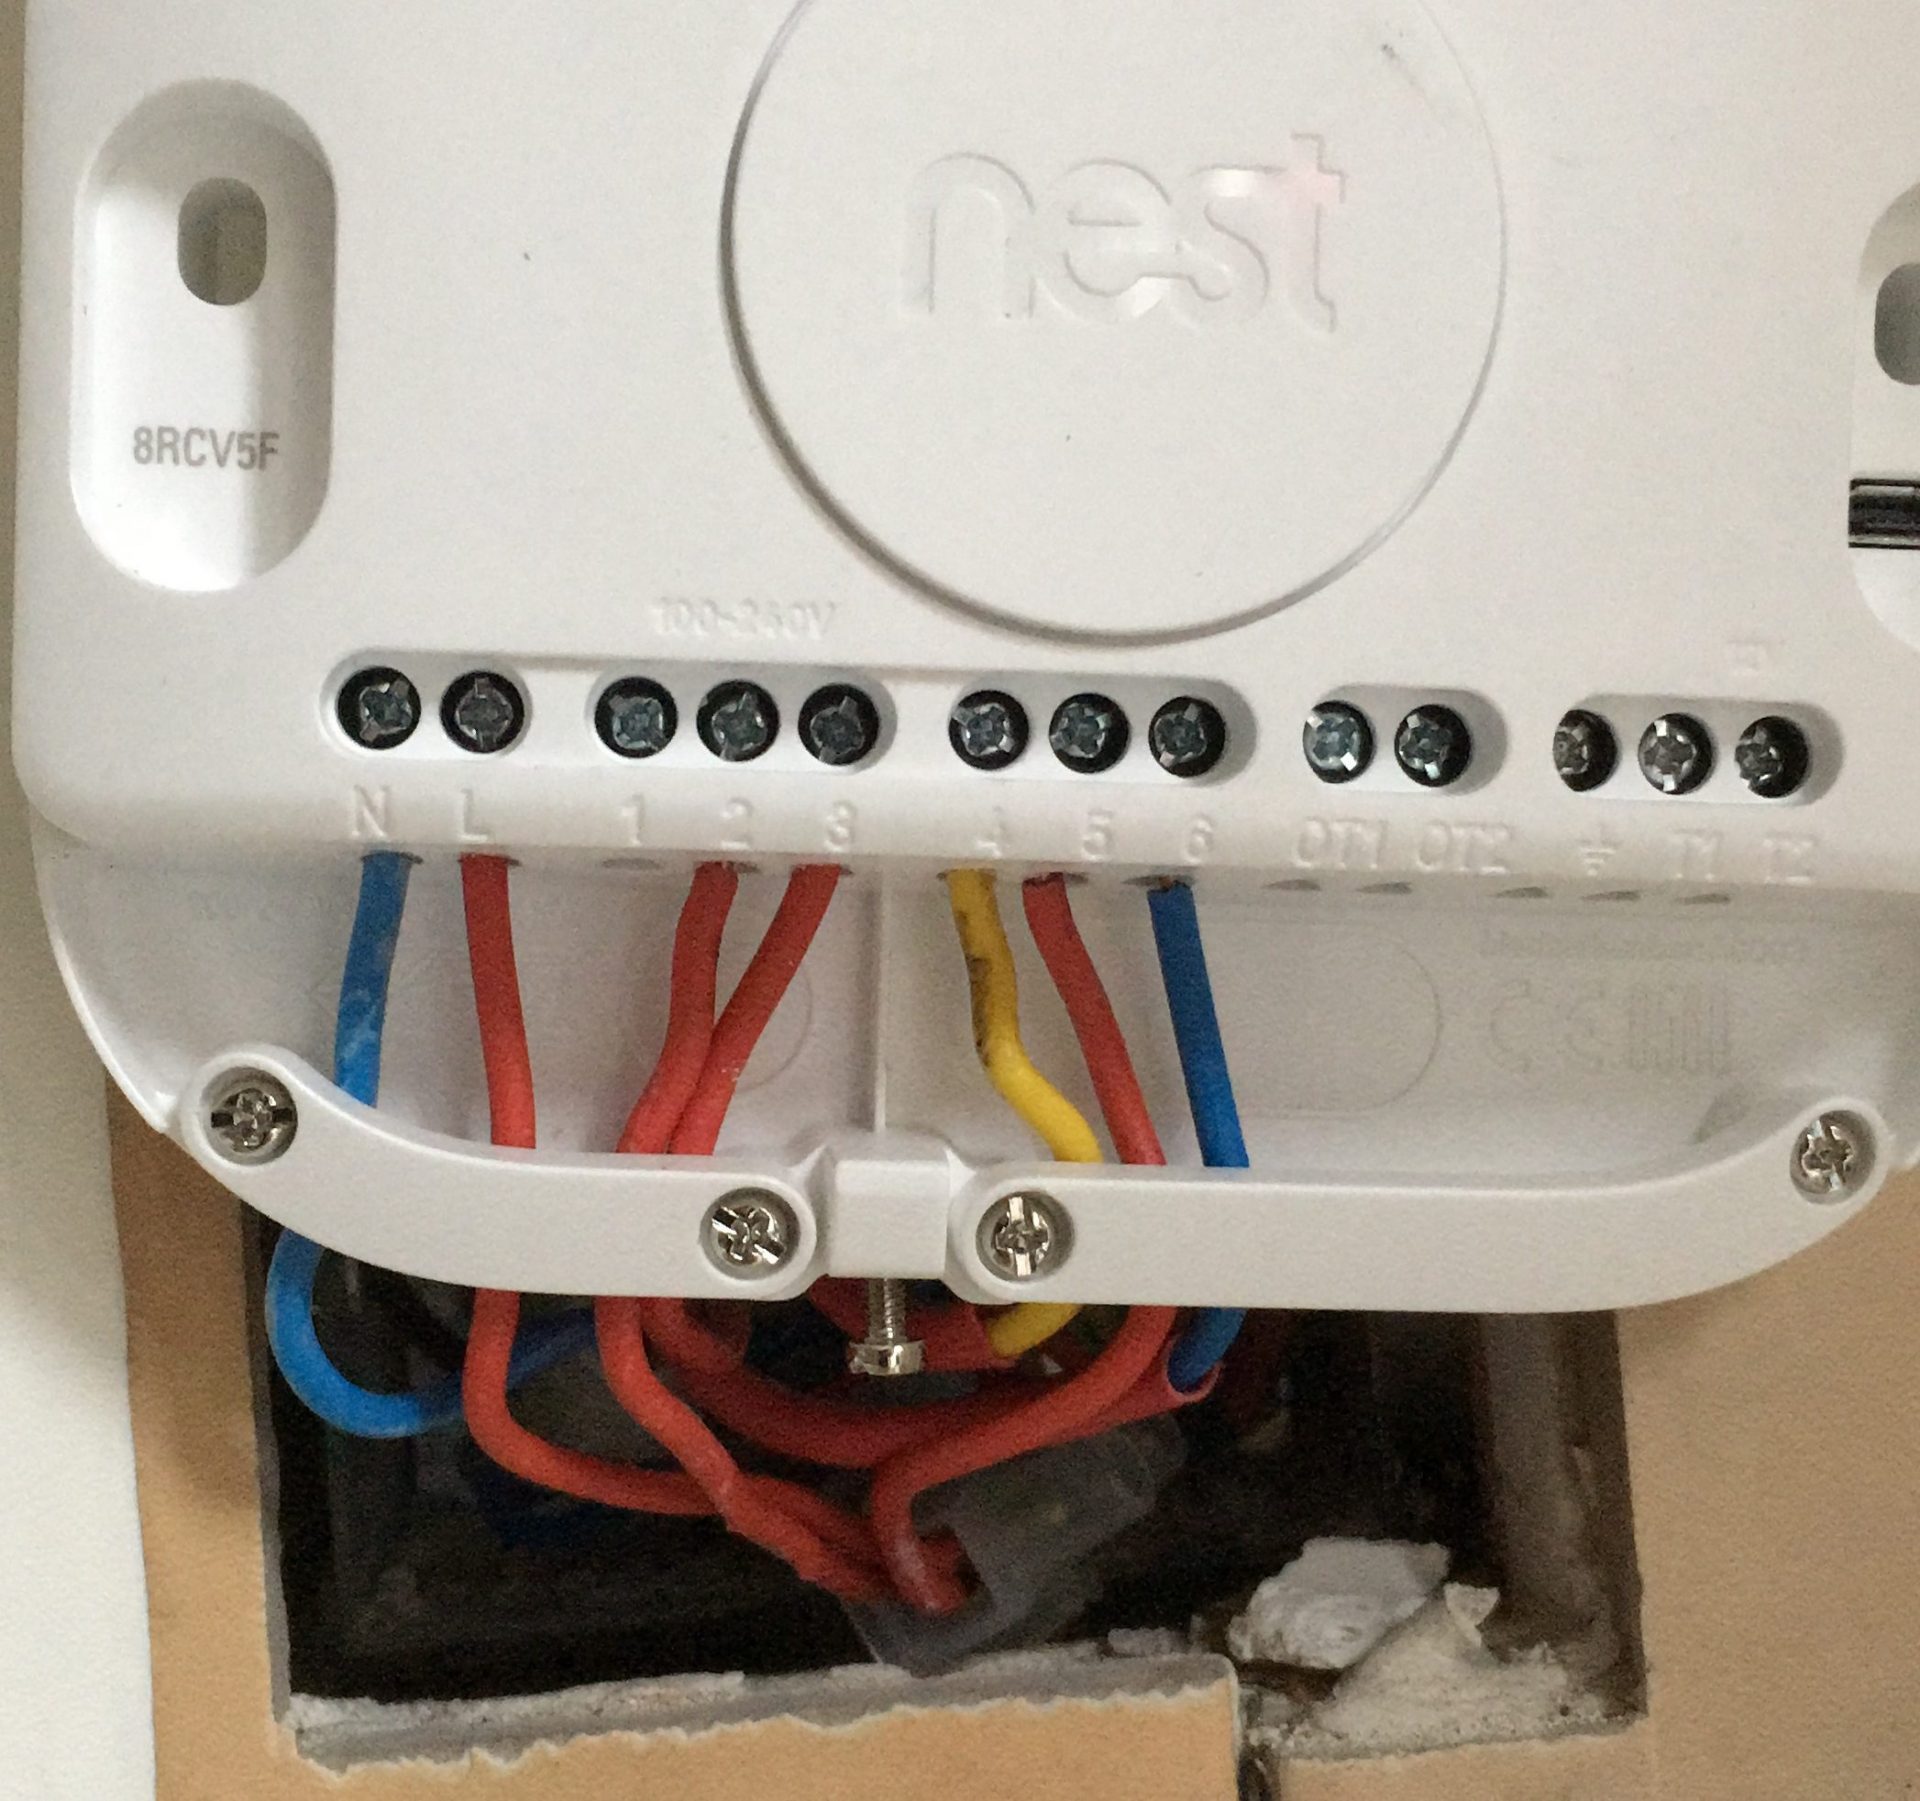
Stride 4: Map your existing terminal wiring to your Nest Heat Link terminals
The next step is to get hold of your Nest Heat Link, unscrew the bottom and remove the cover to reveal the Heat Link terminals:

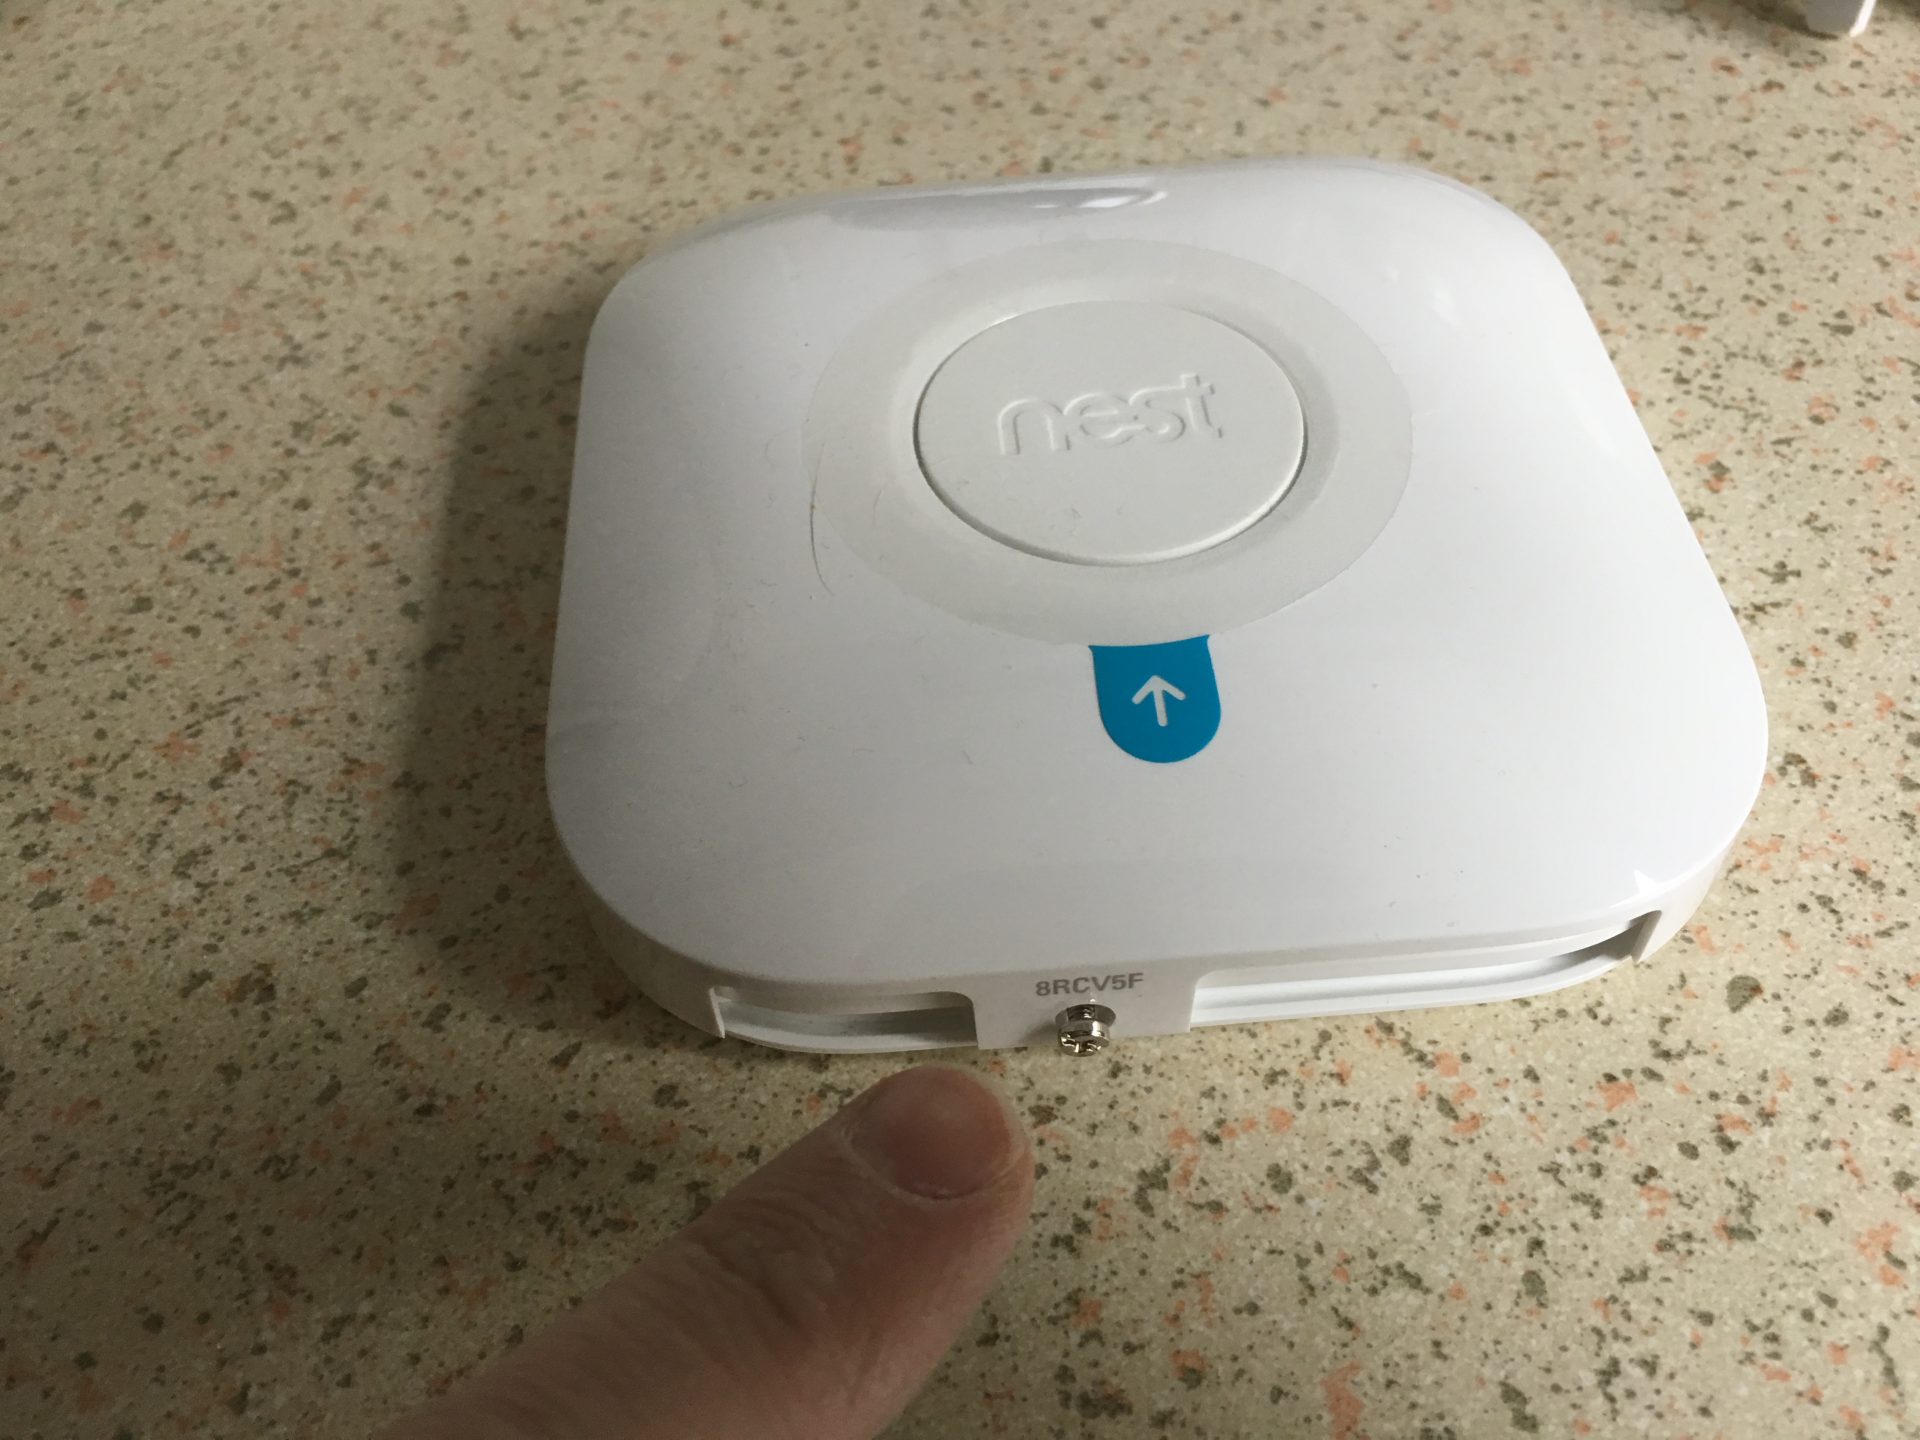

Although there are a lot of terminals, things here are actually very straightforward. If you take a await at the Nest Installation guide this clearly outlines what each of the numbered Nest Heat Link terminals should exist used for:

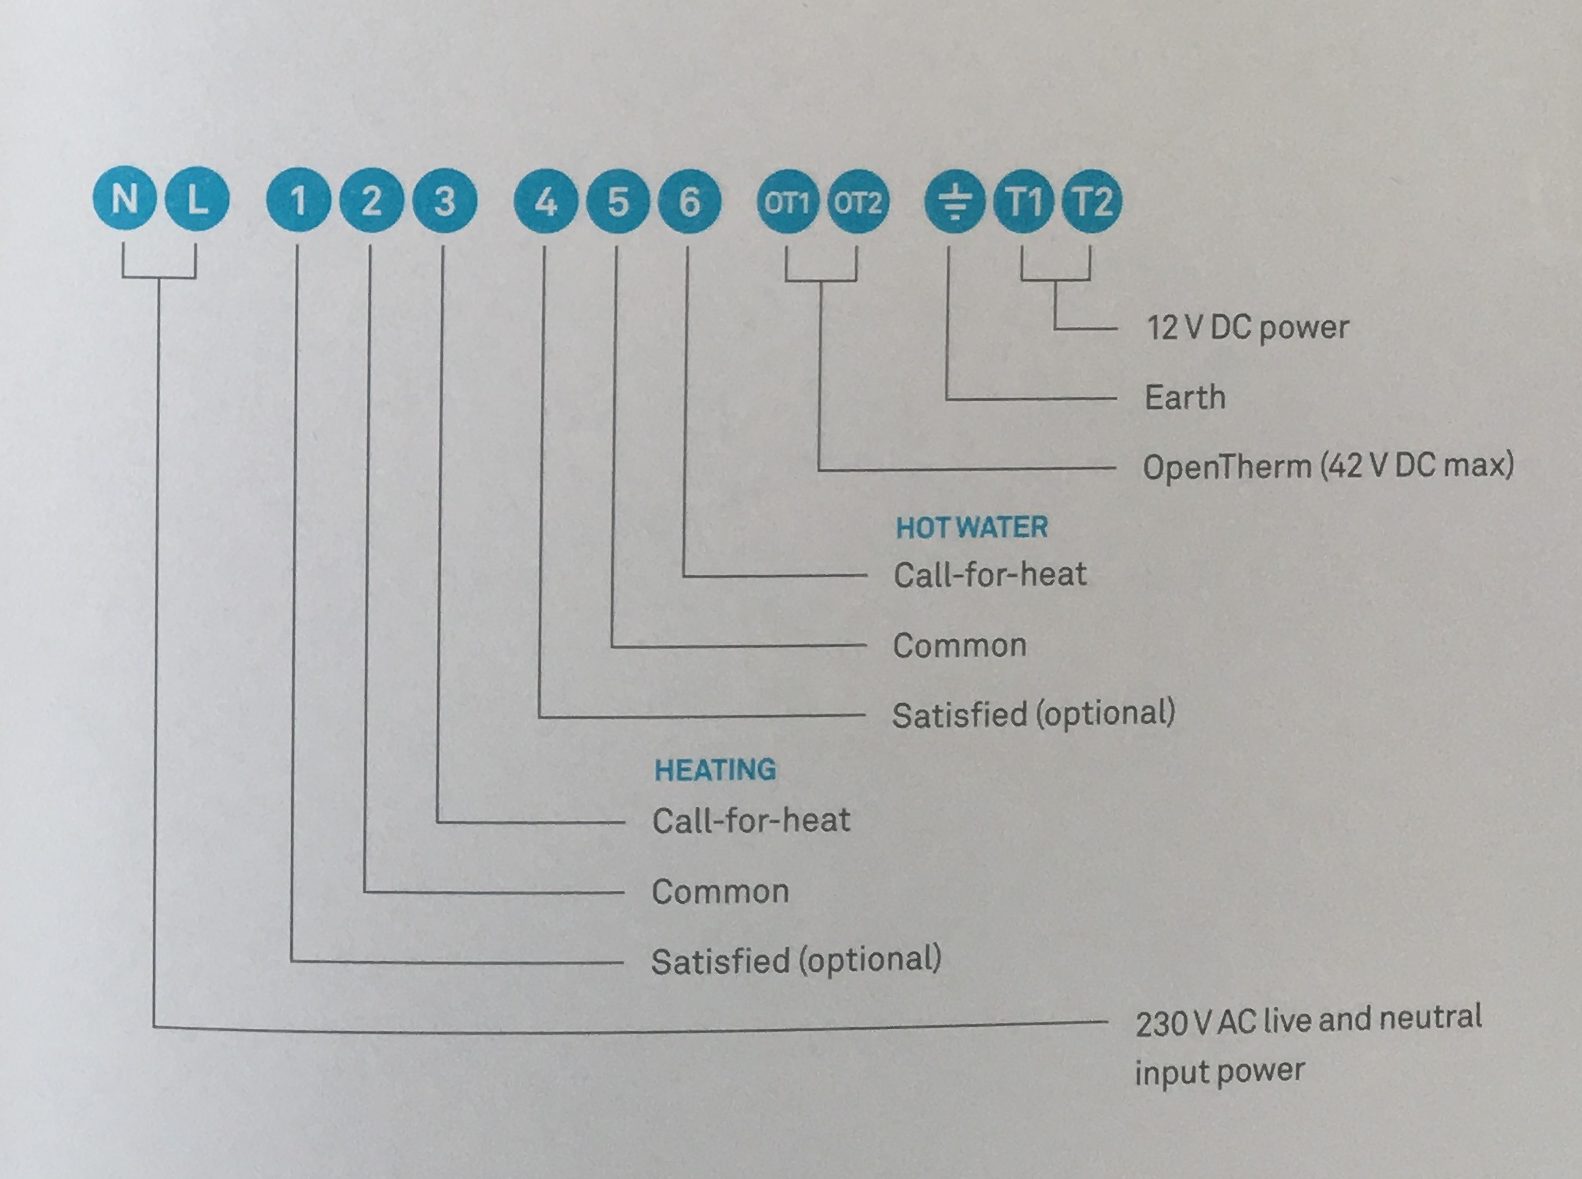
Every bit nosotros are focusing here on the Y-Program setup, terminals such as the OT1 and OT2 don't utilise every bit they are used for OpenTherm boilers. The Y-Programme setup is outlined as follows:
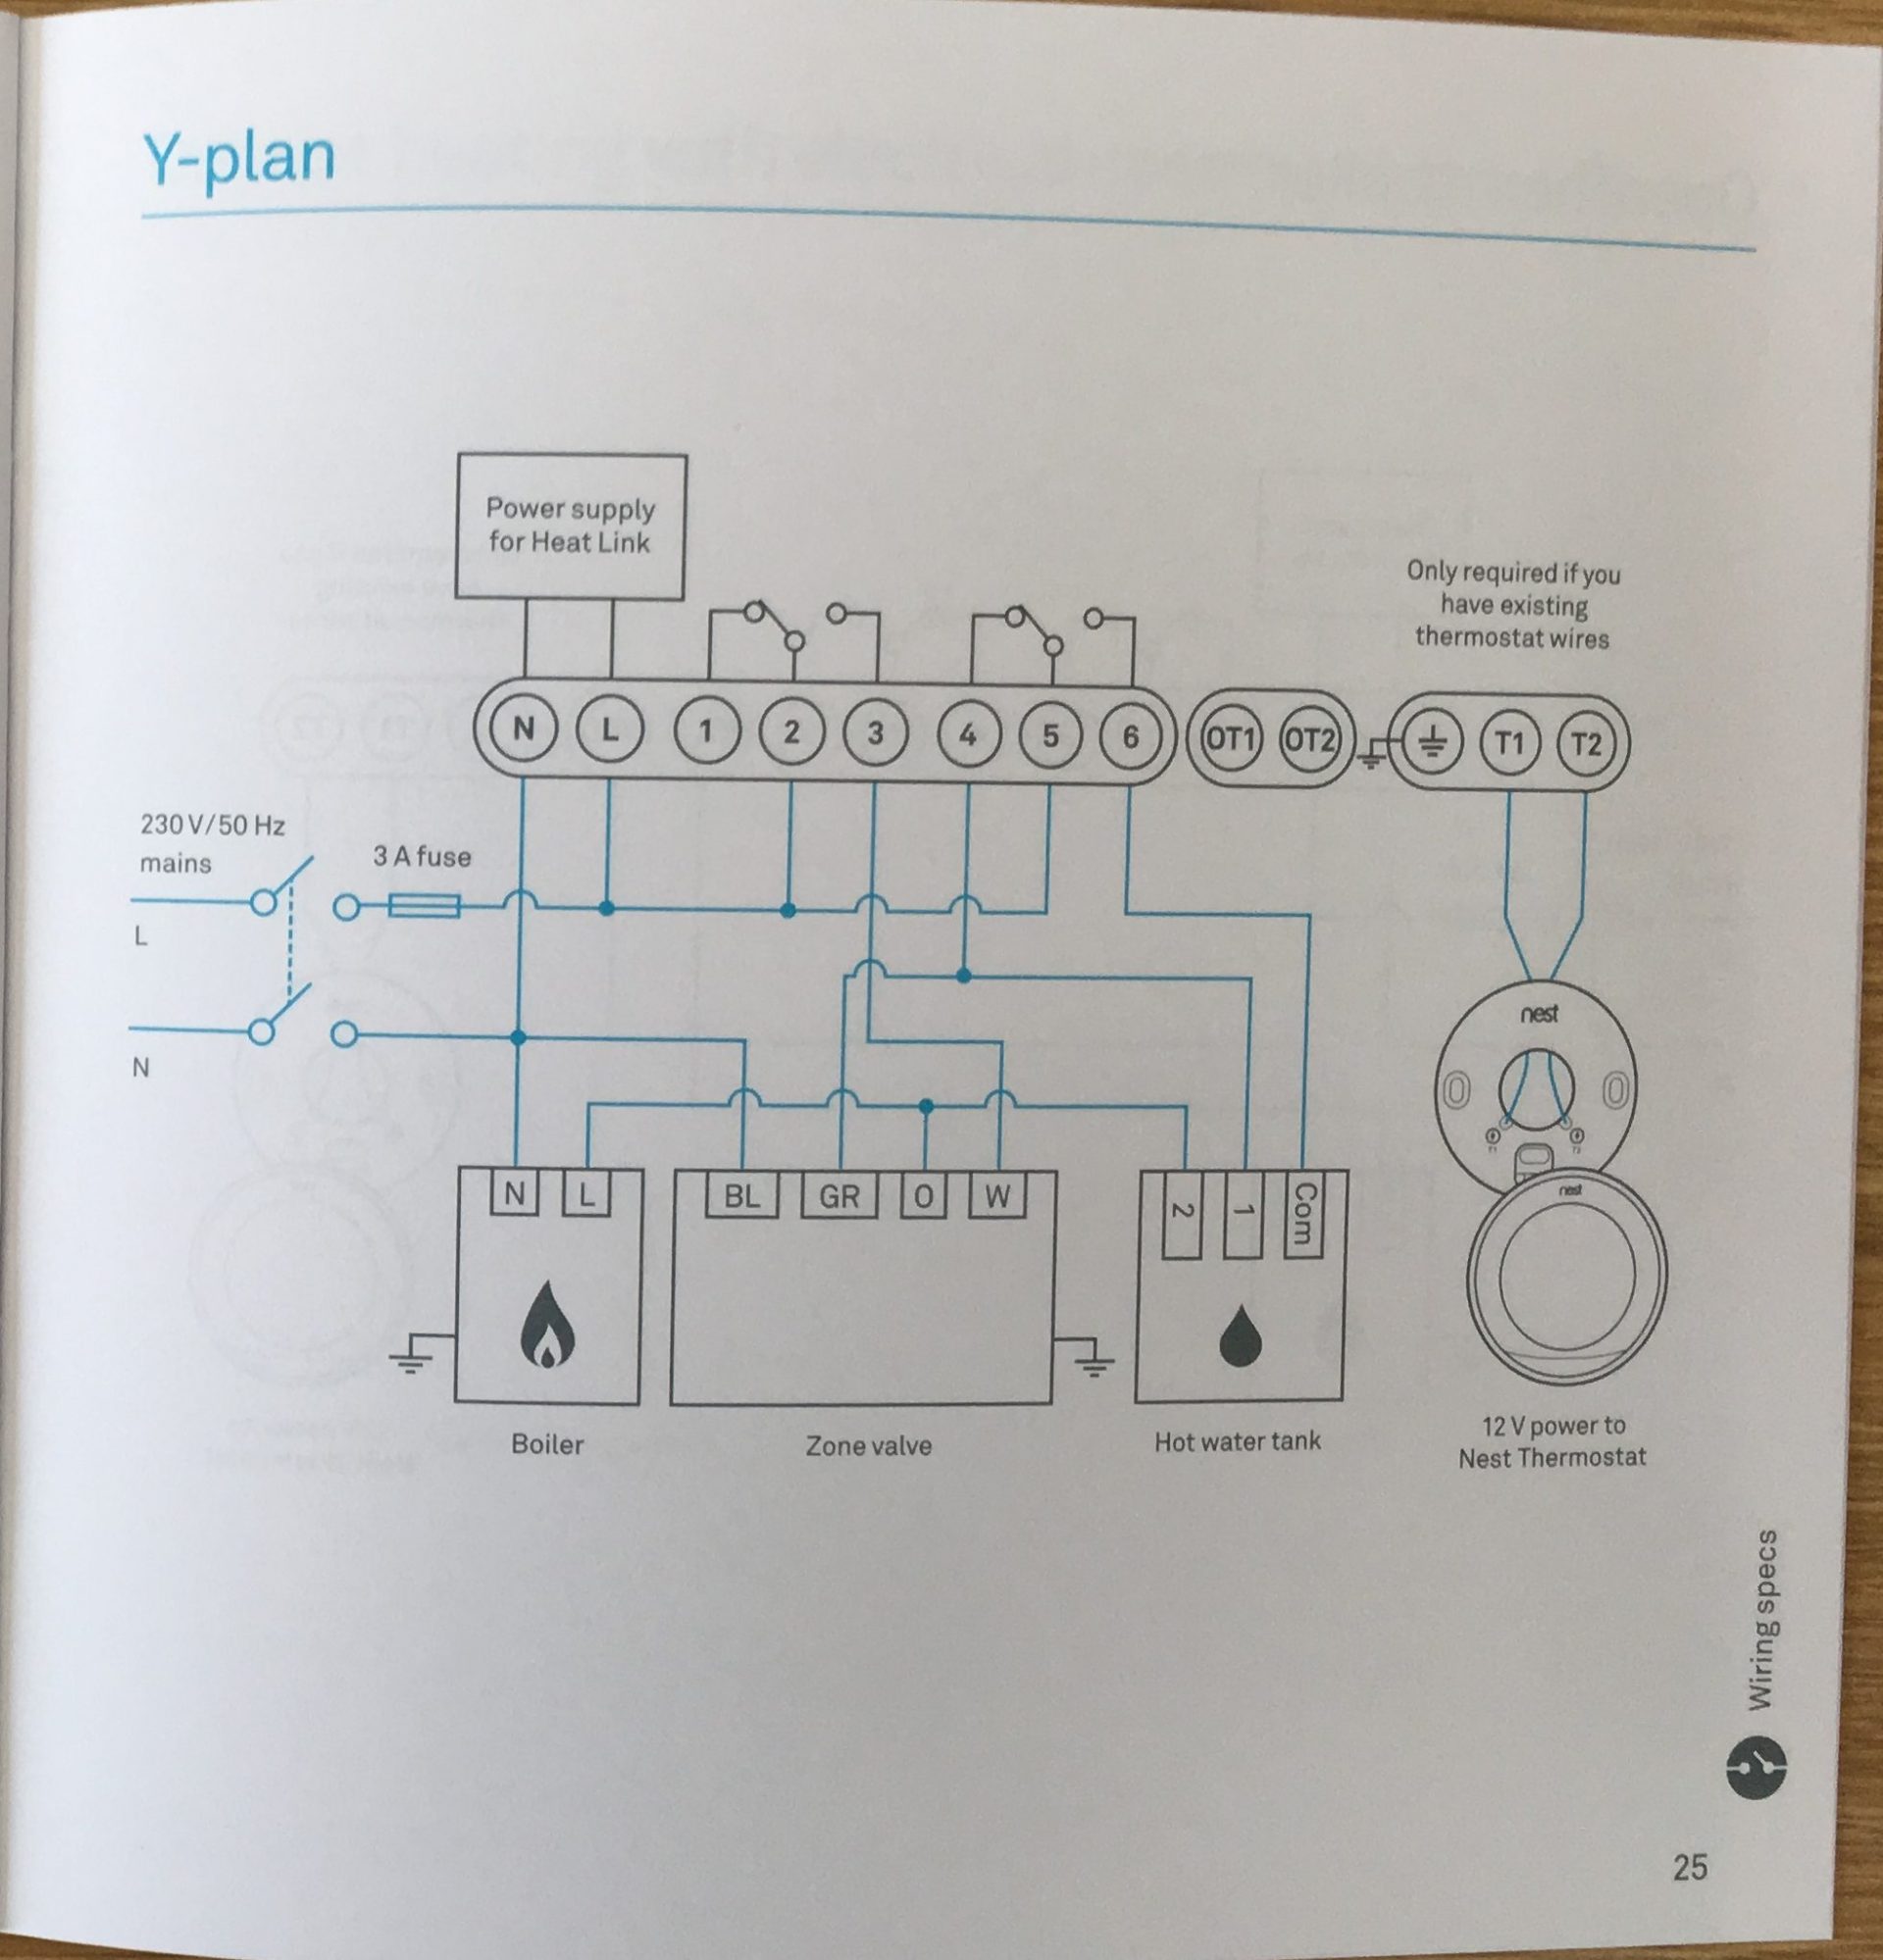
So at this point, this is where you lot need to know what the wires on your existing setup'due south terminals practise so that yous can map them to the terminals on your new Nest Rut Link. This should be every bit follows:
| Function | Existing Terminal | Nest Heat Link Terminal |
| HW OFF | 1 | 4 |
| CH OFF | ii | 1 (Not used) |
| HW ON | 3 | half dozen |
| CH ON | 4 | 3 |
As per the diagrams in the Nest installation guide above, there are 2 switches present – Heating (terminals 1, ii & 3) and Hot H2o (terminals 4, 5 & half dozen). Terminals ii and v are both "Common" and will require you to run a alive ability feed to them.
Every bit you can see from my wiring below I accept done this so there is a alive power feed heading to 50, 2 and 5 – as I needed to add these 2 additional live wires I've simply taken my live wire in the wall, added a block connector to information technology and carve up it out into 3 alive wires (yous can see the cake connector below).
With these wires in place, you accept completed the installation of your Nest Heat Link! The side by side stage is to install your Nest Brandish i.e. Learning Thermostat.
Installing your Nest Learning Thermostat
So the first affair is to know what I'm referring to – the thermostat. As per my original programming unit, my existing thermostat was also made past Danfoss:
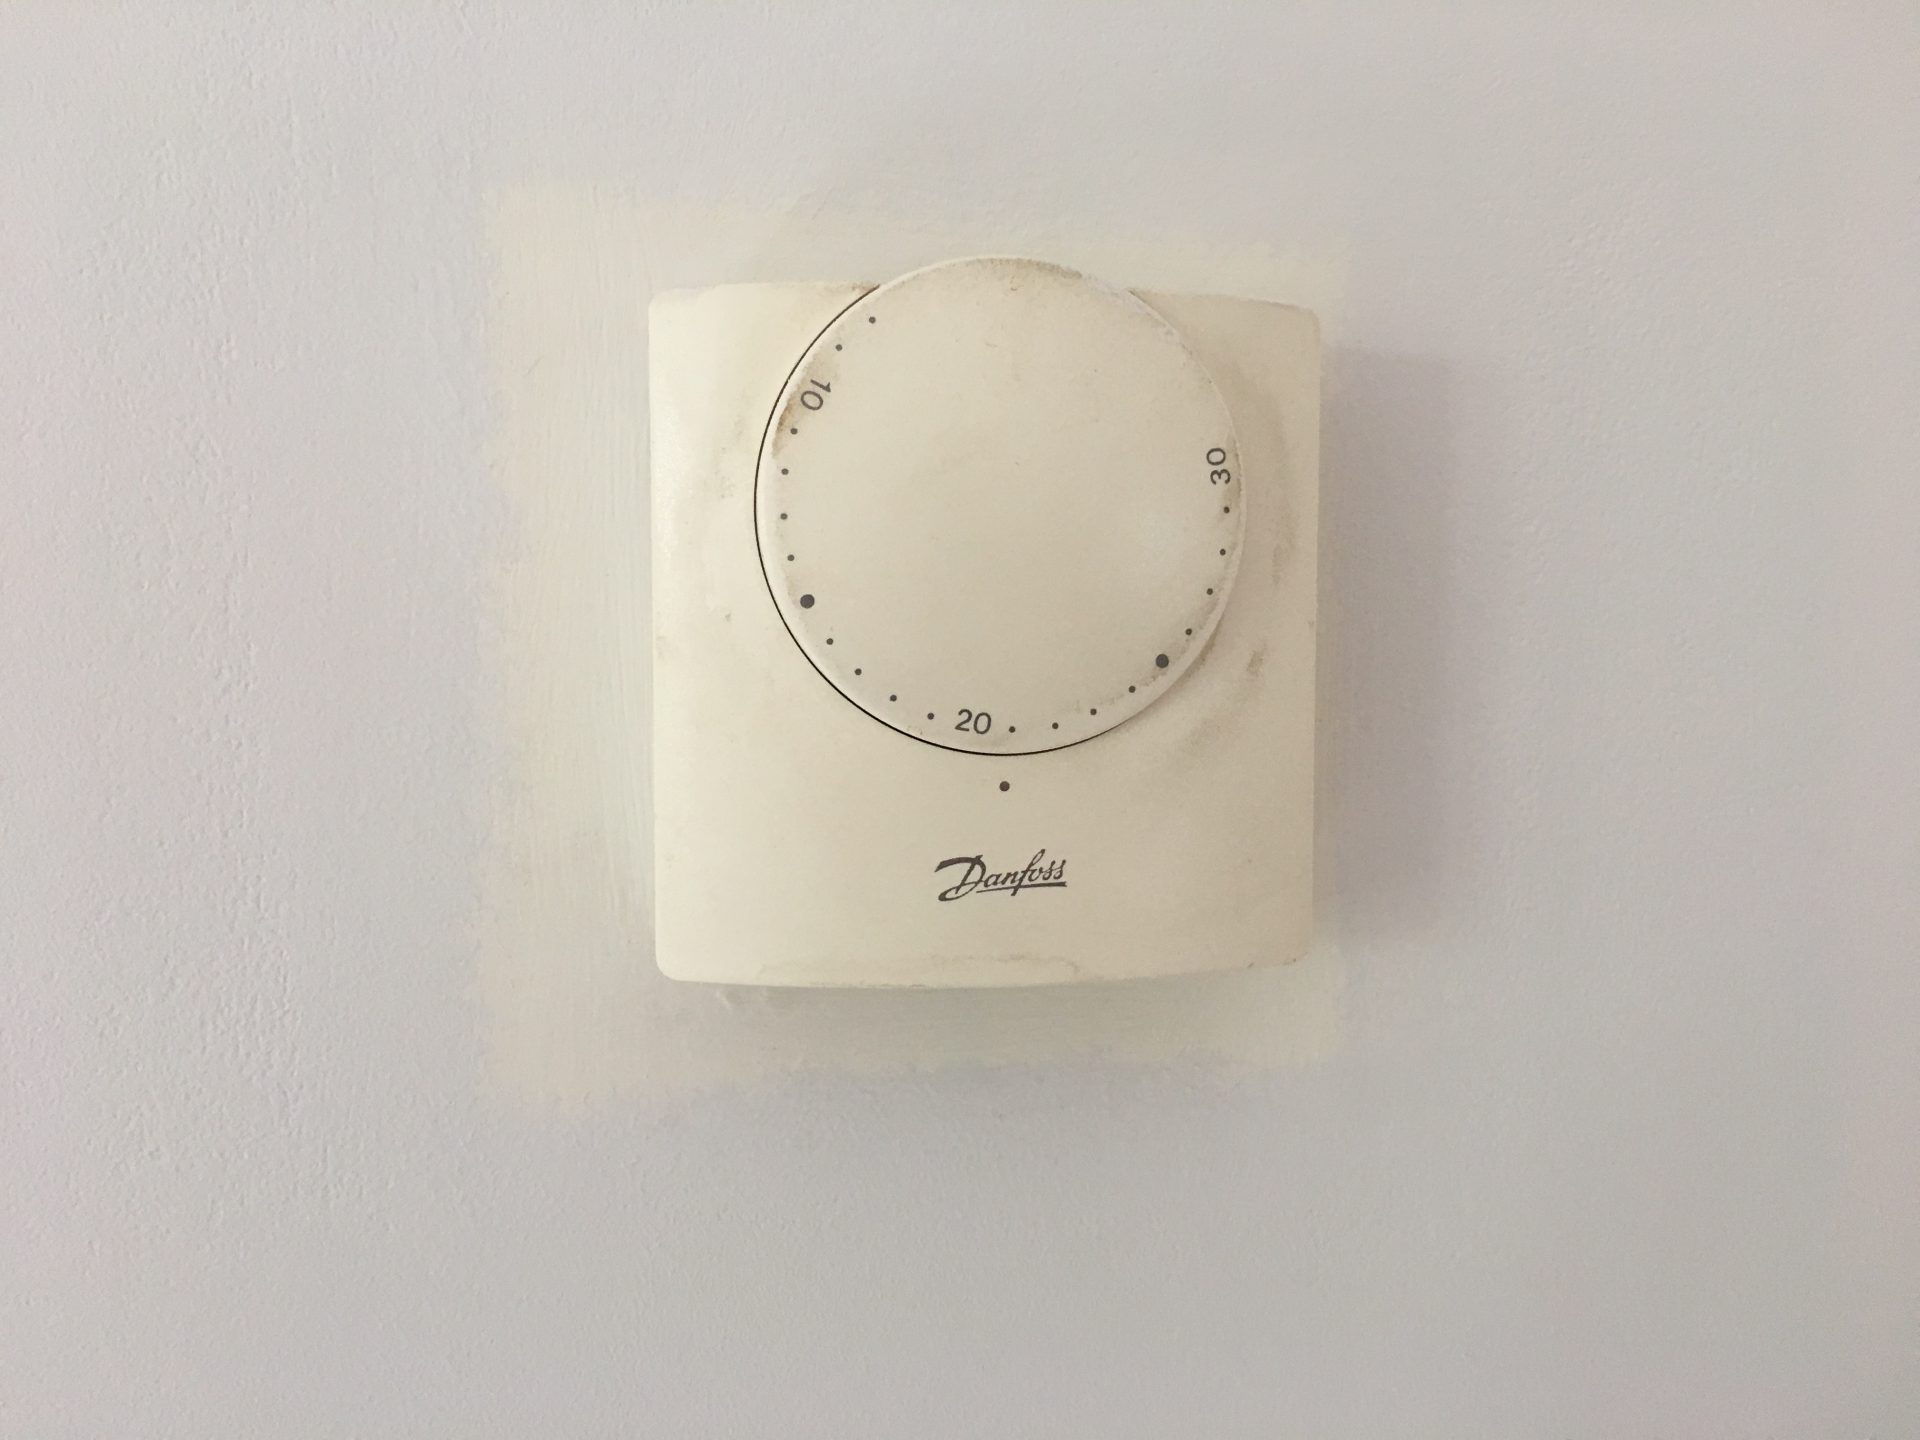
This is the switch in your heating system that asks for more heat when the business firm temperature falls beneath a prepare level. In my house, the thermostat was located in an awkward wall position behind where my sofa ordinarily sits which has made hanging pictures an absolute pain.
So when it comes to your existing thermostat and your new Nest Learning Thermostat, there are 2 installation options available to yous:
- Replace your existing wired thermostat in situ with your new Nest thermostat
- Remove your existing wired thermostat entirely and utilise your new Nest thermostat elsewhere either difficult wired or via a plug socket
Whatever selection you go with, you volition need to remove the existing thermostat so we will start from there.
Step 1: Removing your existing thermostat
The first thing that we need to do is get to the wiring on your existing thermostat. At present if your thermostat is anything like mine was, these things are designed to be put on the wall and non to exist taken off the wall. I'm not going to lie, getting mine off of the wall was pretty difficult. Somewhen I managed to get the cover off however to see what was going on within:
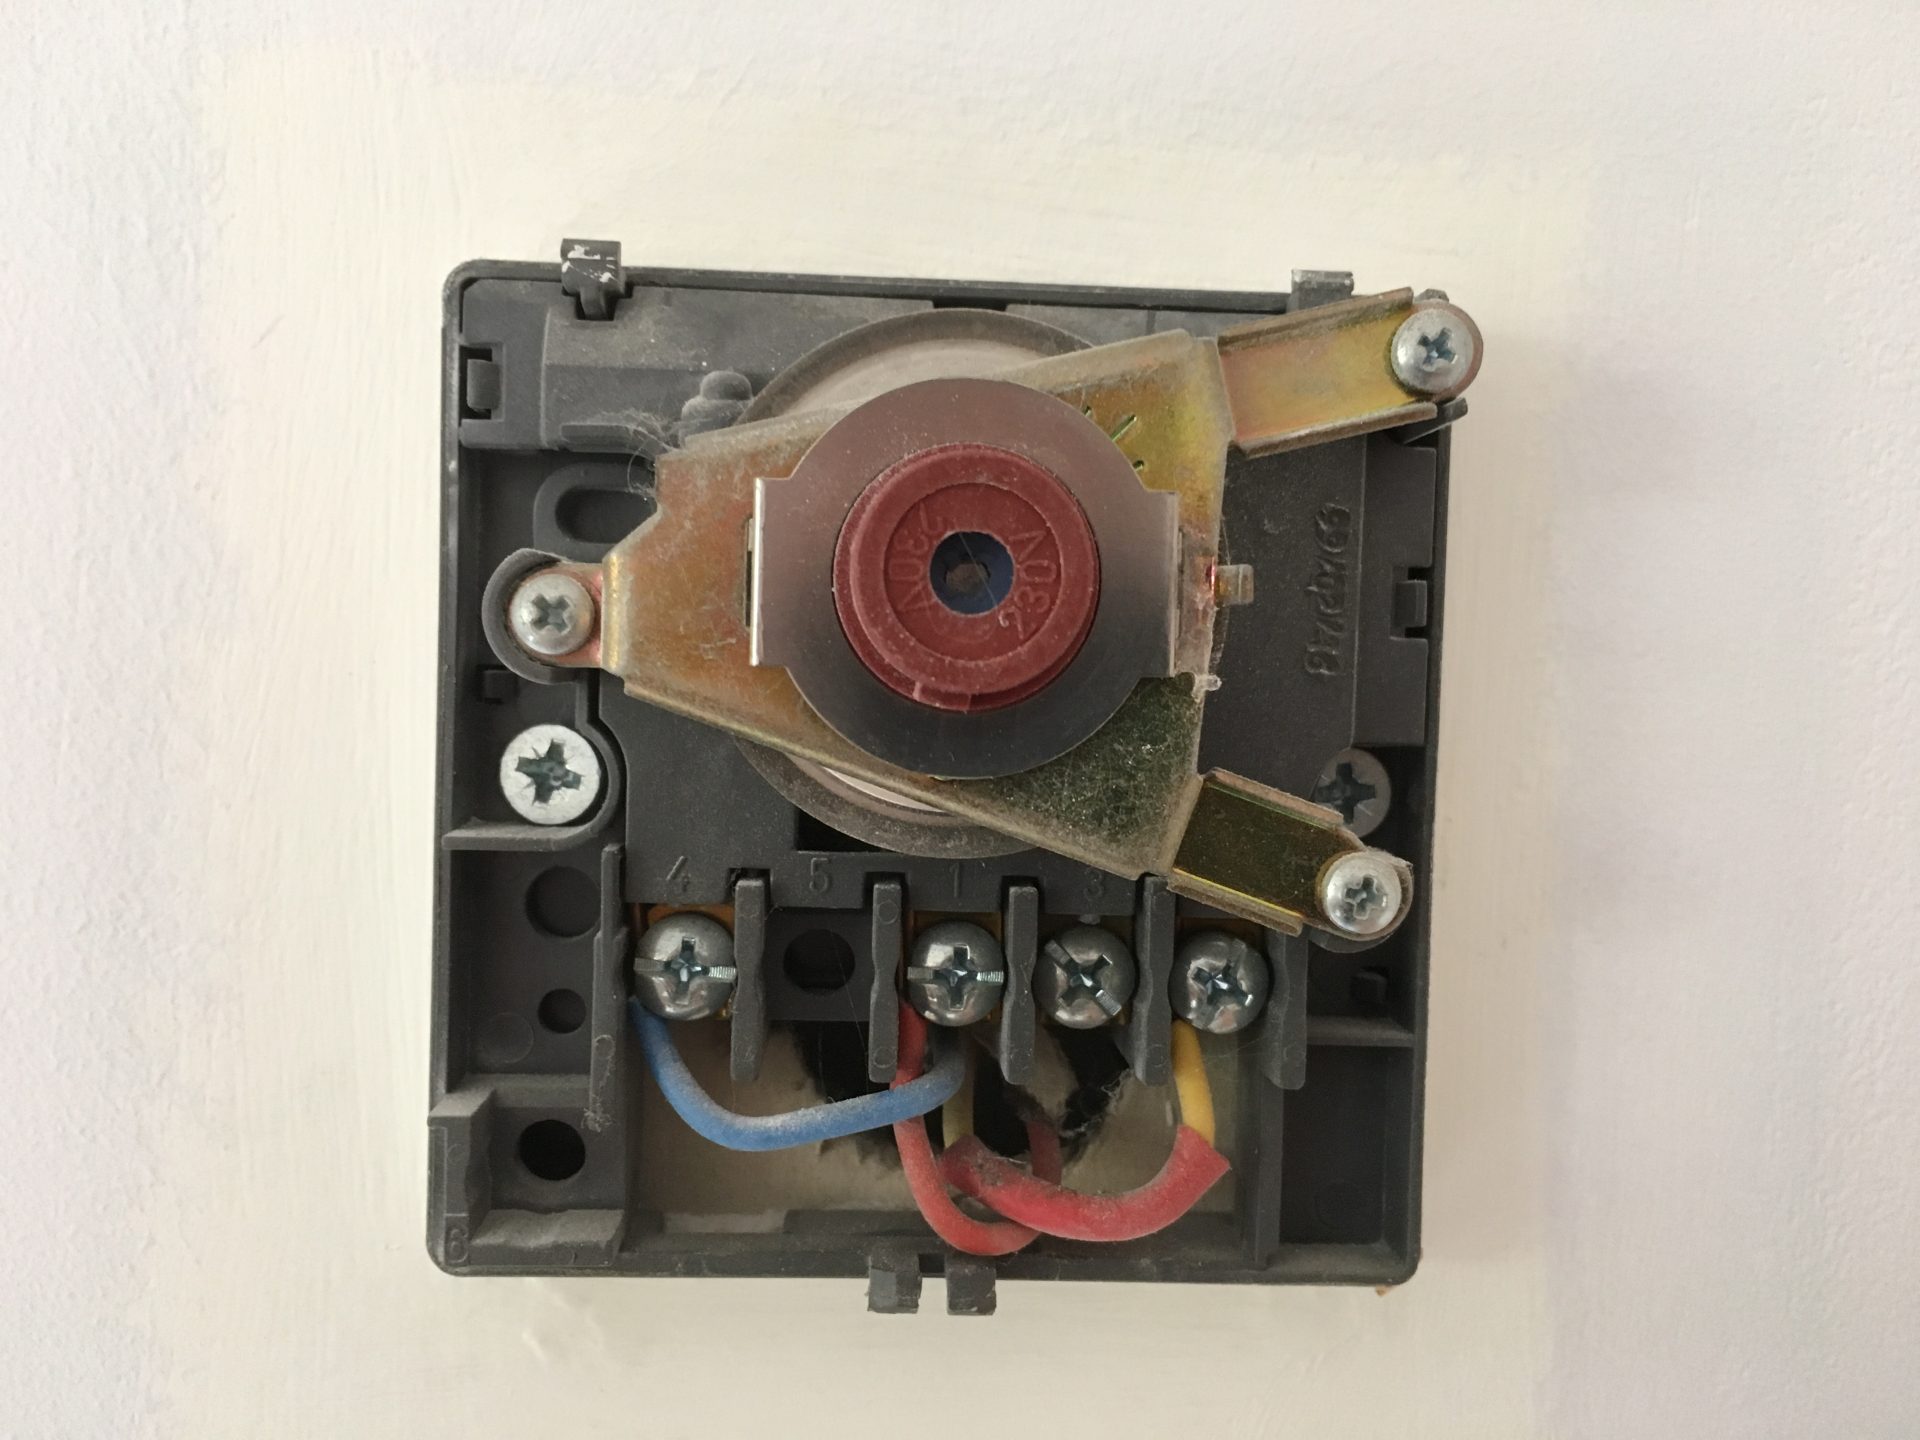

With my thermostat removed this is what I was left with – zilch more than a simple ability circuit:
Step 2a: Installing the Nest thermostat in situ
So ane of your options is to simply remove this existing thermostat and replace it similar for similar with your new Nest thermostat.
This should be a really straightforward installation that requires you to take the Nest Base and do naught more supply it with power to the T1 and T2 terminals. These then demand to exist wired to the Heat Link'southward respective T1 and T2 power terminals.
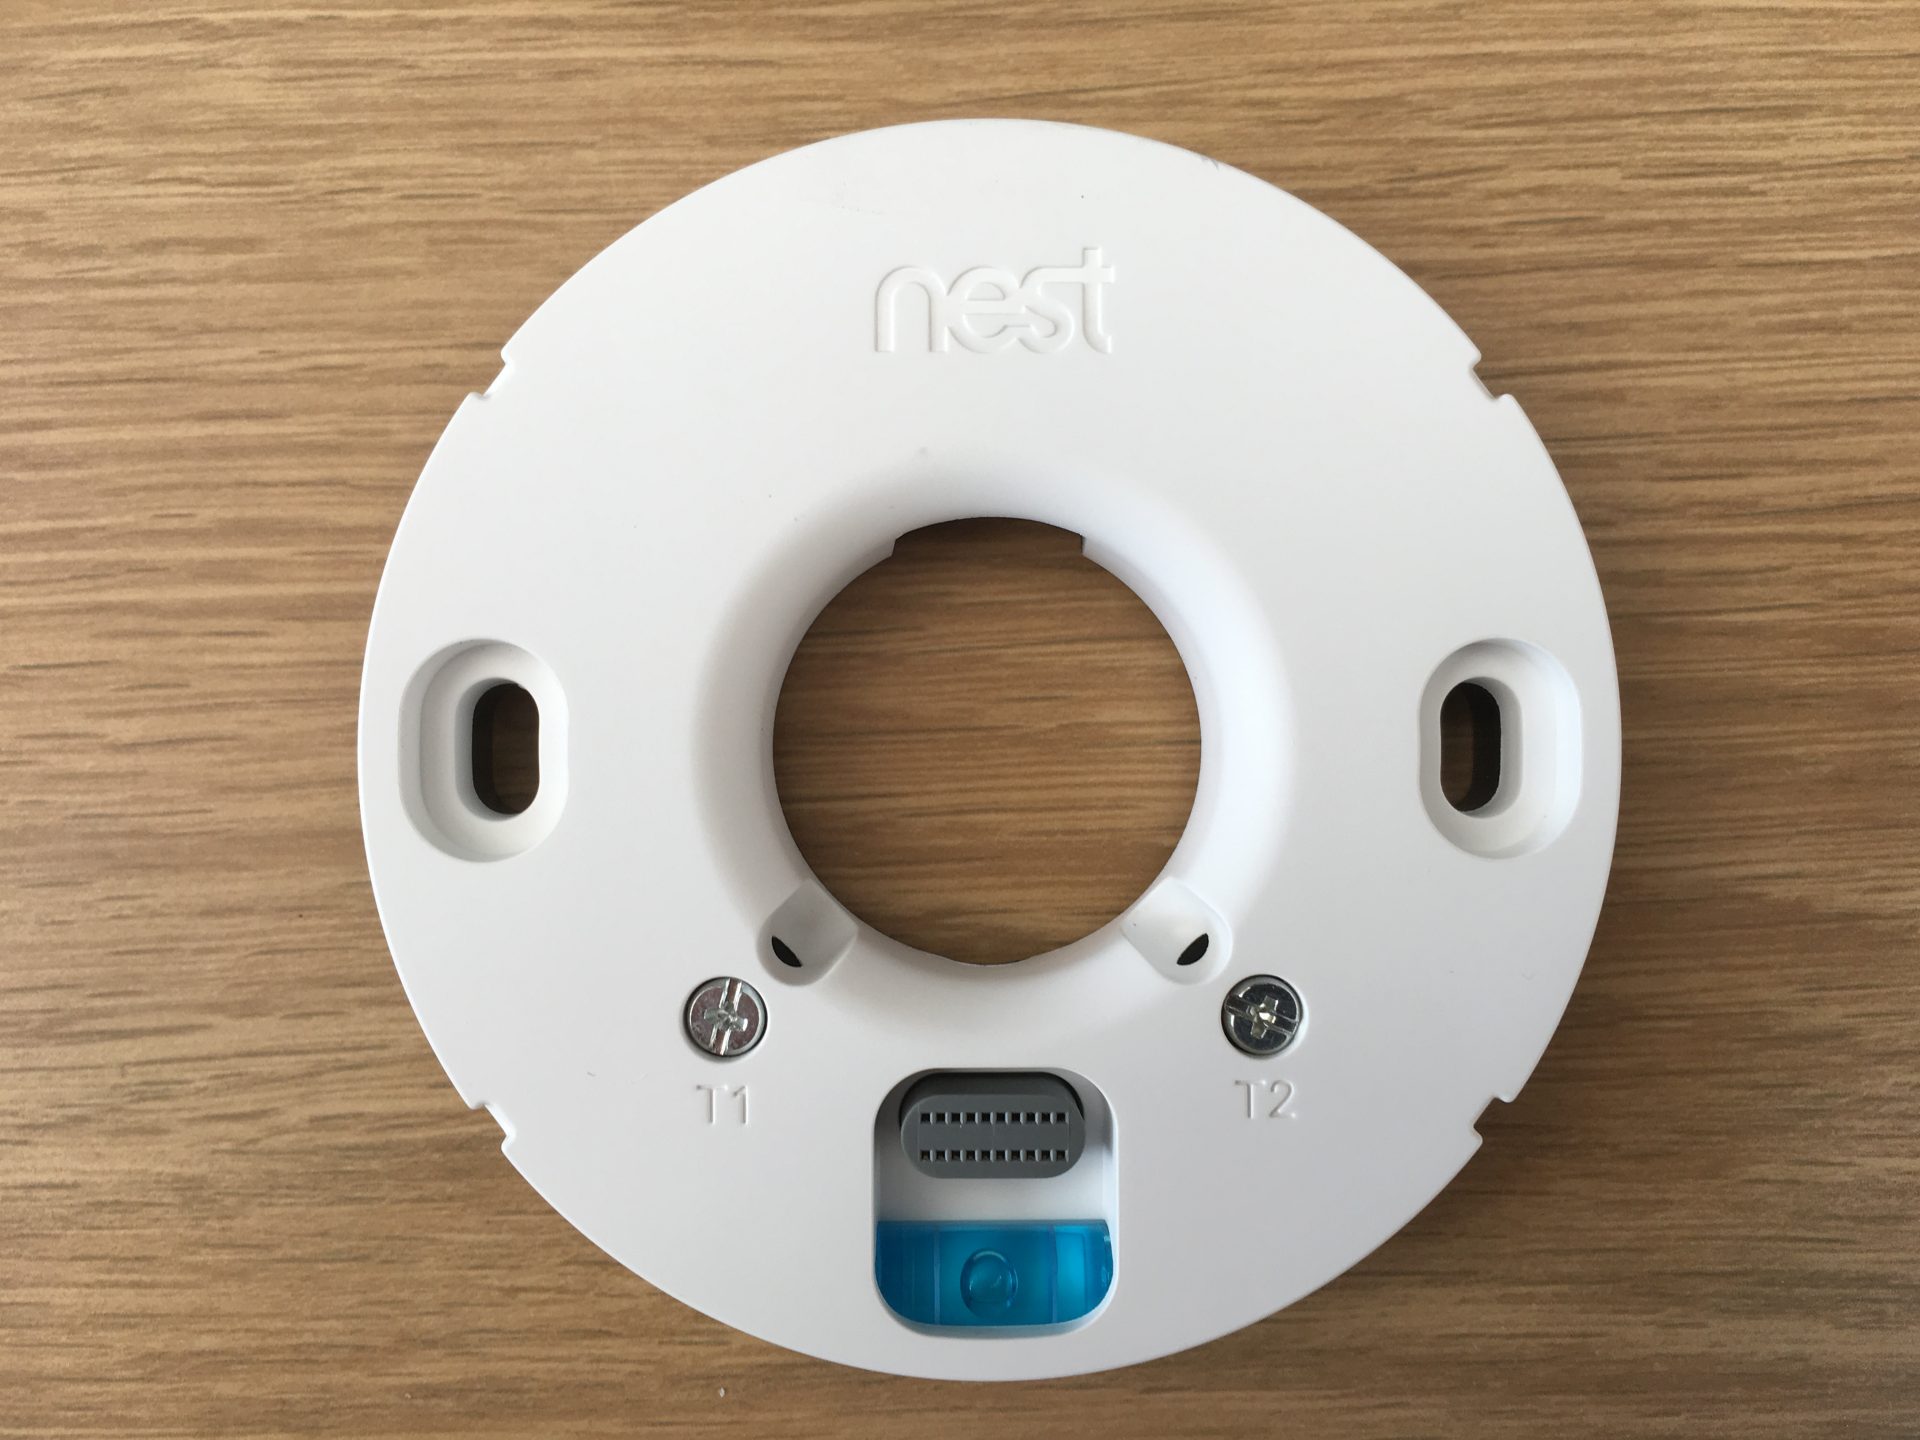
In one case you know how to do the installation you can screw this Base of operations to the wall and use the optional Trim Plate to cover any holes/crude edges – the Nest Display then simply pushes and clicks into this Base of operations.
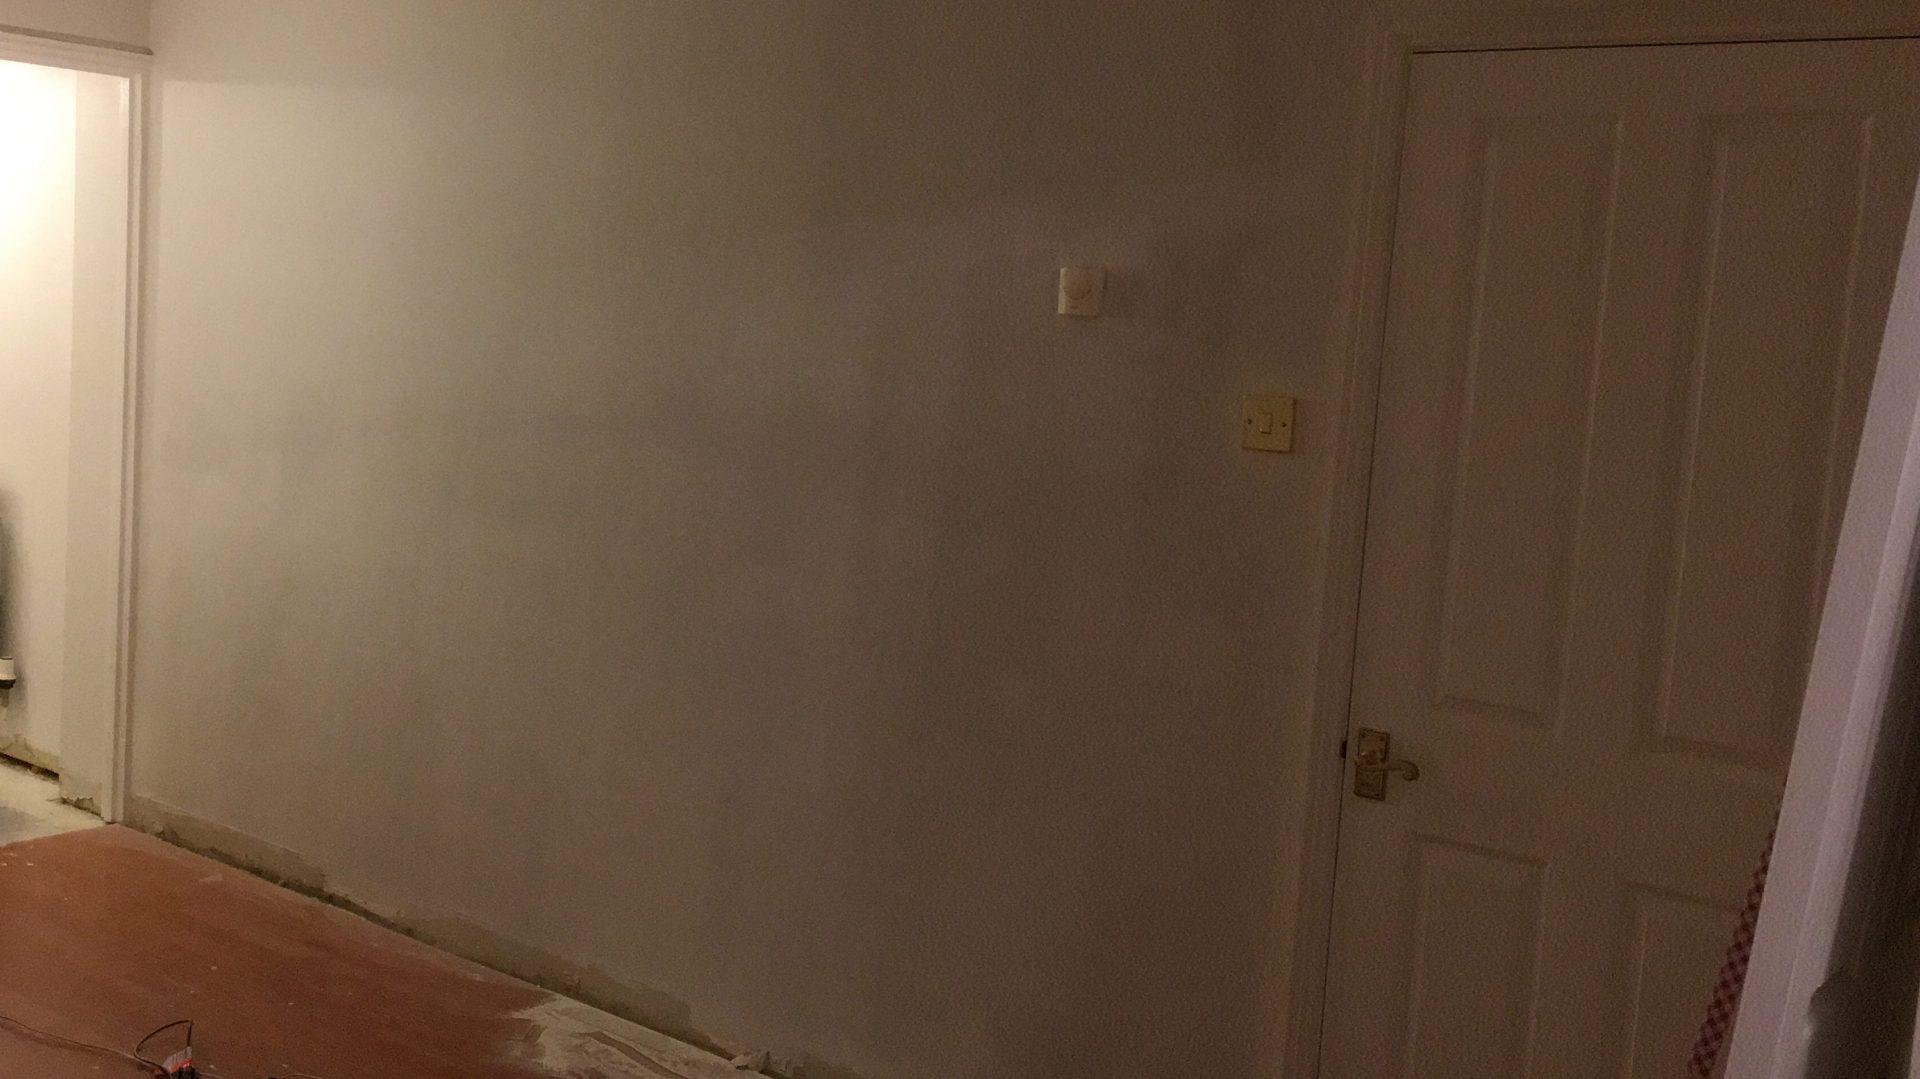
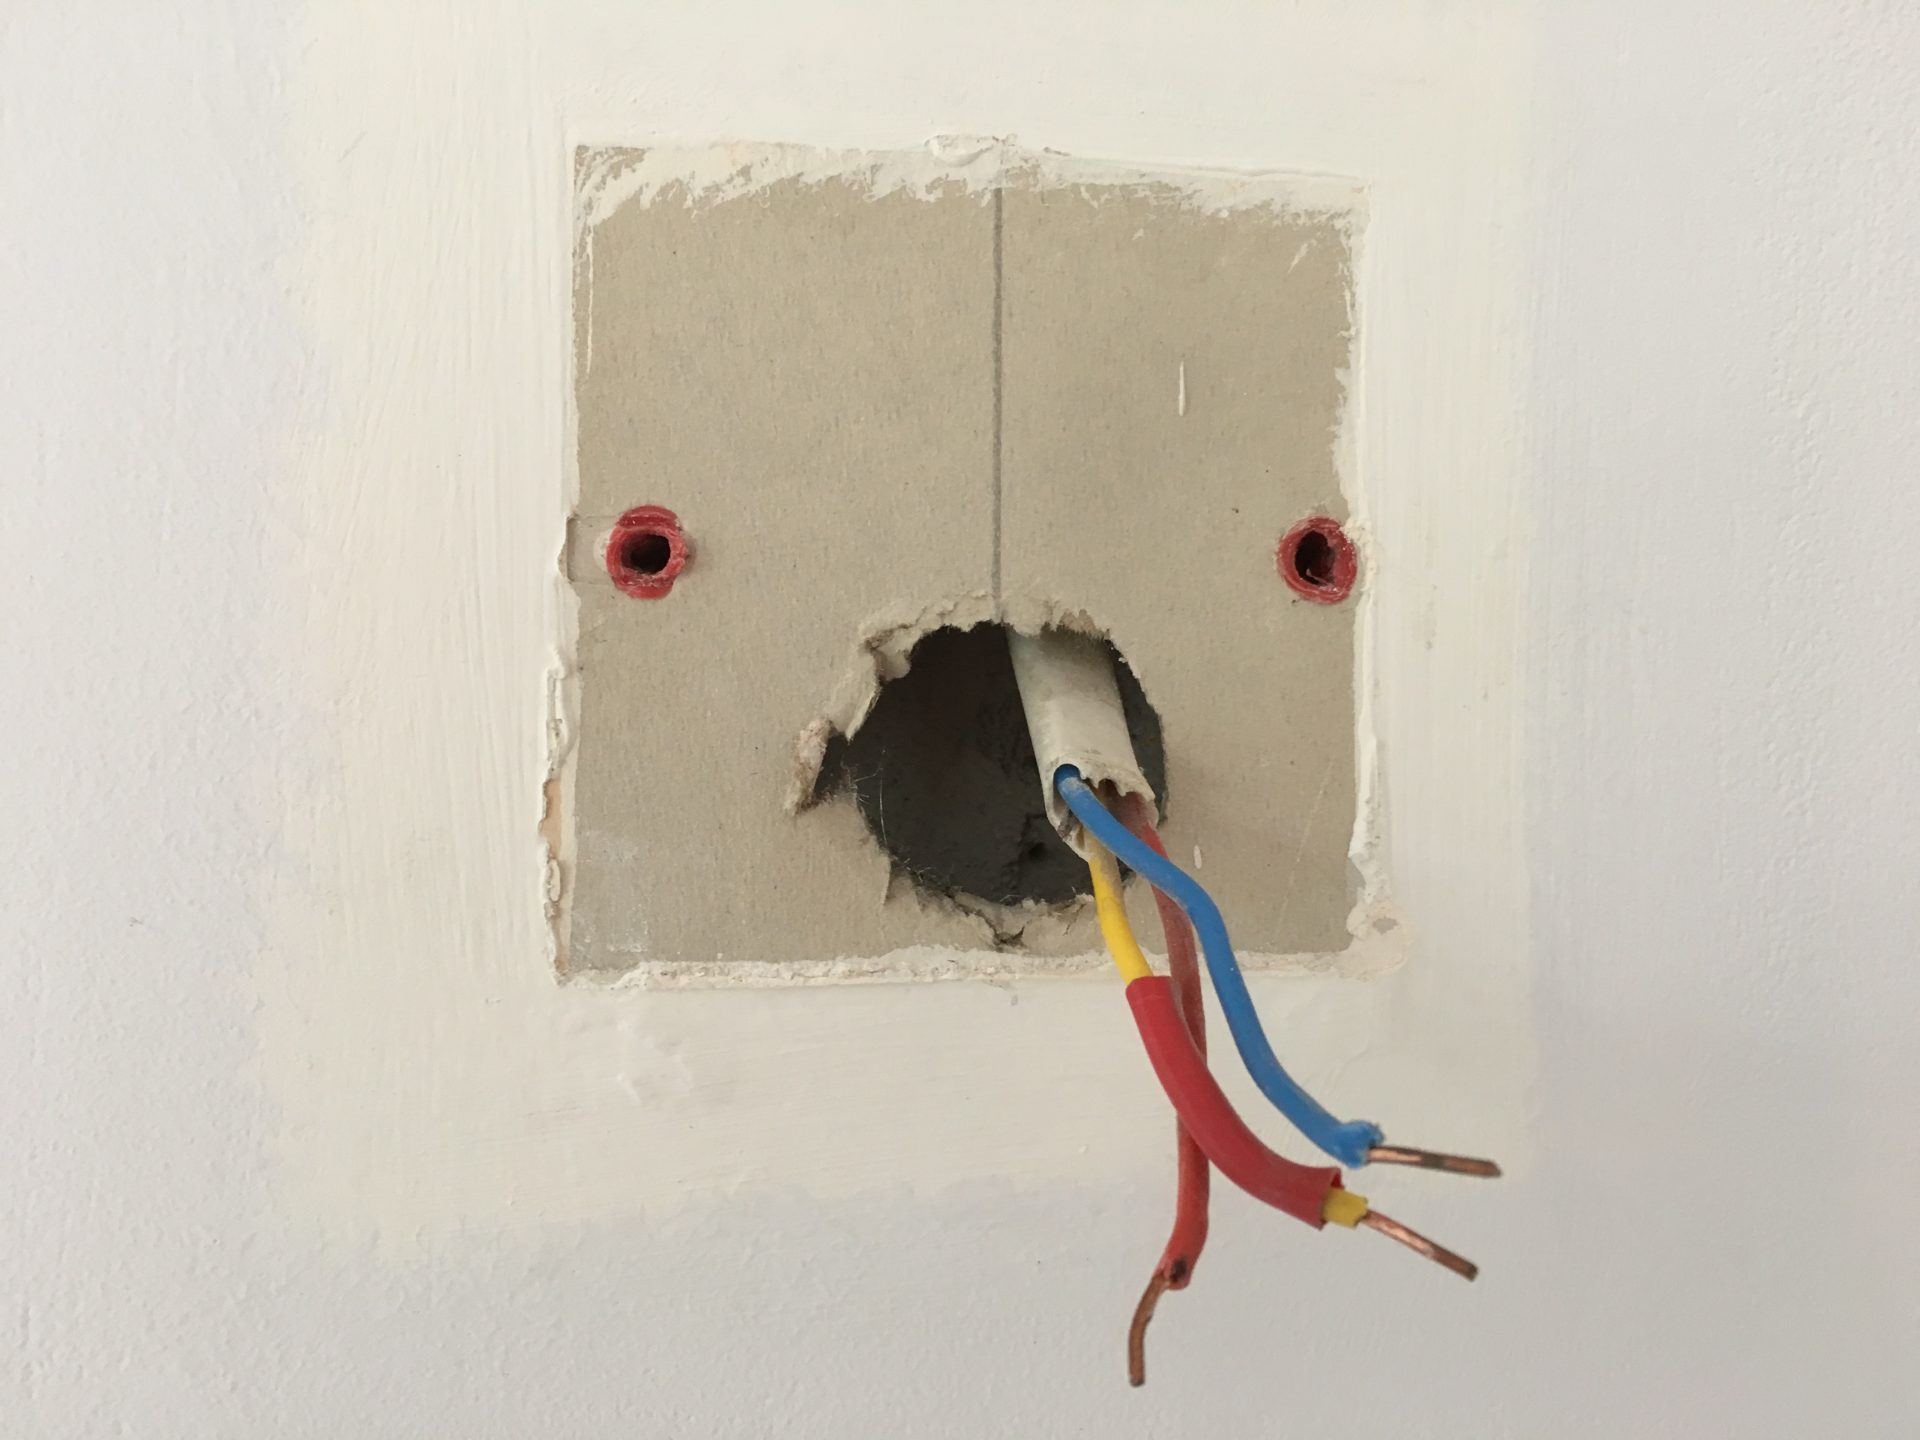
Step 2b: Removing the existing thermostat to apply the Nest thermostat elsewhere
Due to the aforementioned wall position of my existing thermostat I went downward the route of removing the thermostat from my wall completely to tidy things upwardly. By doing this nevertheless you are going to be left with live wires in your wall and not forming a circuit so there is additional piece of work to be done. In addition, you are going to take a pigsty in your wall so y'all will demand to consider that information technology volition likely need to be re-plastered and re-painted too as per my image to a higher place.
Every bit the thermostat is nothing more than a switch, the new Nest thermostat would but become a wireless switch for my house and so my existing difficult-wired thermostat needed to be removed and have these switch related wires joined dorsum together to re-form the circuit – this is where things got a piddling complicated for me!
Footstep iii: Place your existing thermostat wires in your junction box
So, with a Y-Plan system these typically utilise a junction box that combines the switched wiring for the various components of the organization:
- Boiler
- Thermostat
- 3 port valve
- Cylinder thermostat
- Pump
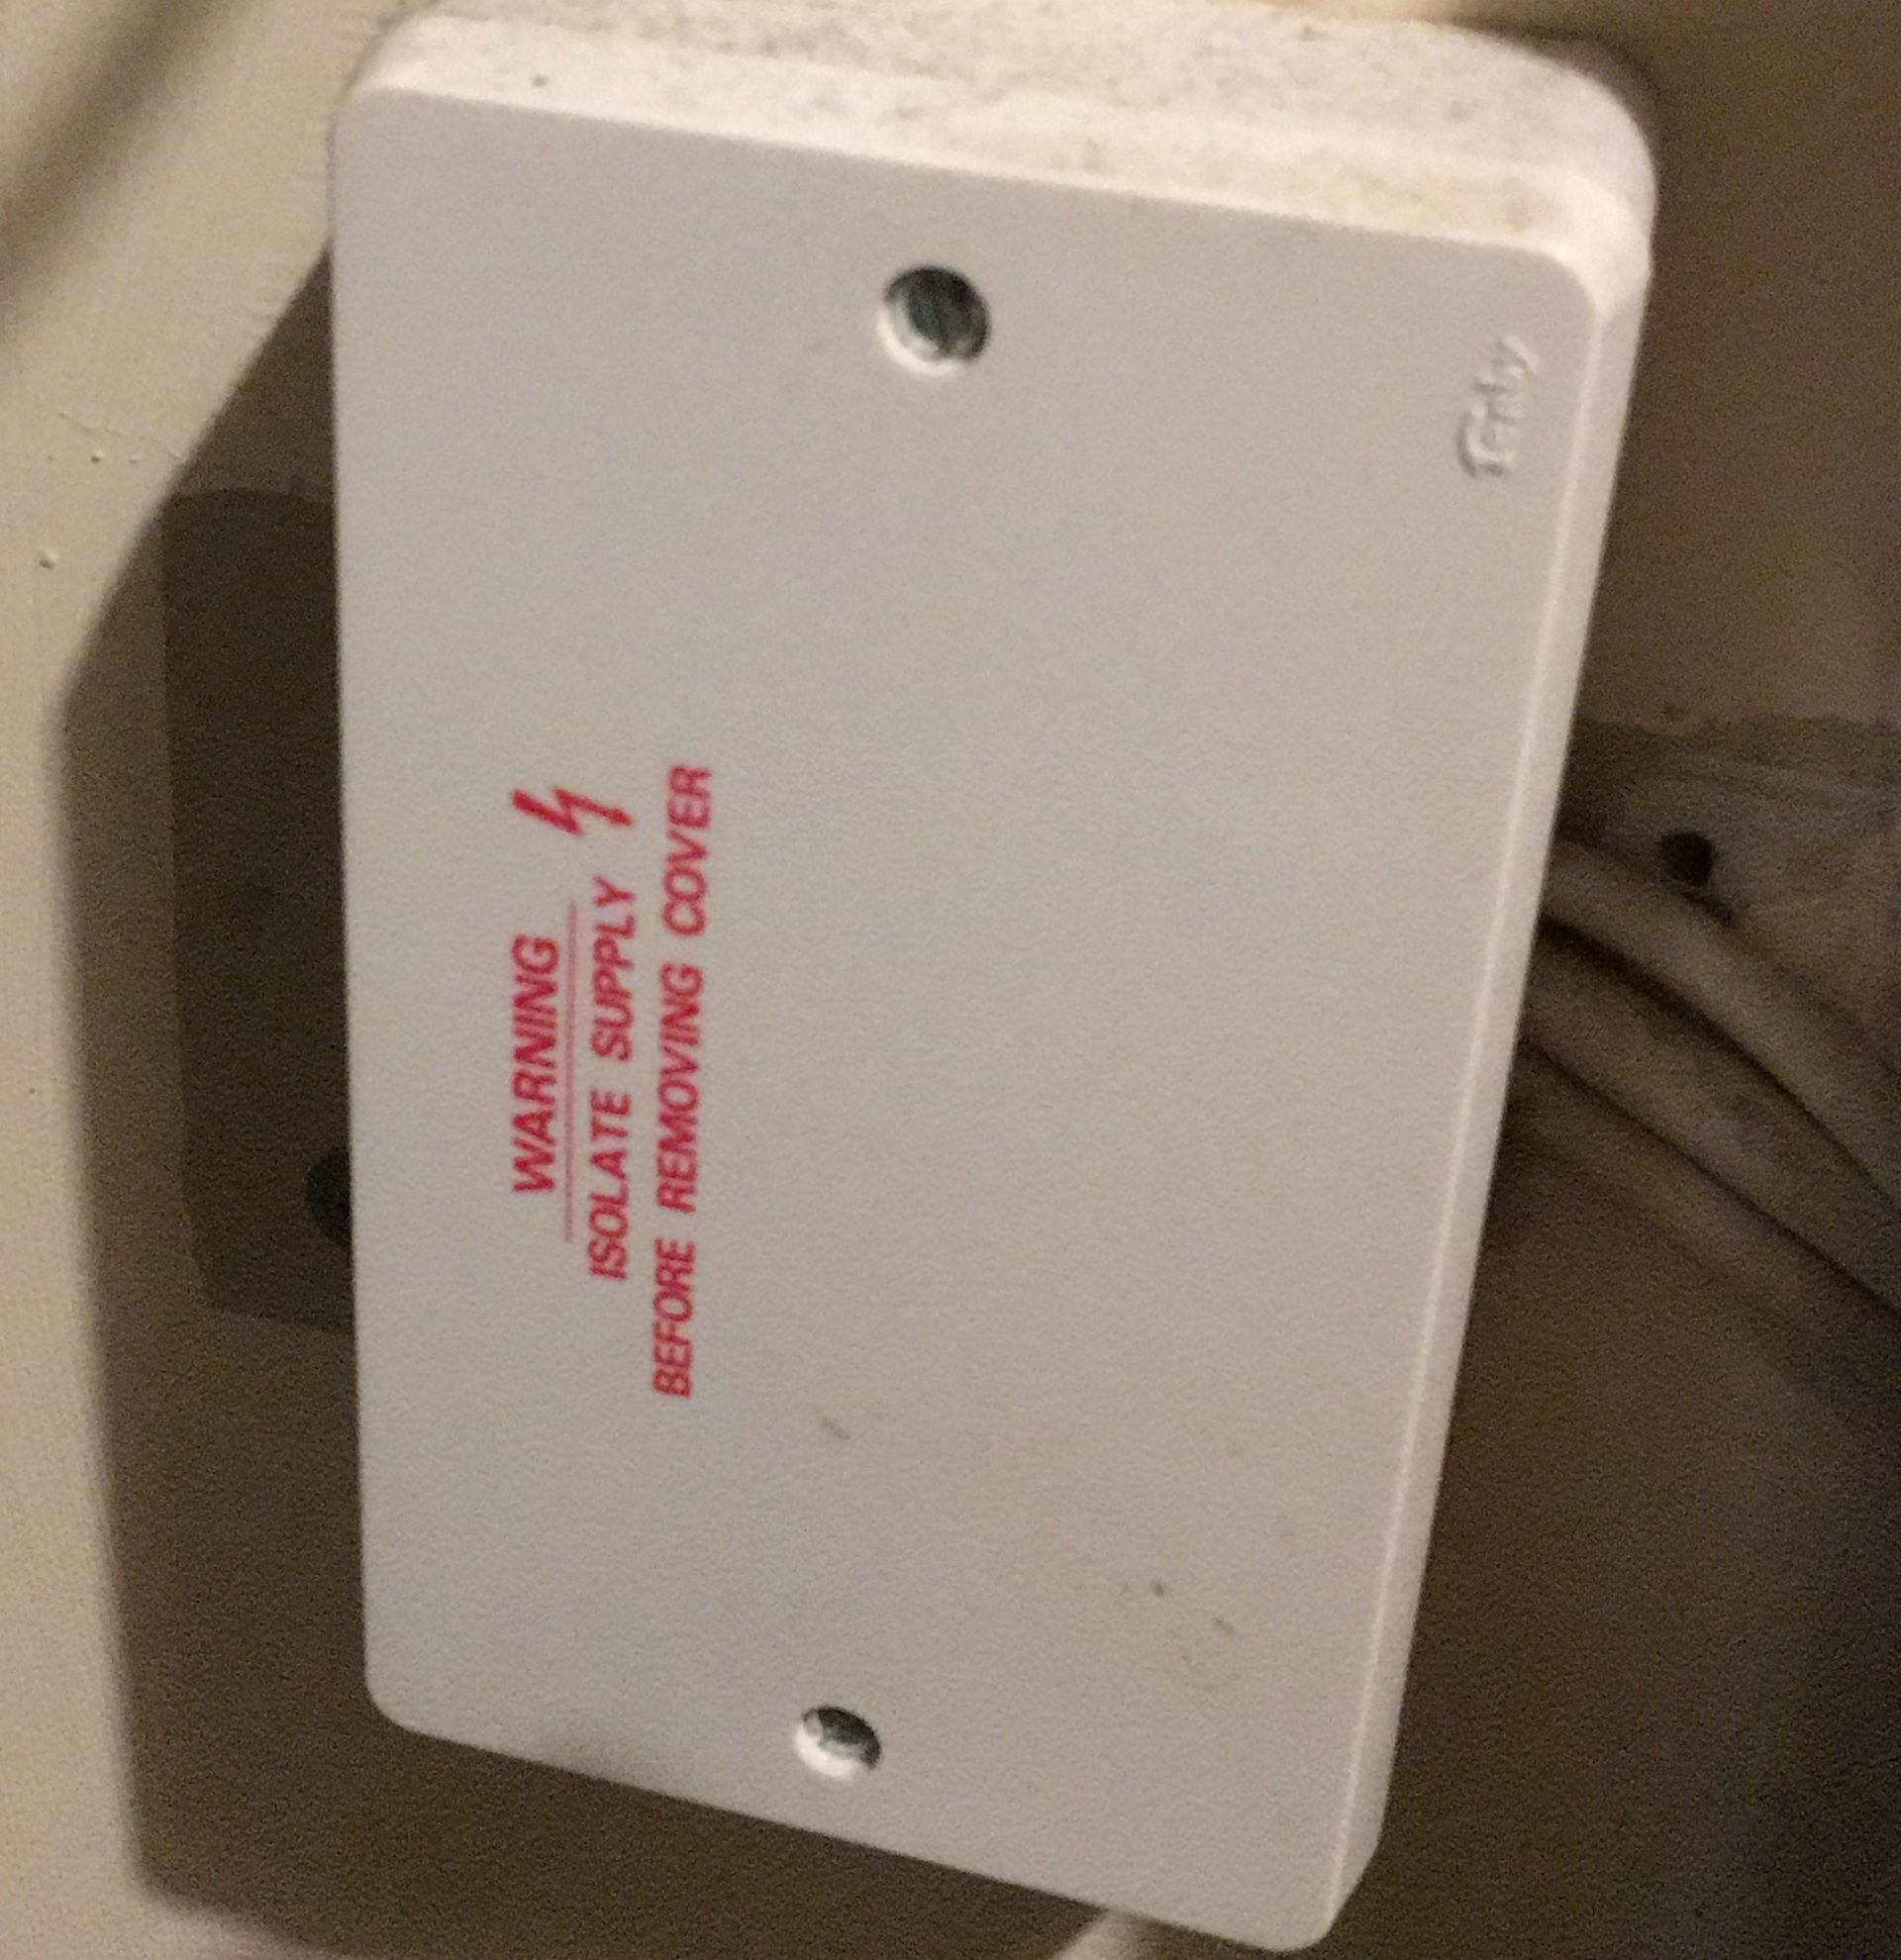
This junction box is likely to exist located in your ambulation closet and be encased in an electrical box:
Opening up the box presents you with a lot of wiring which I hadn't anticipated before starting my installation and so from hither things got a bit tricky.
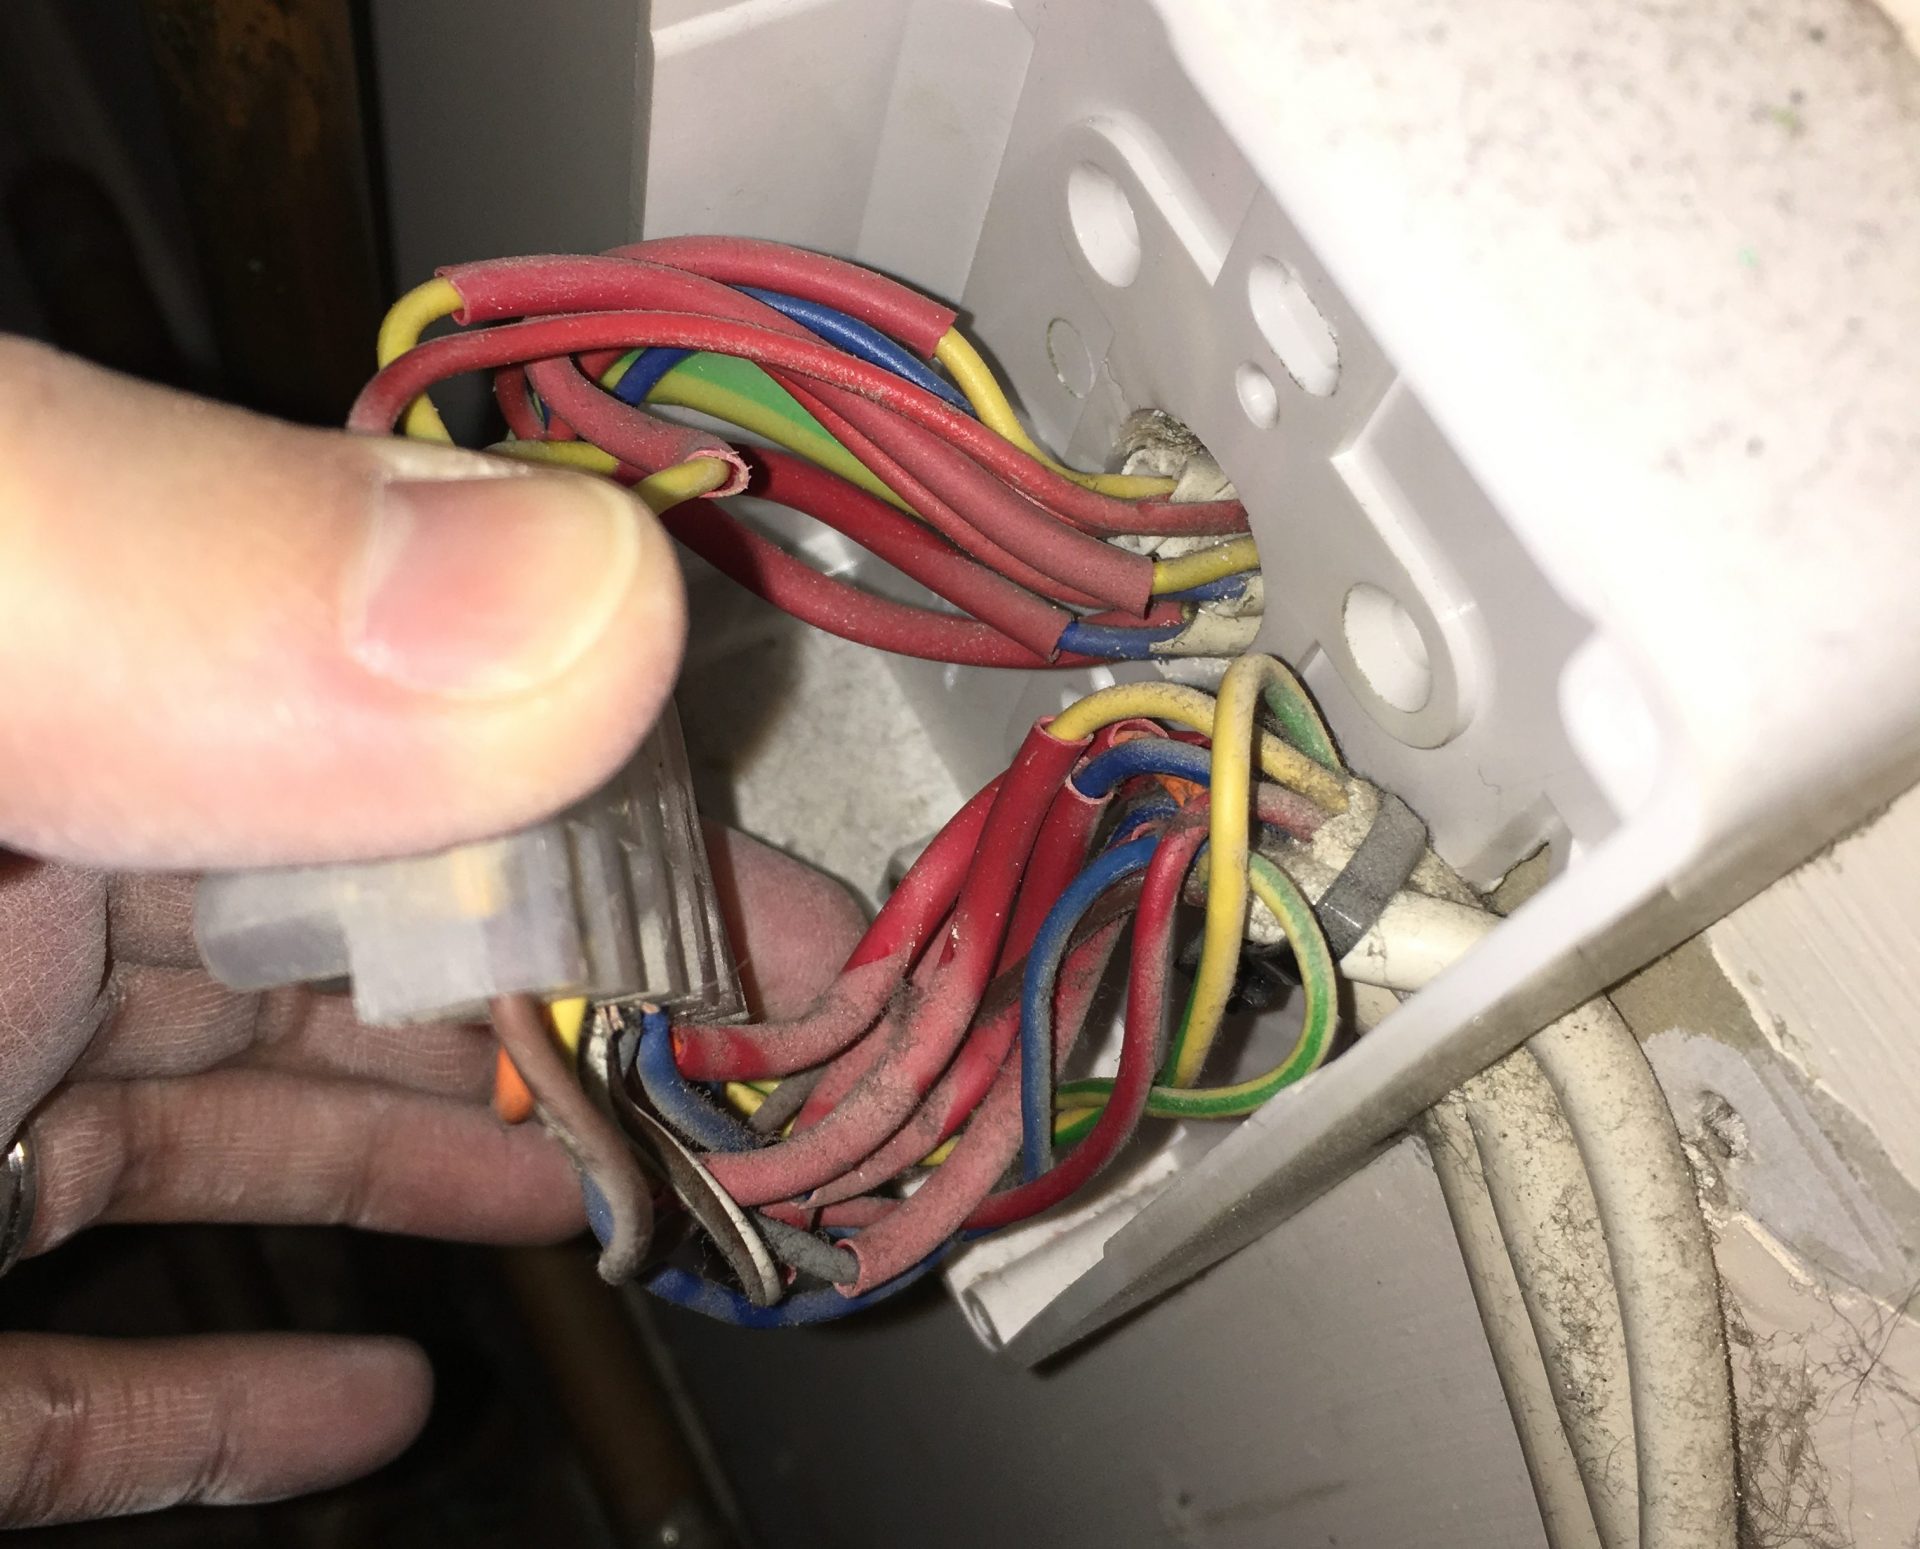
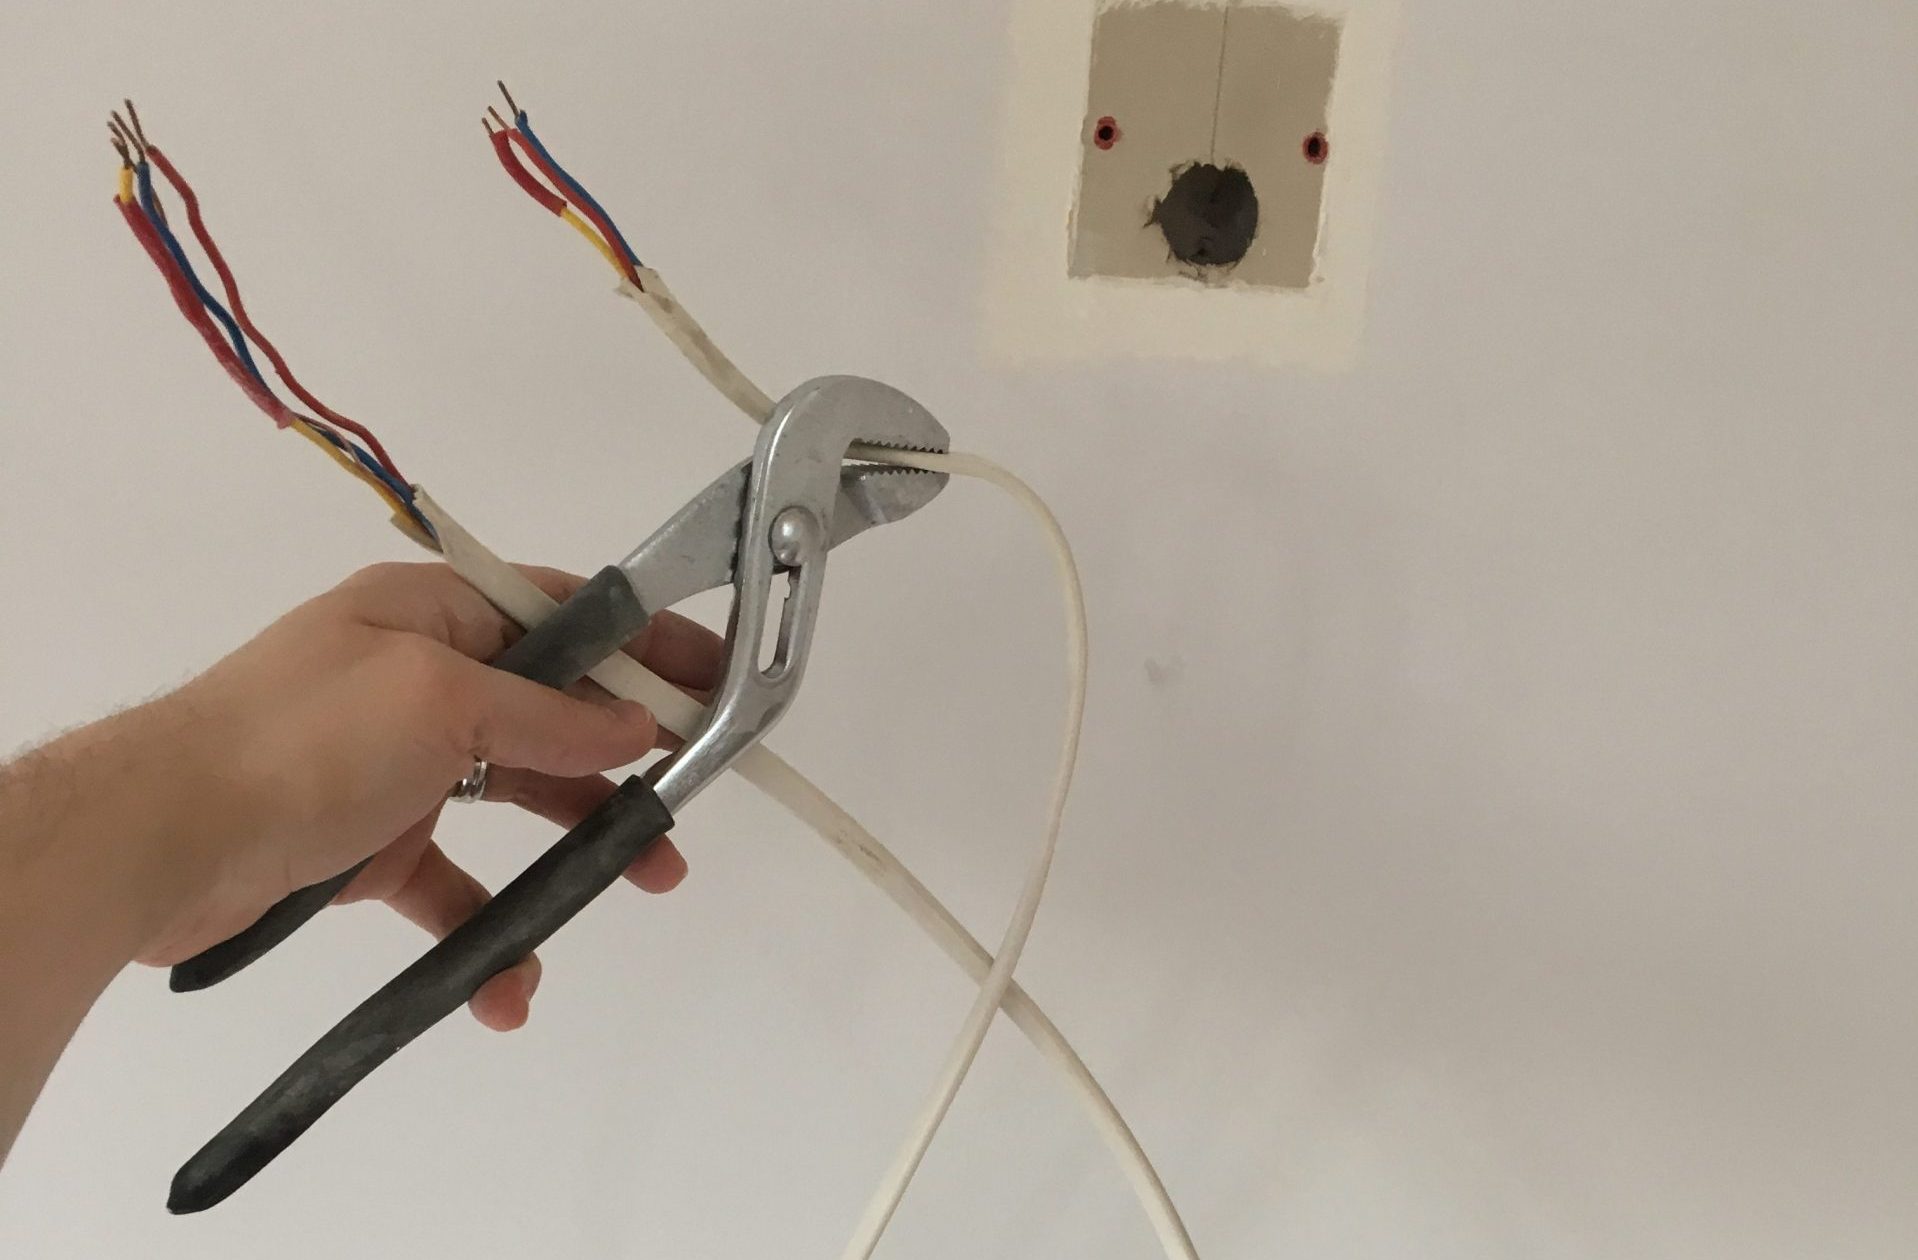
I knew that the wires coming out of the existing thermostat went straight up the wall and this would certainly explain the thermostat's awkward wall position in the lounge as I figured they must head straight to this junction box. The issue I had was knowing which wires related to the thermostat every bit none were labelled, they all looked the same and there were 3 pieces of cable coming out of the wall here where any ane of these could exist the i powering the thermostat.
Without electric testing equipment this made the job about impossible so I tried to identify every cablevision i by 1 which meant I figured out the entire wiring setup within my house and by process of elimination identified the thermostat wires.
This is how my wiring looked and should exist useful for anyone with the same setup as me to see what's going on:

So what I have done hither to keep things easy is go along the original programmable unit (control unit) in my diagram and map those terminals to the new Adjacent Heat Link beneath it so you can come across where they should exist going.
With regard to the thermostat, if you follow the "Lounge Thermostat" summit left I've labelled this equally cable ane – I managed to identify that this cable became what I've labelled every bit cable 6 in my airing cupboard so I know all 3 wires hither relate to the thermostat switch.
Therefore to remove the thermostat and re-connect the excursion I've done 2 things:
- Remove all of the wires located in cable 6 from the junction block (terminals 1, 2, three & 6). I've marked the original wire positions with dotted lines.
- Move the live wire that was coming out of cable 7 (red dotted) to power the thermostat (via junction cake terminal 3) from terminal three and moved it into last 6 equally indicated by the pinkish circle.
This meant that all wiring to the thermostat was now redundant and the circuit reconnected and made rubber. You tin can therefore safely remove the old thermostat wire from the wall and with a flake of force pull it through:
And that'south everything done! Well, other than patching up the new hole in your wall and repainting anyway!
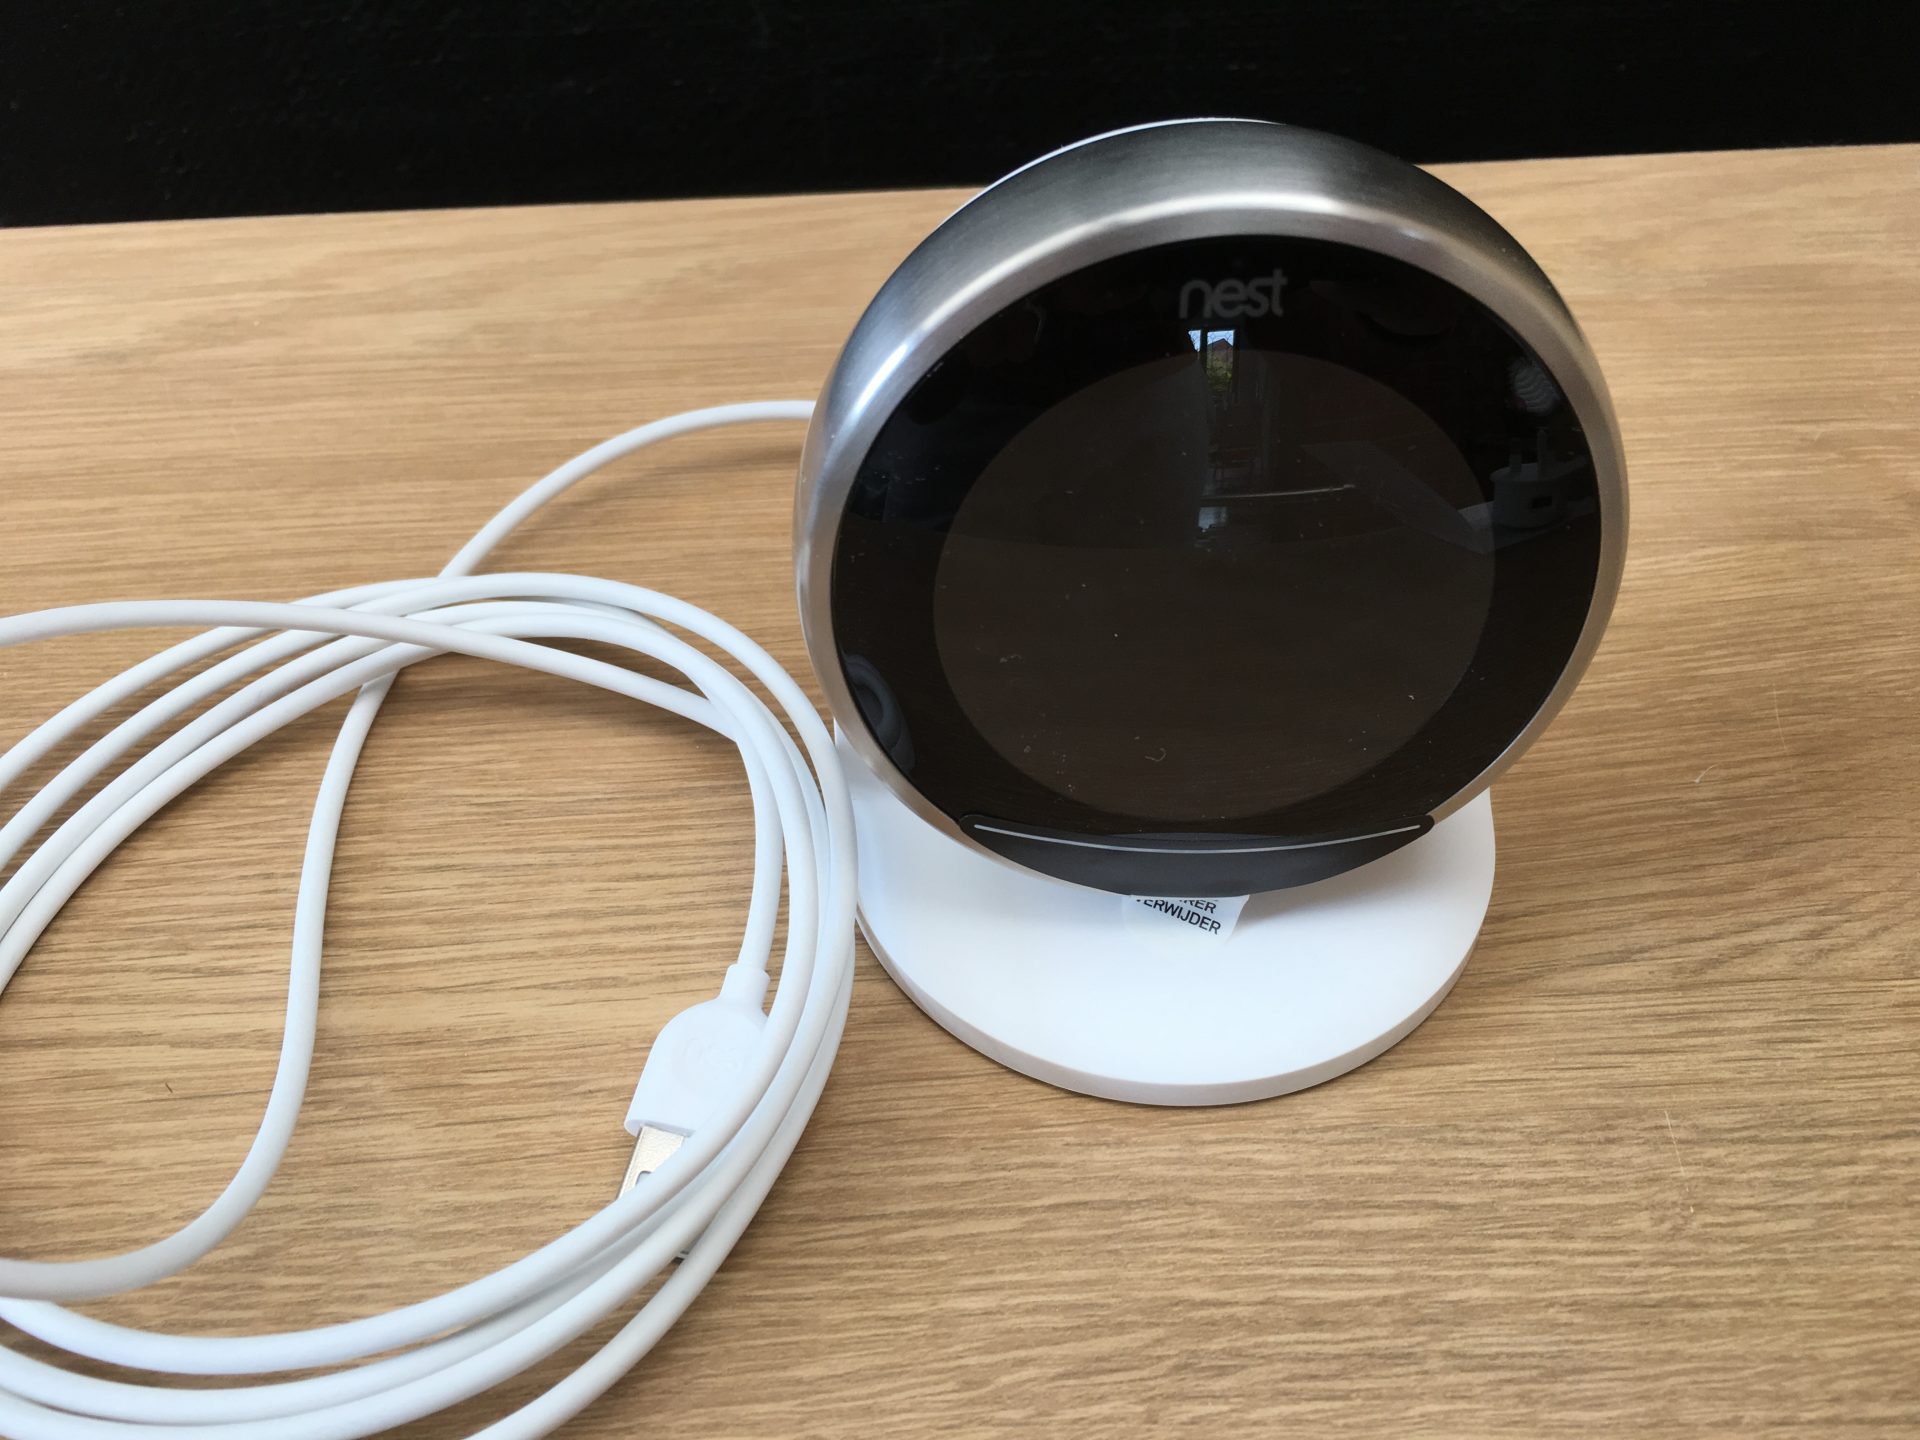
Setting upward the Nest Stand and Display
So the final stage is to become the wireless Nest Display (which is also your thermostat) up and running. For this at that place are a few options:
- Mount the Nest Display on a wall
- Mount the Nest Display on a stand
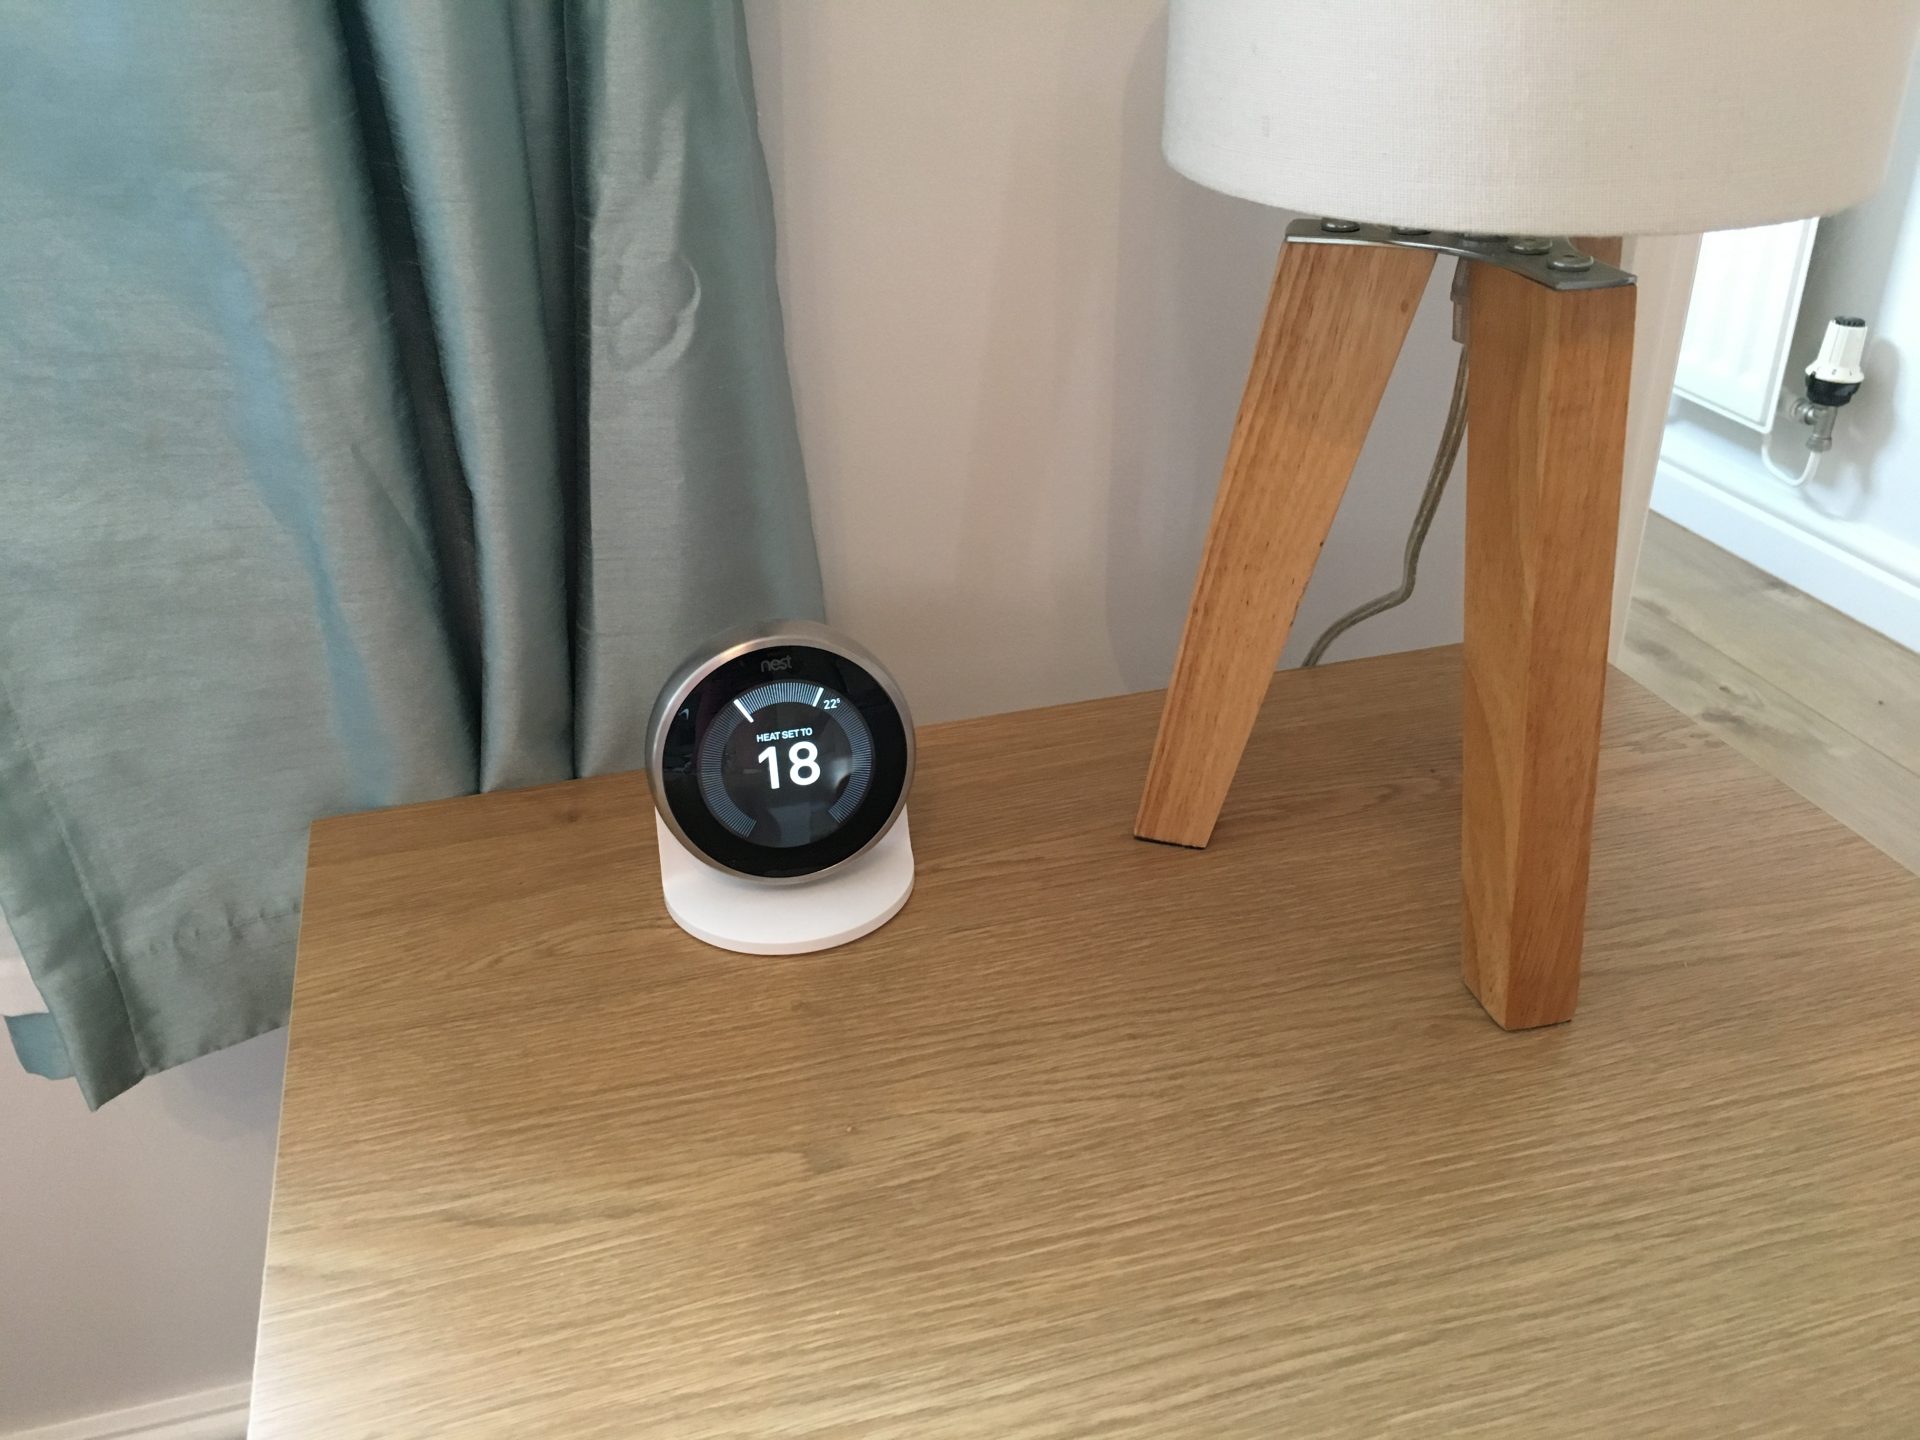
I wasn't keen to dig any new holes in the wall to re-position it or accept wires running up my wall from sockets so I opted to go ahead with the Nest Stand which I picked up from Amazon.
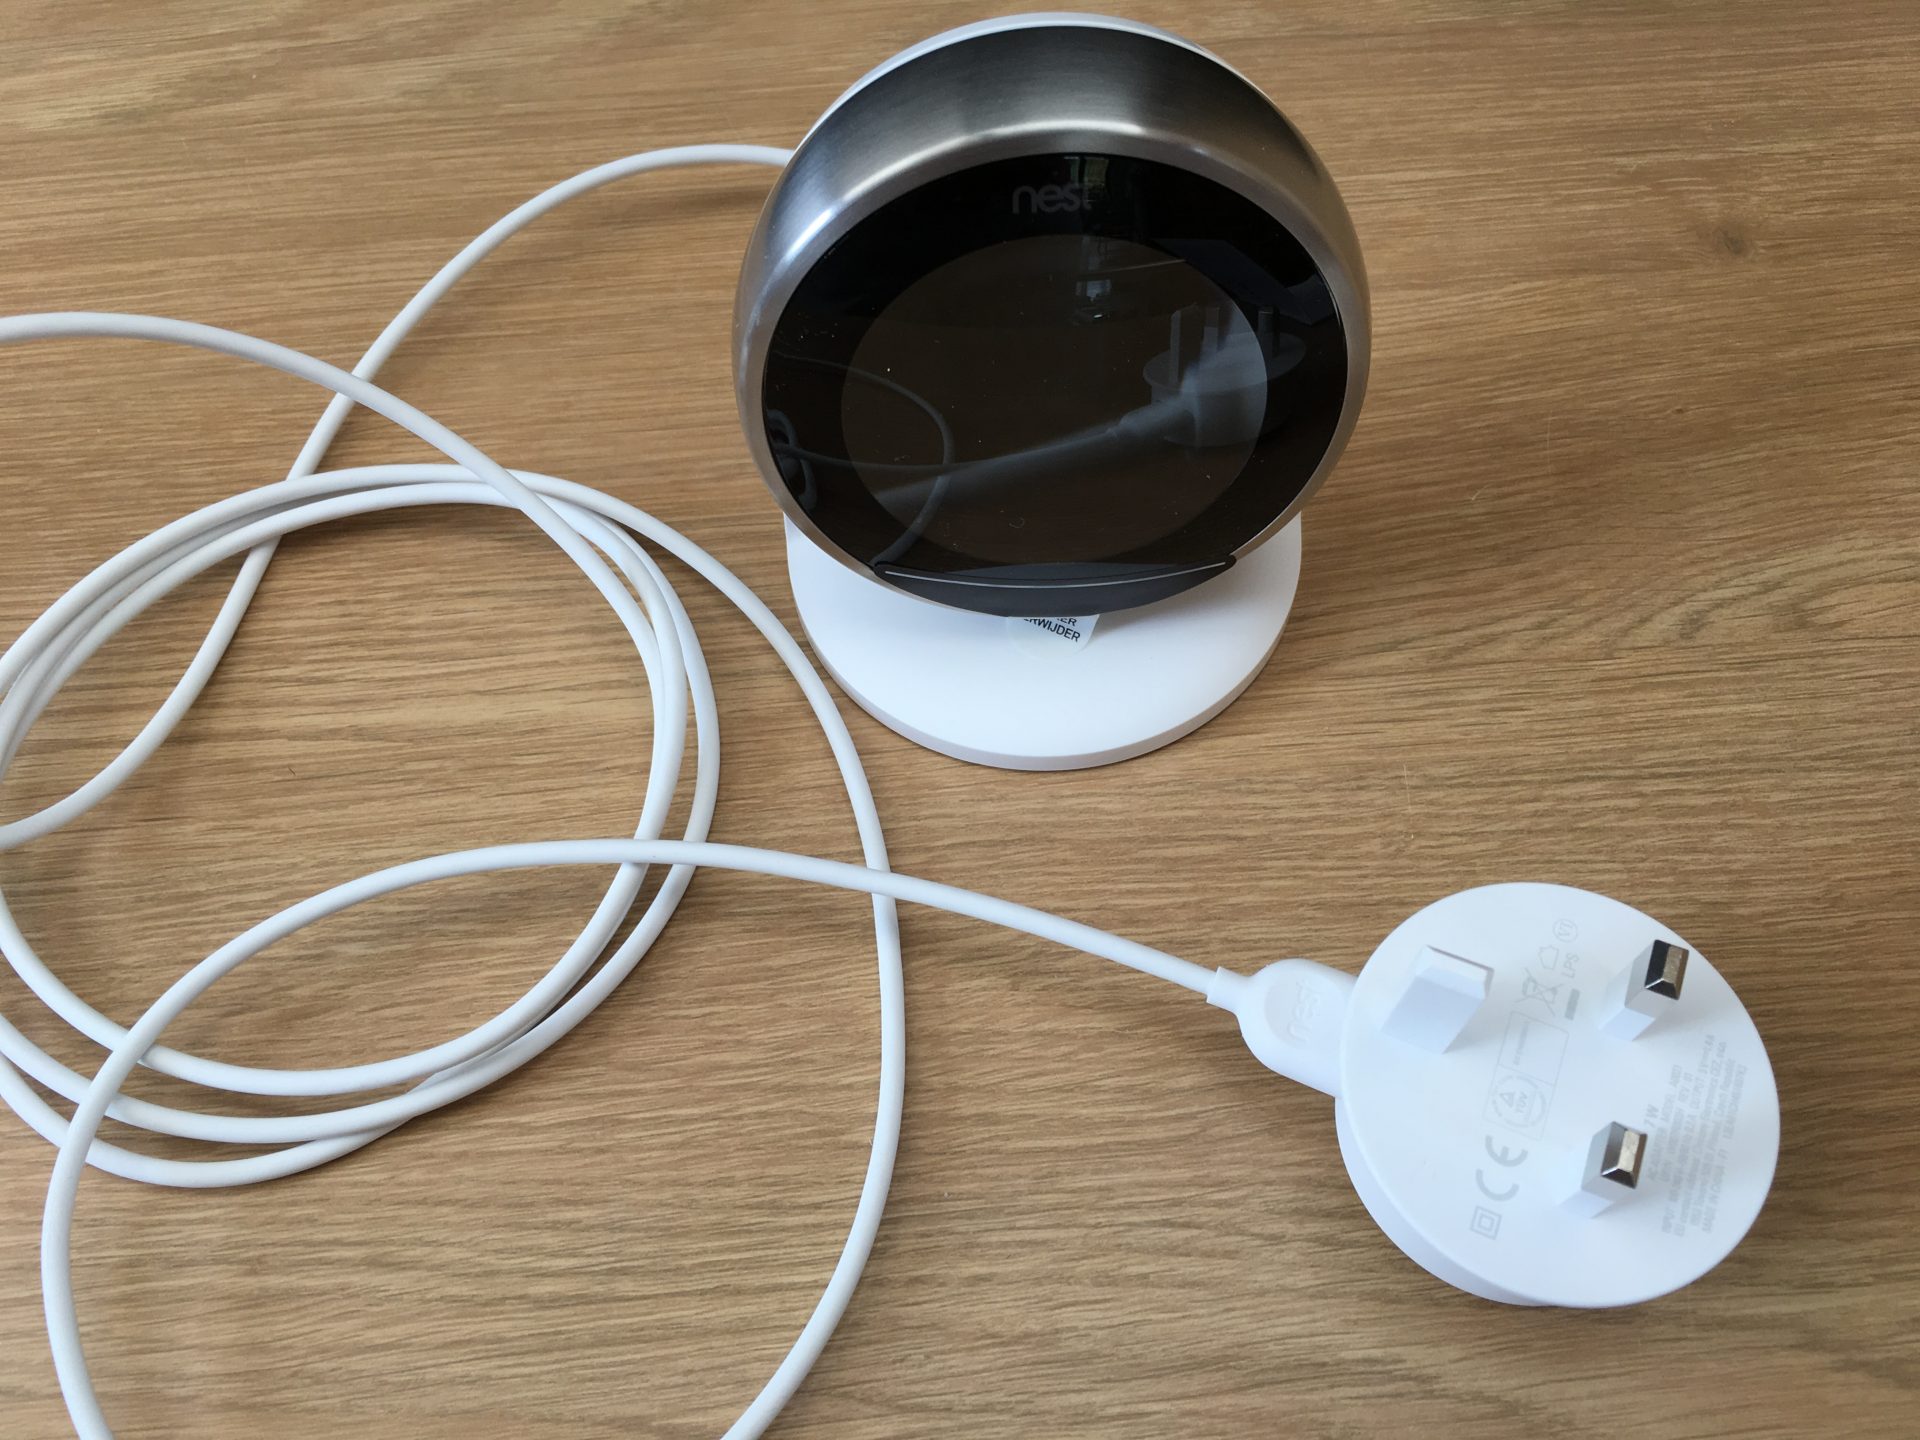
What's in the Nest stand box?
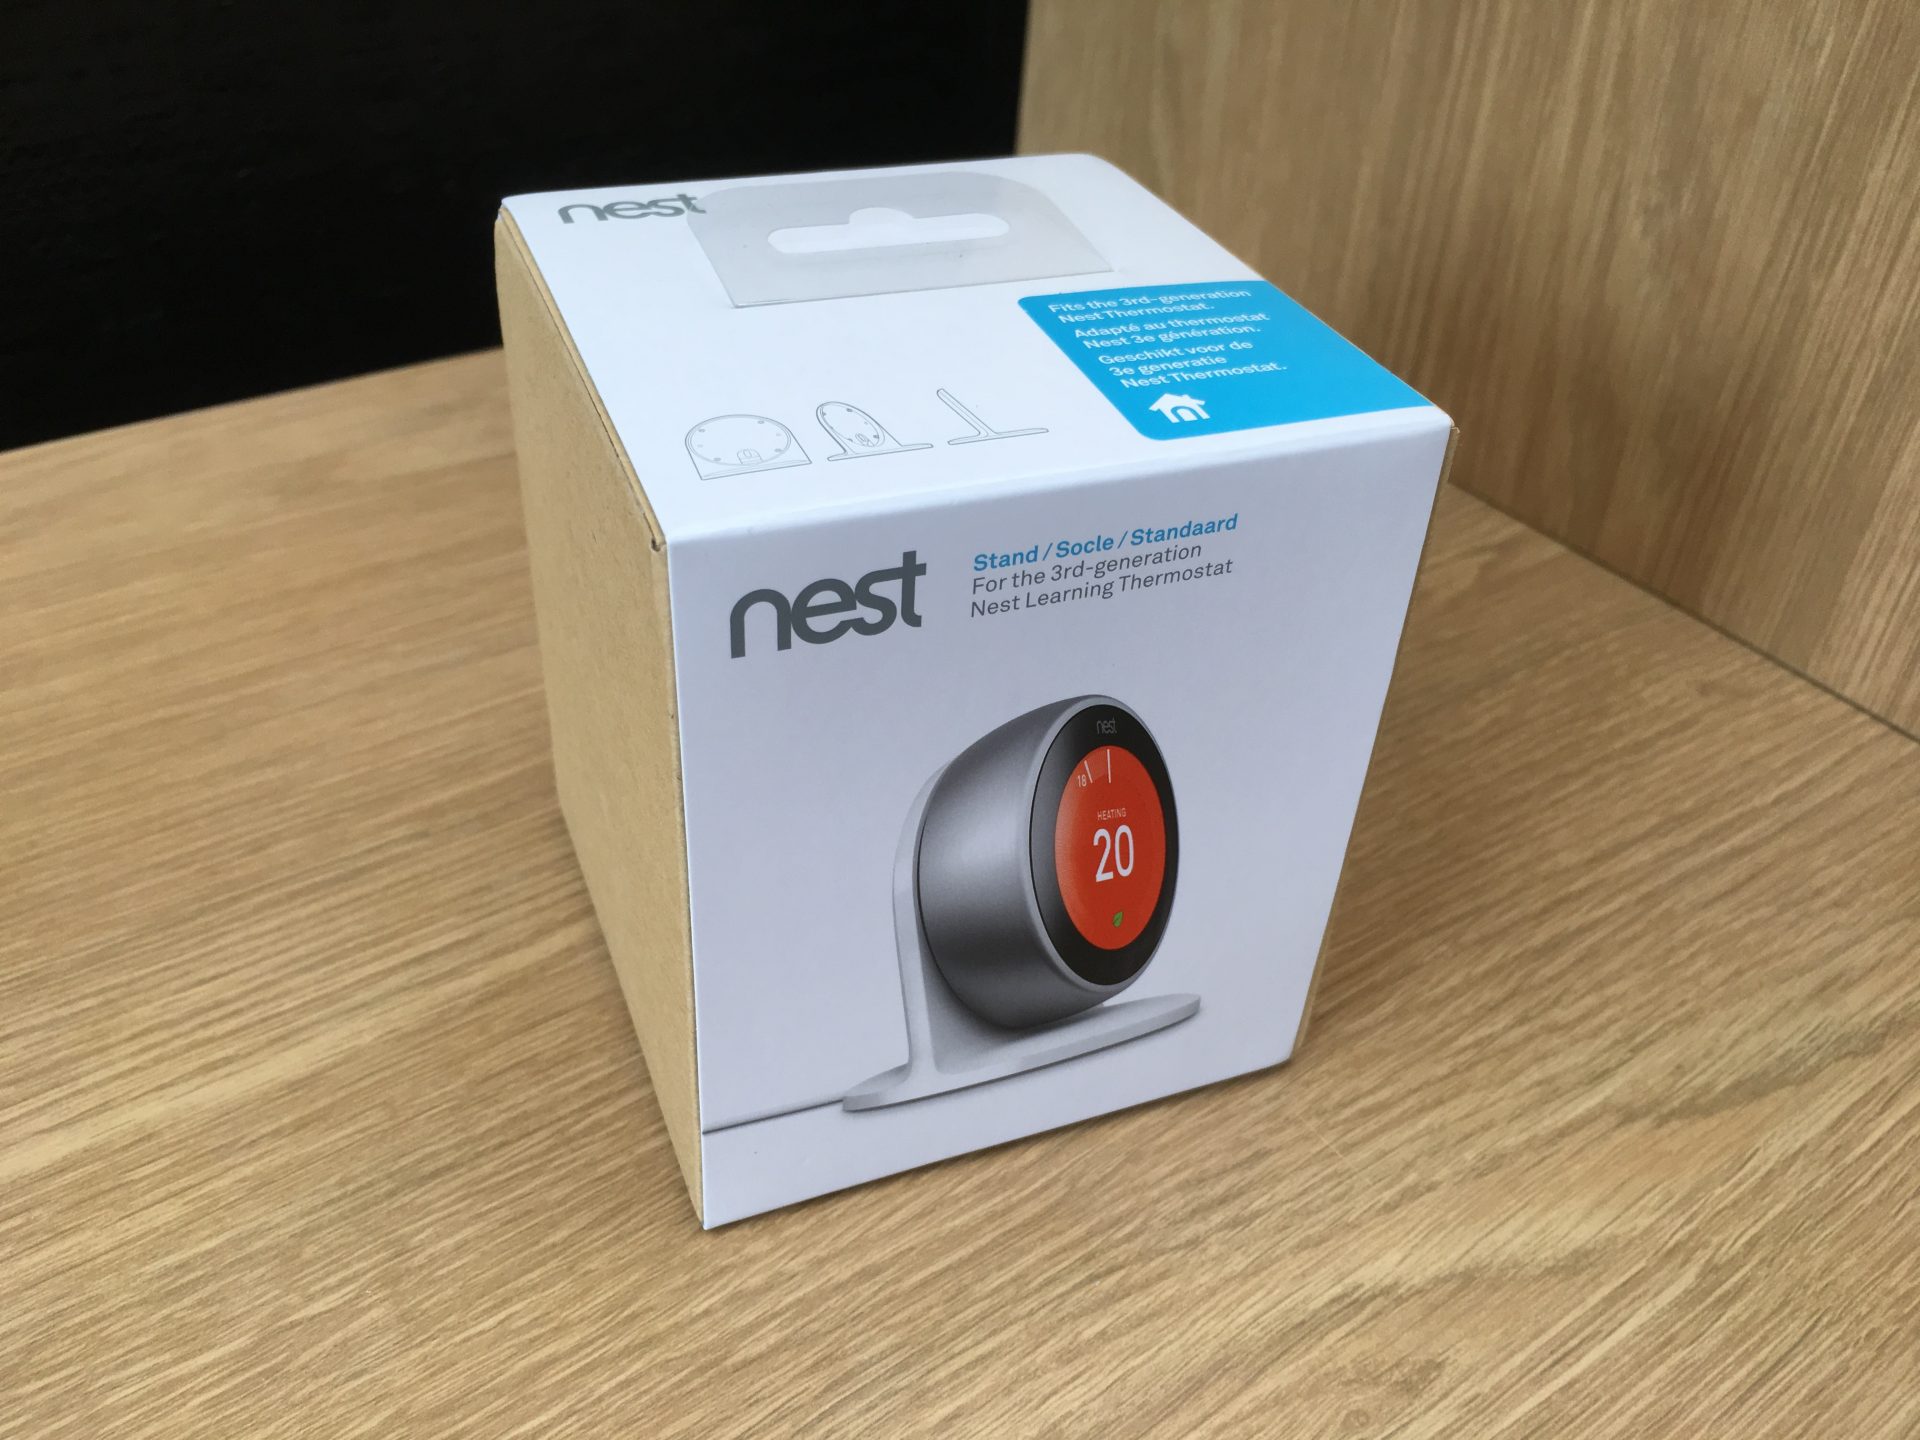
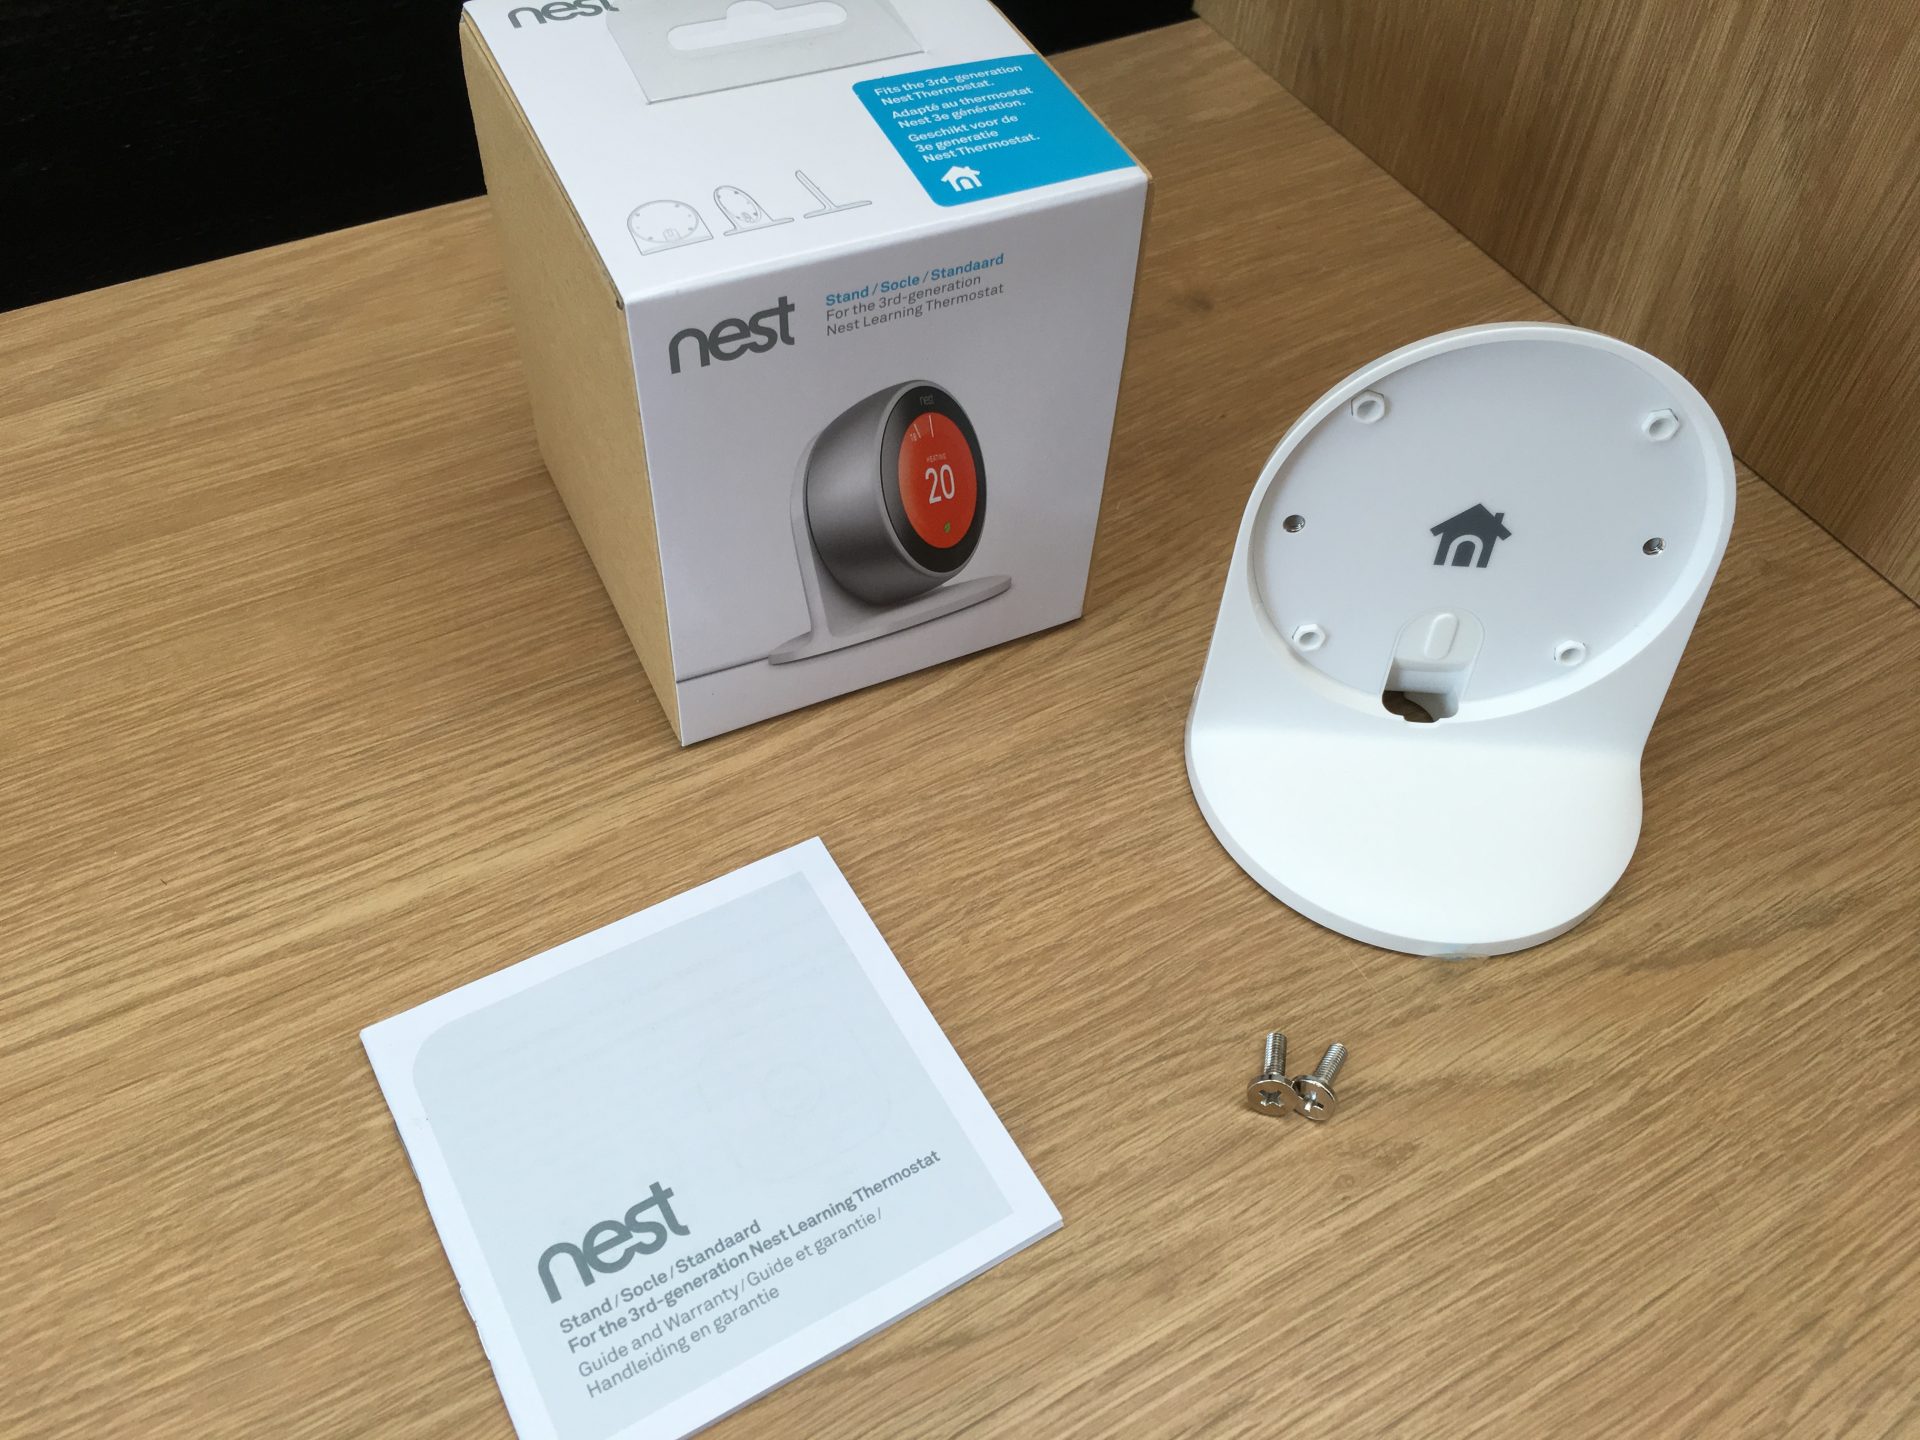
That'southward information technology, a unproblematic plastic stand up and 2 screws! £29!
Step 1: Gather the parts needed for the Nest Stand
To get the Nest Stand set up you need to gather together the key components.

This requires:
- Nest Stand
- Nest Base
- Next Display (Learning thermostat)
- USB cable
- USB plug
- 2x screws
Step 2: Join together the Nest Stand components
Connect the USB cablevision to the Nest Base.
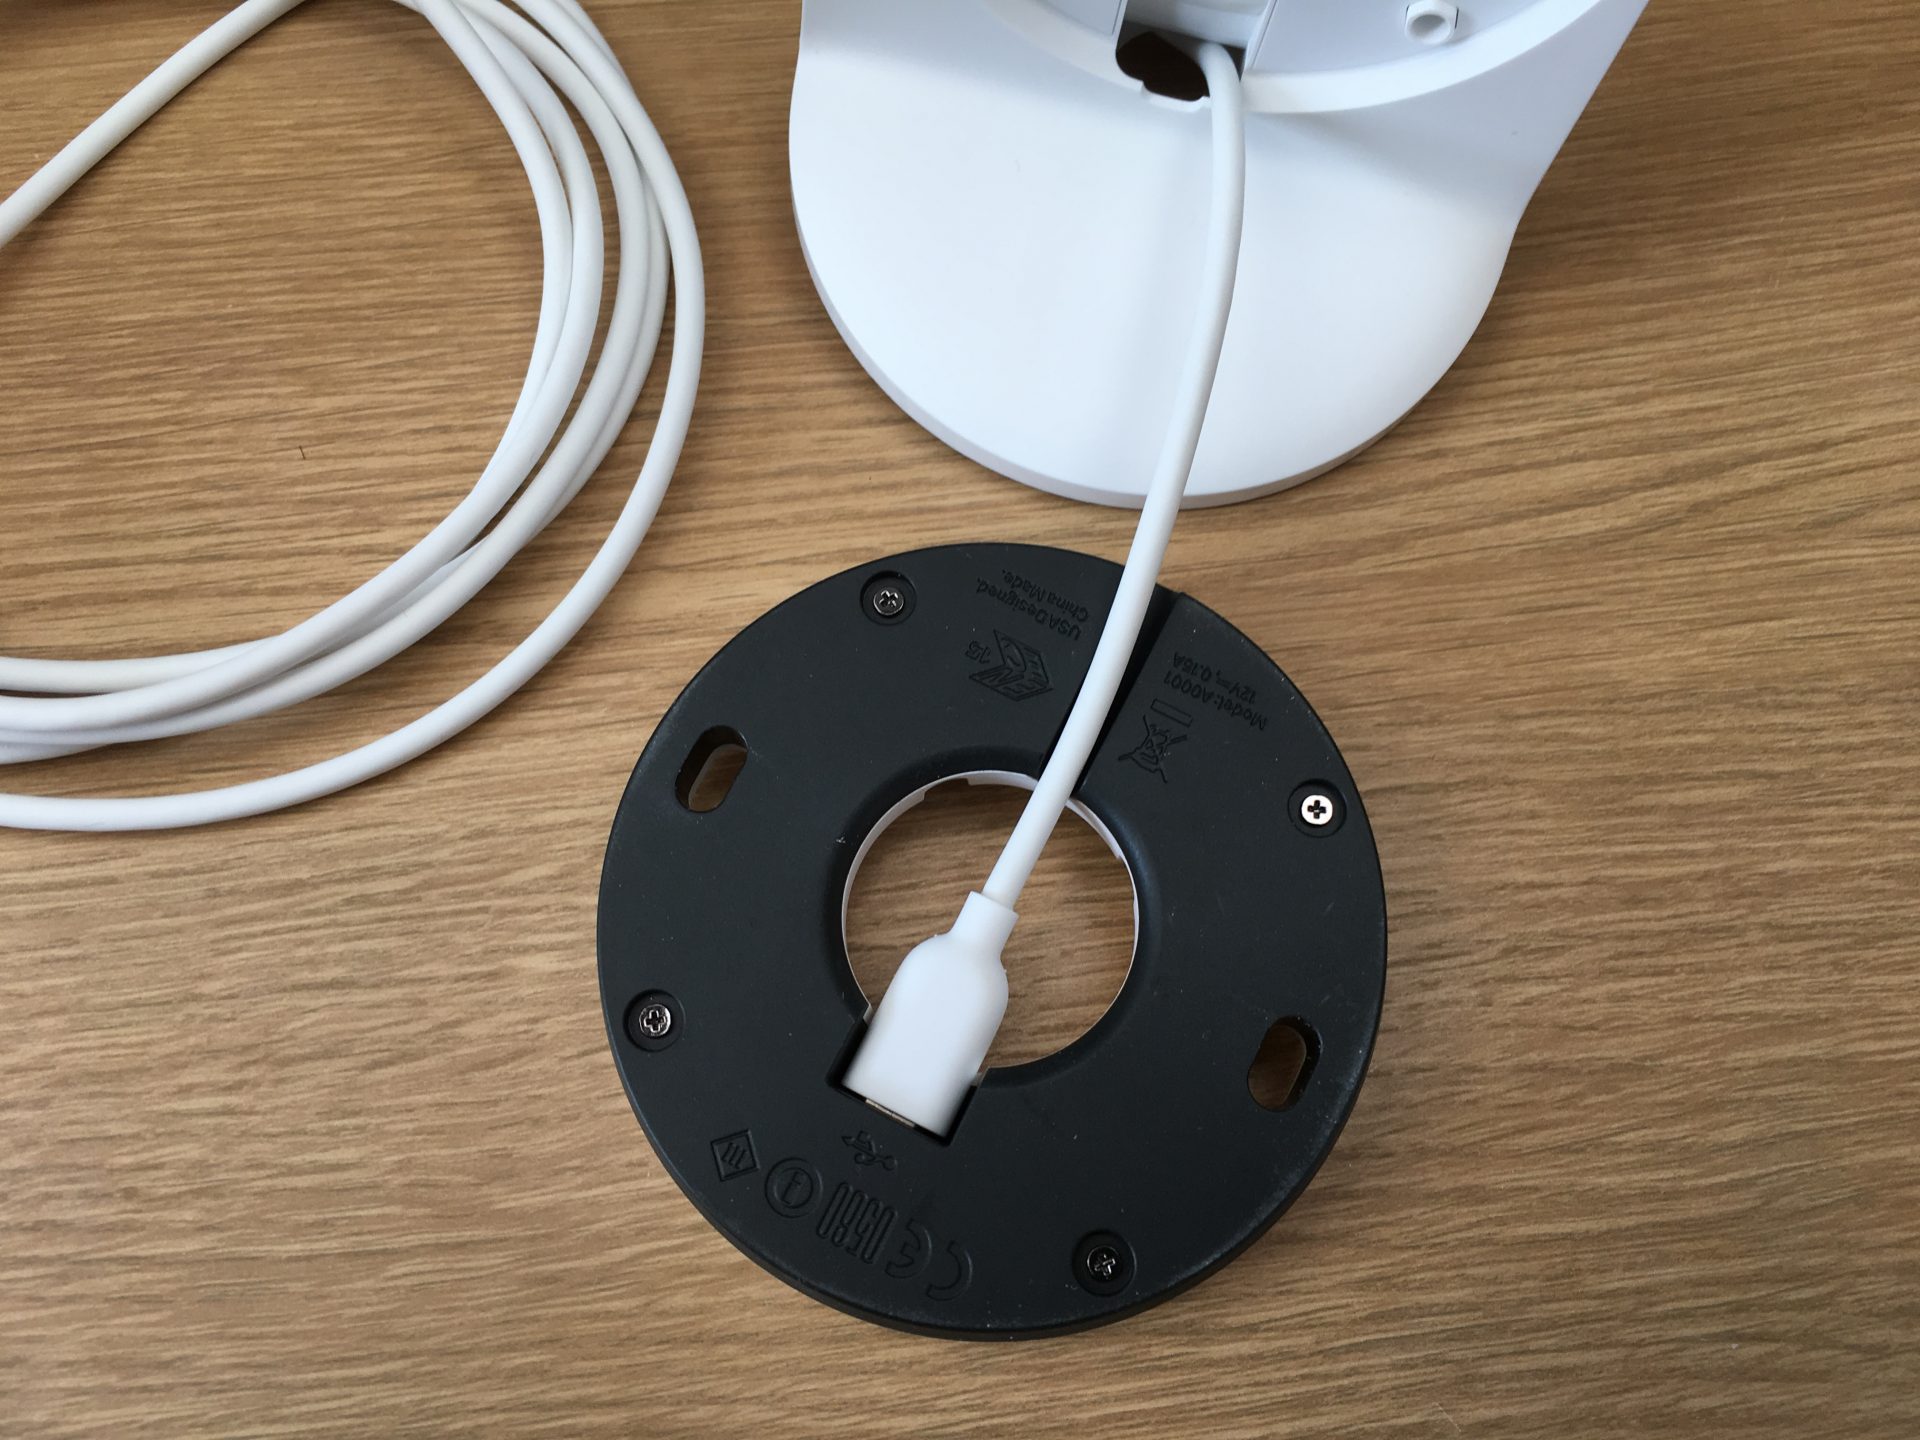
Screw the Nest Base to the Stand.
Push button the Nest Display / thermostat onto the base until it clicks.
Adhere the plug.
Step 3: Identify your Nest thermostat in a location within your dwelling house
For the purpose of me testing the setup I located my Nest thermostat in my kitchen by the banality – this allowed me to hands examination the unit of measurement and whether or non the wiring was correctly installed with the boiler firing up as required.
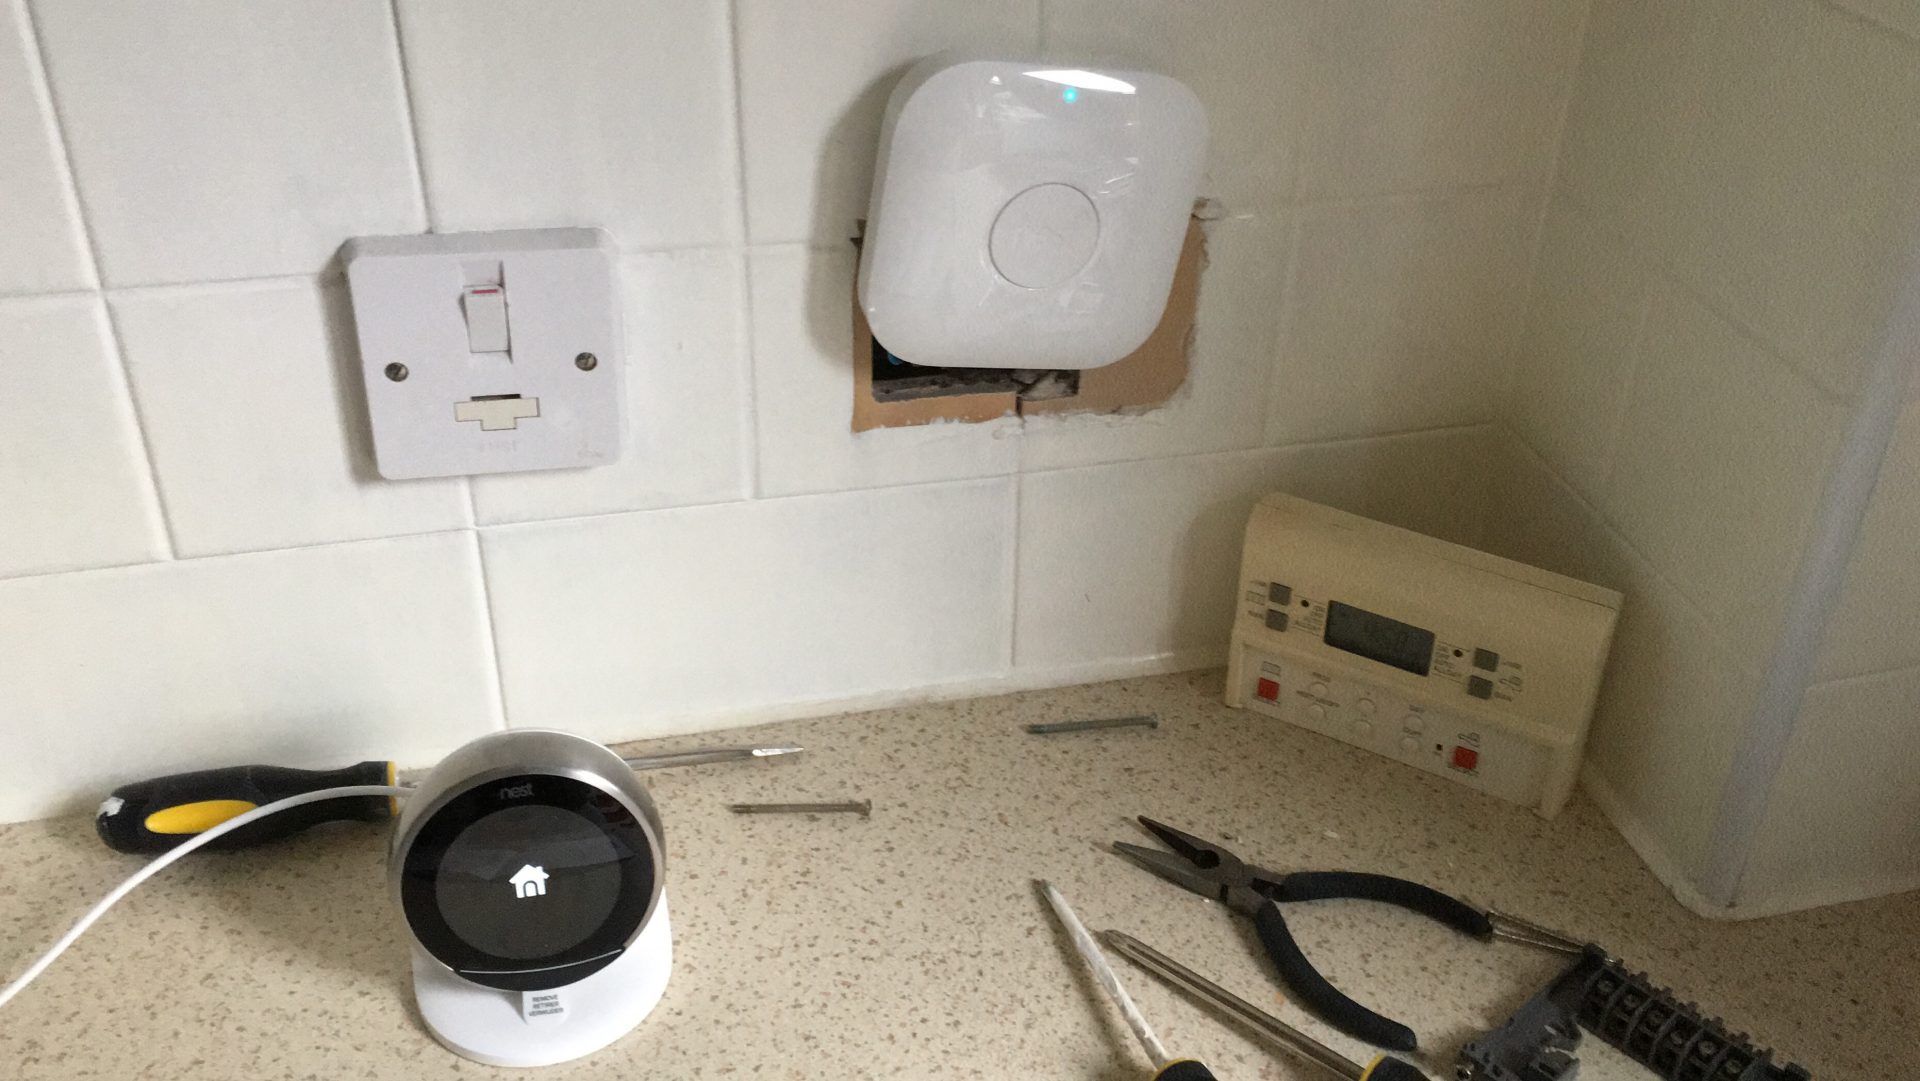
Too note that if yous install your Nest Rut Link in place of your erstwhile programmer, y'all are going to encounter an issue such equally below where the pigsty in the wall is a different size – again you should plan for this to avoid an unsightly install. With my installation equally I am going to be re-fitting the kitchen later this year, this issue wasn't something I was concerned about.
Step 4: Switch the power back on
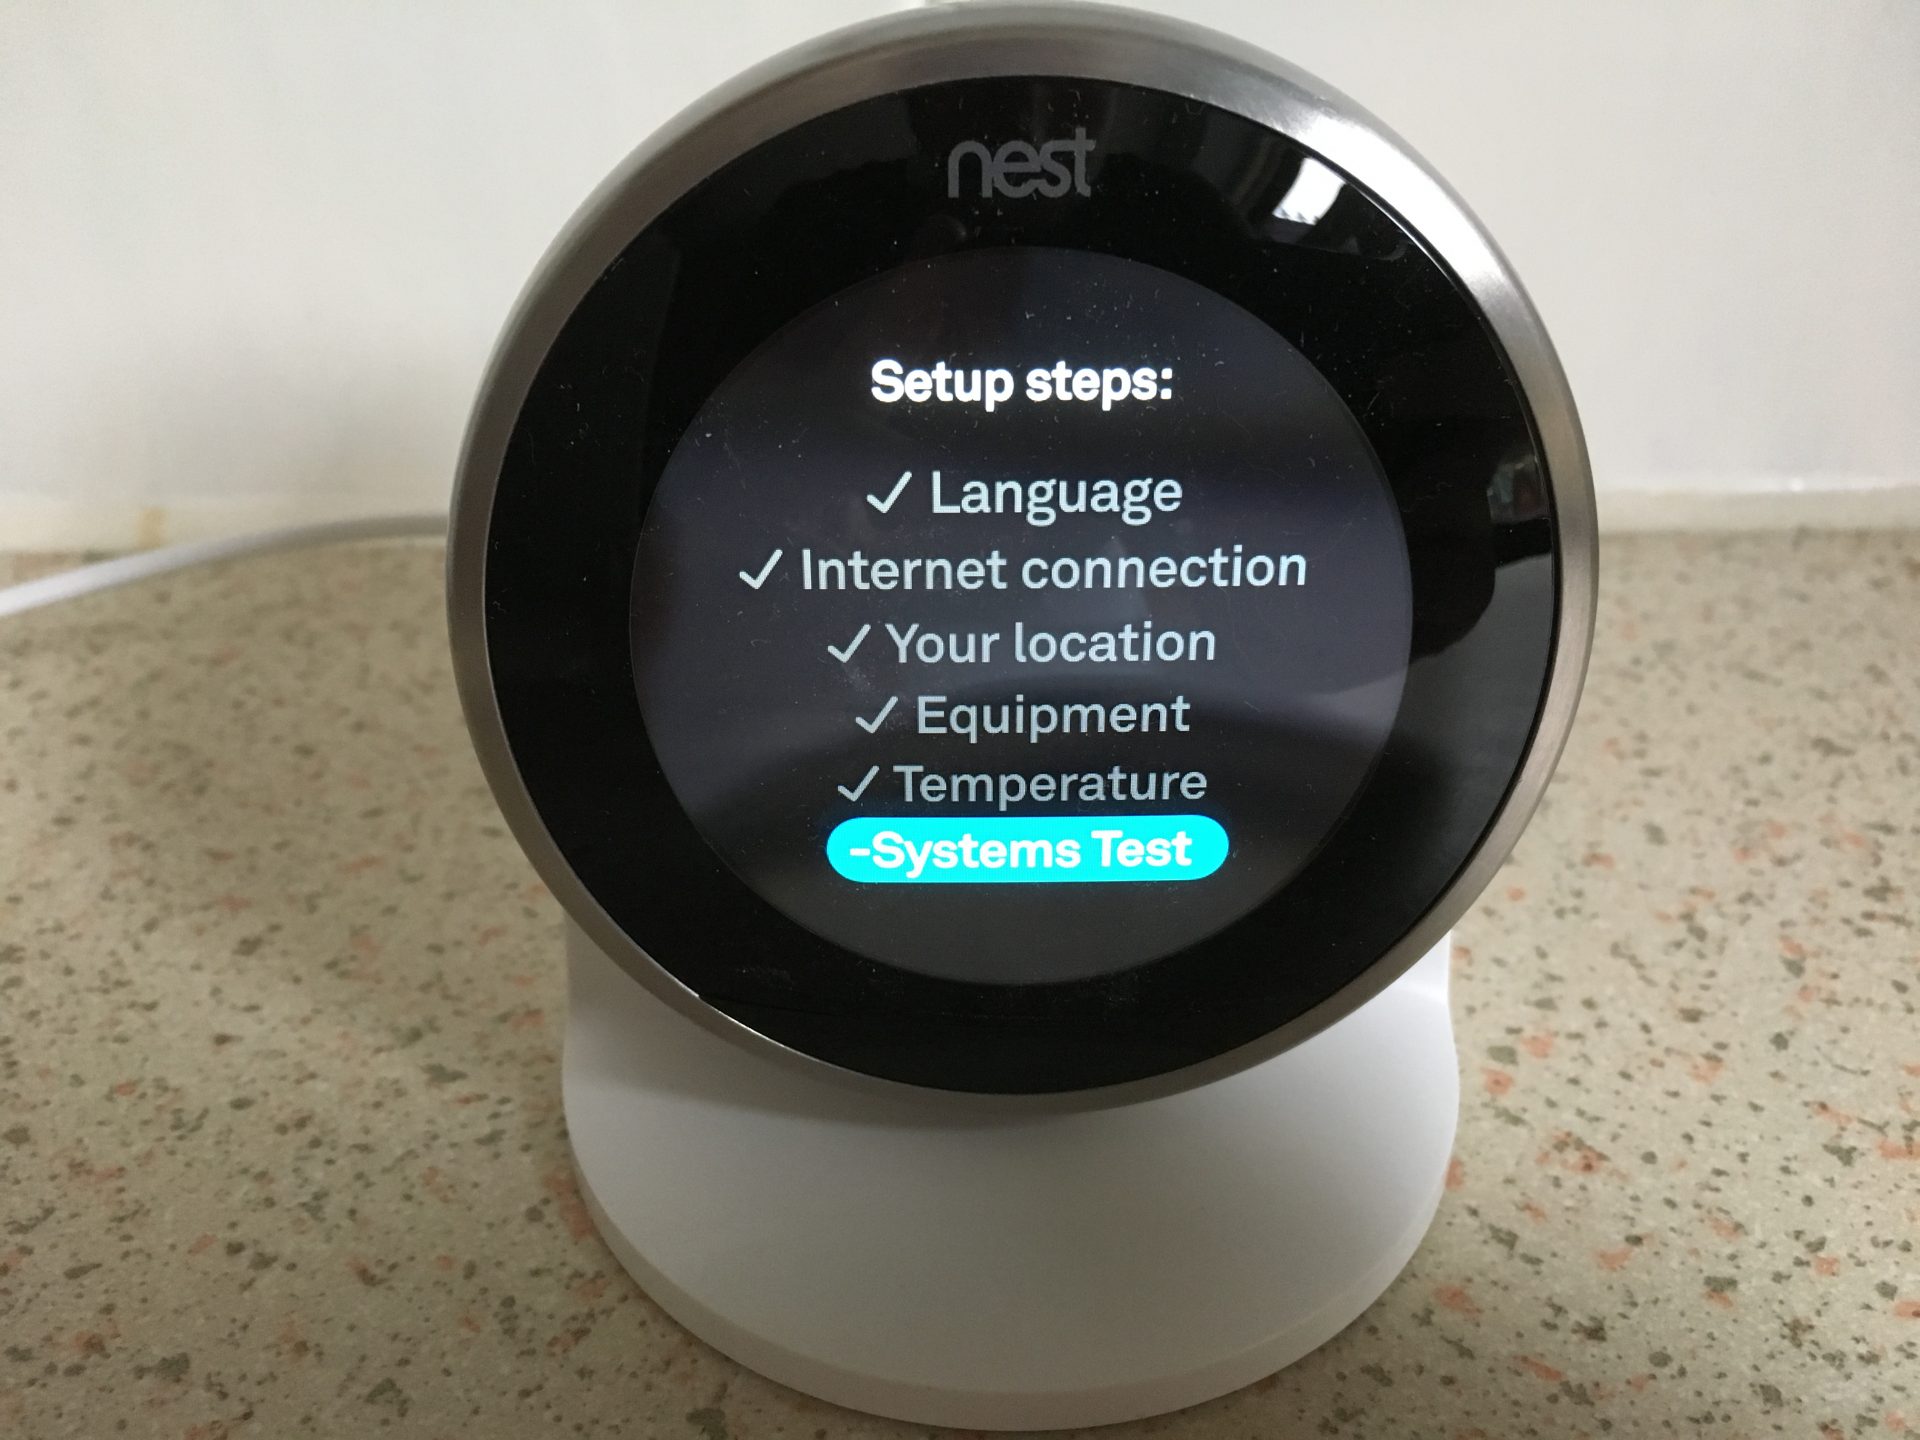
The final stride of the installation is to switch your power back on. If everything has been washed correctly there should be no blown fuses, with the house icon appearing on the thermostat display and a lite illuminating on the Heat Link as per the above photo.
Step 5: Follow the on-screen setup instructions
With the power back on, your Nest thermostat's display will have you through a serial of questions to connect information technology to your wi-fi, link it to your phone app (you lot will need to download this) and cull your minimum temperature.
The Nest organization will then acquire over fourth dimension what temperatures you lot want at different times of mean solar day in your house and gradually plan for these and automatically arrange your heating, saving yous money.
Step six: Test your installation
With the app installed on your smartphone you tin can now test your organisation.
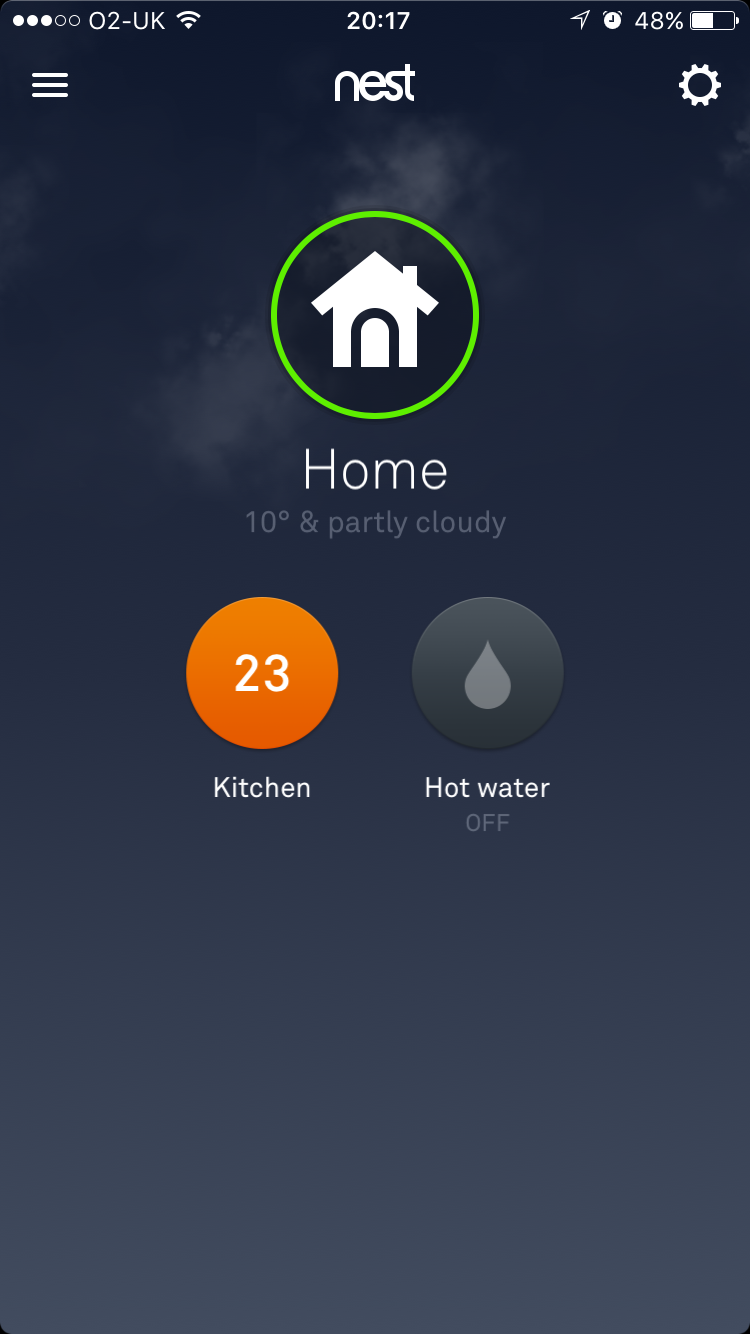
Footstep 6a: Hot h2o test
From the Nest app if you tap the "Hot water" icon this should change the condition to "ON":

You should and so discover that your 3 port valve moves the "West" position allowing the menstruum of hot water to fill your organization. If the temperature of the water in your cylinder isn't high enough and then your boiler should also fire upwardly.

Step 6b: Central heating test
The second examination is to check the heating works. For this, tap the hot water icon to disable the hot water and tap the temperature setting, adjusting it to a number above the current room temperature:
This should make the temperature number highlight in orange to indicate it is on and the on the valve, the switch should move to the "H" position indicating Heating and allowing hot water to menstruum through your heating system and radiators. Once more, if the temperature in your cylinder is too low your boiler should burn down upwards likewise at this point:
Step 6c: Hot h2o and Fundamental heating test
The last test is to ensure you tin have both hot water and heating at the same time. To practice this, on the app enable both the icons equally previously shown:
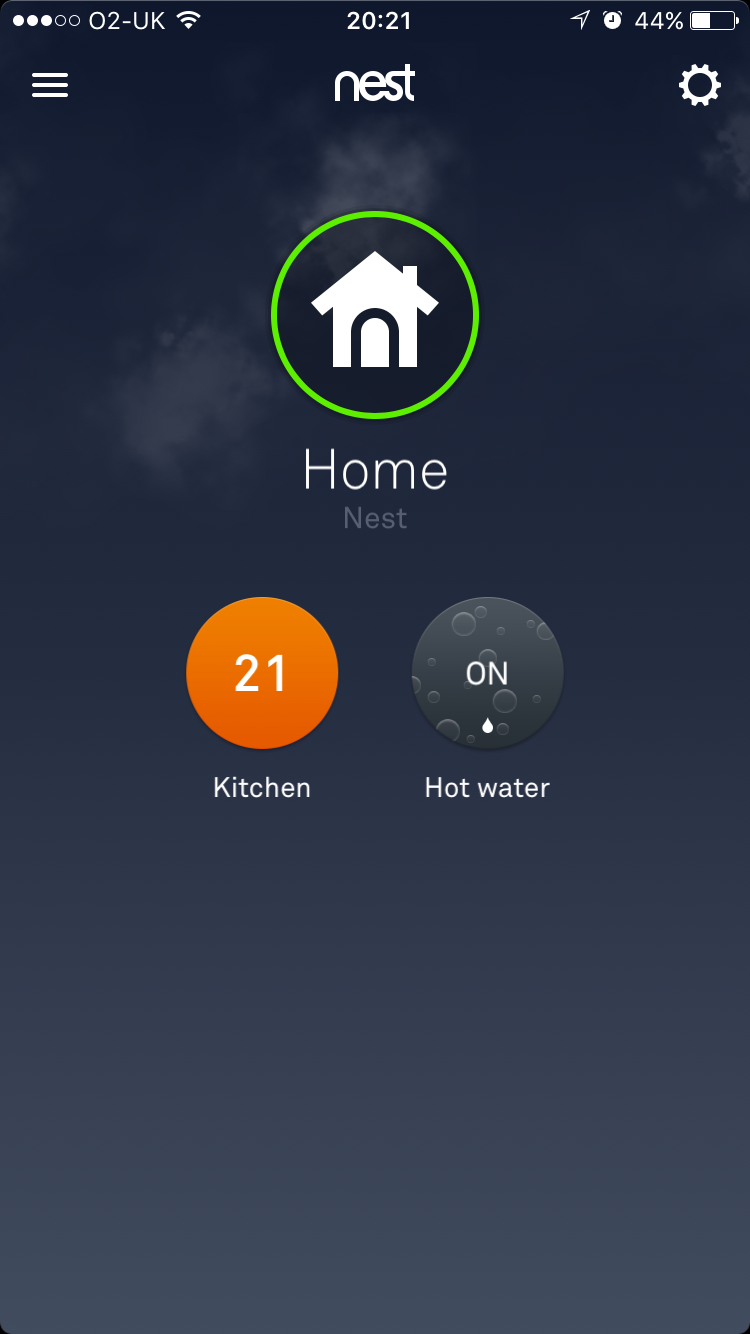
This should then move the switch on the valve to the "M" (mid) position which should permit for both hot h2o and heating via your radiators.
With everything working as intended I tin can now motion my thermostat to whatever position in the house where there's a plug socket – it's now sitting in my lounge on a table.
Nest installation summary
Now when it comes to electrics I'k massively inexperienced and so I was a little nervous doing the installation myself. That said, looking at some of the wiring diagrams and a few videos on YouTube, the installation and setup should be pretty straight forward. Heck, if I can exercise it anyone can!
The only matter that I struggled with during my installation was tracing wires that ran inside the walls to know which ones I could safely remove equally without electrical testing equipment this is extremely difficult.
I must say however that this is a brave install to exercise yourself if you don't know what you are doing – just remember that if y'all balls up the wiring you are going to end upwardly with no hot water and no key heating! Therefore if you actually don't have any thought what y'all are doing I fully advise you lot seek professional person help from ane of Nest'southward approved installers.
Personally this was a massive DIY challenge for me every bit a few years ago I wouldn't have fifty-fifty considered undertaking such a task. I'1000 glad I took it on however as the organization is working flawlessly and I've got a really great sense of achievement pushing myself to try something advanced similar this and get information technology right!
Buy the Nest thermostat today on Amazon
If you've read this postal service during your inquiry to buy a Nest unit, end hesitating and offset ownership! It's an amazing piece of kit that y'all won't regret installing in your house. Pick up the ii components on Amazon here:
- Purchase: Nest tertiary Gen Learning Thermostat
- Buy: Correspond the Nest tertiary Gen Learning Thermostat
Other Nest products to consider
If you have already purchased a Nest thermostat and are looking to enhance your abode with smart technology, the learning thermostat is just ane of several products offered by Nest. I'm currently in the centre of debating how much of the amazing kit from Nest I should purchase but hither are some other great products to consider.
Nest Protect Smoke and Carbon Monoxide Alarm
The Nest Protect smoke and carbon monoxide alarm does exactly what it says on the tin can offer a reassuring protection organization even when yous are non at dwelling house. It comes in either battery or wired formats and has vocalisation and phone alerts covering low-battery, Smoke, Carbon monoxide, Sensor failure
Learn more and buy on Amazon hither.
Nest Cam Outdoor Security Camera
The Nest Cam outdoor security photographic camera gives you 24/seven live video via its 130° wide-angle view in 1080p HD. It operates seamlessly from minus twenty degrees to plus twoscore, is weatherproof to allow for rain and has 8 infrared LEDs to enable night vision monitoring.
The camera tin can exist programmed for telephone alerts when activity is detected and allows for talk and listen functionality to speak directly through the device.
Larn more and buy on Amazon hither.
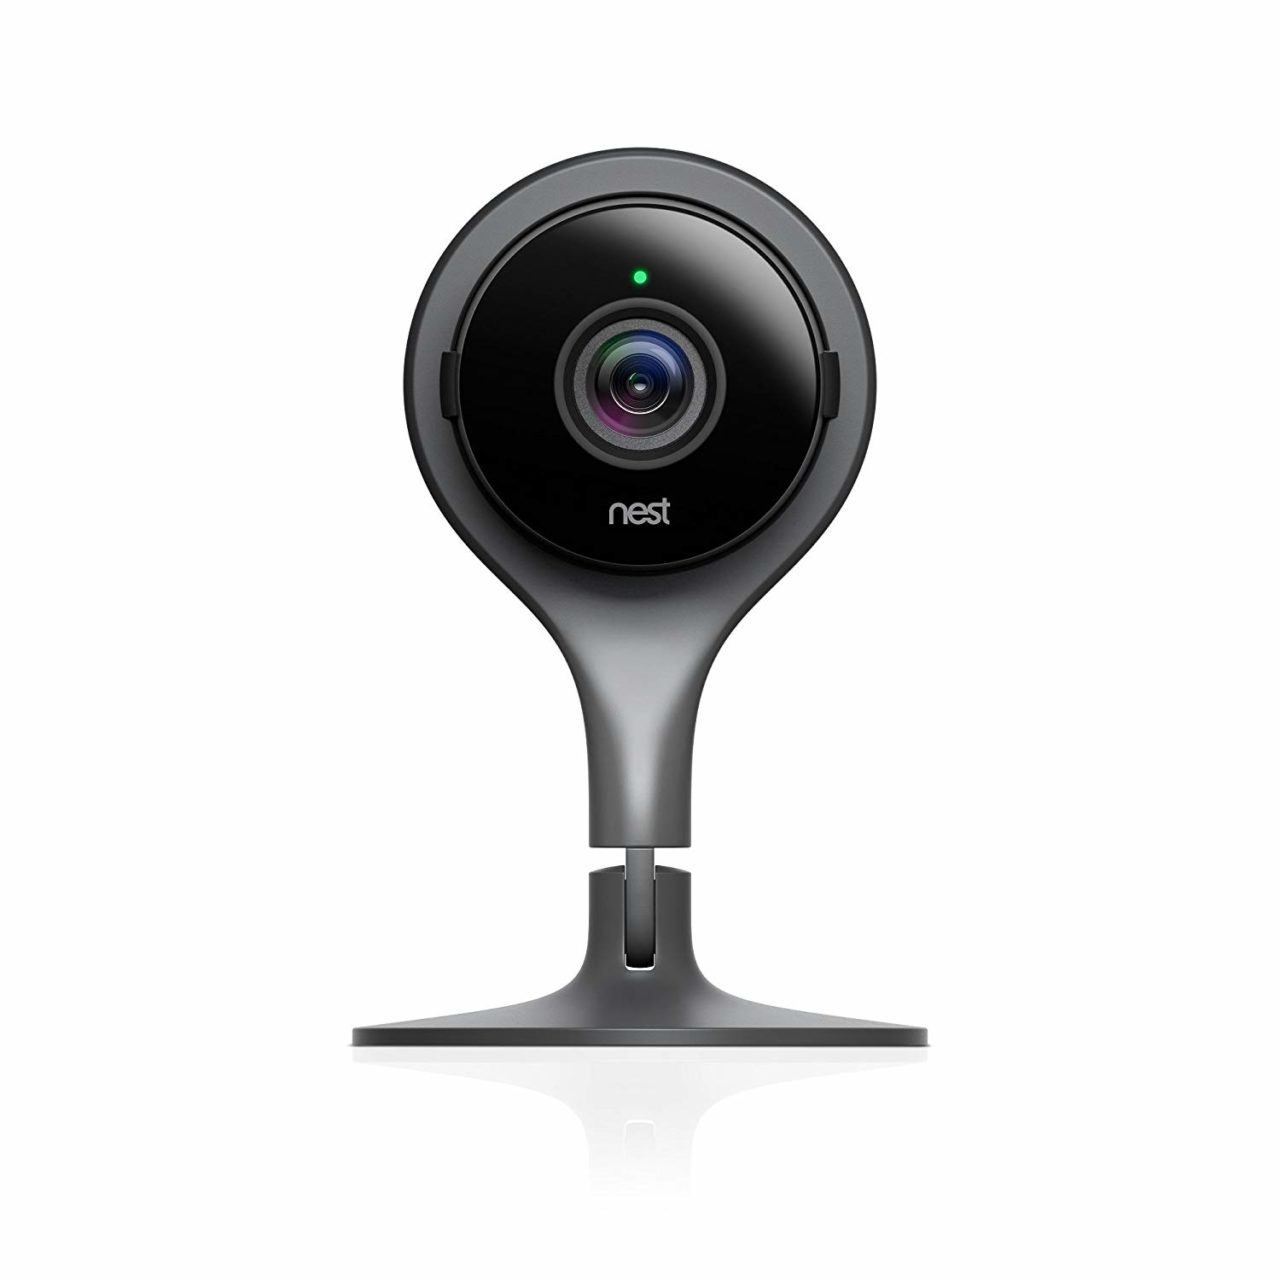
Nest Indoor Security Camera
The Nest indoor security camera contains motion sensor recording and allows for a live view of the inside of your home via the Nest app. It has night vision, 1080p HD video quality, wide bending lens and see, talk and listen feature assuasive you to talk through the device.
The indoor security photographic camera is a corking fashion to keep an eye on your abode, monitor your pets, check in on your baby at dark.
Learn more and buy on Amazon here.

Source: https://lifeofman.co.uk/install-nest-learning-thermostat-3rd-gen-y-plan-system/
Posted by: herringcomentend.blogspot.com
0 Response to "How To Install Nest Thermostat To Worcester Boiler"
Post a Comment